

Growing Kitchen Parsley indoors is easier than you might think, and I’m so excited to share some simple DIY tricks that will have you snipping fresh, flavorful herbs right from your windowsill! Forget those sad, wilted bunches from the grocery store – imagine the vibrant taste of freshly harvested parsley elevating your favorite dishes.
Parsley has a rich history, dating back to ancient Greece and Rome, where it was used not only for culinary purposes but also for medicinal and decorative ones. It was even believed to symbolize victory and celebration! Today, while we might not be crowning athletes with parsley wreaths, its culinary importance remains undeniable.
Why should you bother with this DIY project? Well, for starters, it’s incredibly convenient. Having fresh parsley on hand means you’re more likely to use it, adding a burst of freshness and nutrients to your meals. Plus, it’s a fantastic way to reduce food waste and save money. But more importantly, growing kitchen parsley yourself connects you to the food you eat, fostering a sense of accomplishment and a deeper appreciation for nature. So, let’s dive into these easy-to-follow tips and tricks to get your indoor parsley garden thriving!
Growing Kitchen Parsley: From Seed to Snippet, Right on Your Windowsill!
Okay, parsley lovers, gather ’round! I’m going to show you how to have fresh, vibrant parsley right at your fingertips, all year round, without even stepping foot outside. We’re talking about growing parsley indoors, and trust me, it’s easier than you think! Forget those sad, wilted bunches from the grocery store – we’re going for flavorful, homegrown goodness.
What You’ll Need: The Parsley Powerhouse
Before we dive in, let’s make sure you have everything you need. This isn’t a complicated project, but having the right tools and materials will make the whole process smoother and more enjoyable.
* Parsley Seeds: You can choose between curly parsley or flat-leaf (Italian) parsley. I personally prefer flat-leaf for its stronger flavor, but it’s totally up to you! Make sure you get good quality seeds from a reputable source.
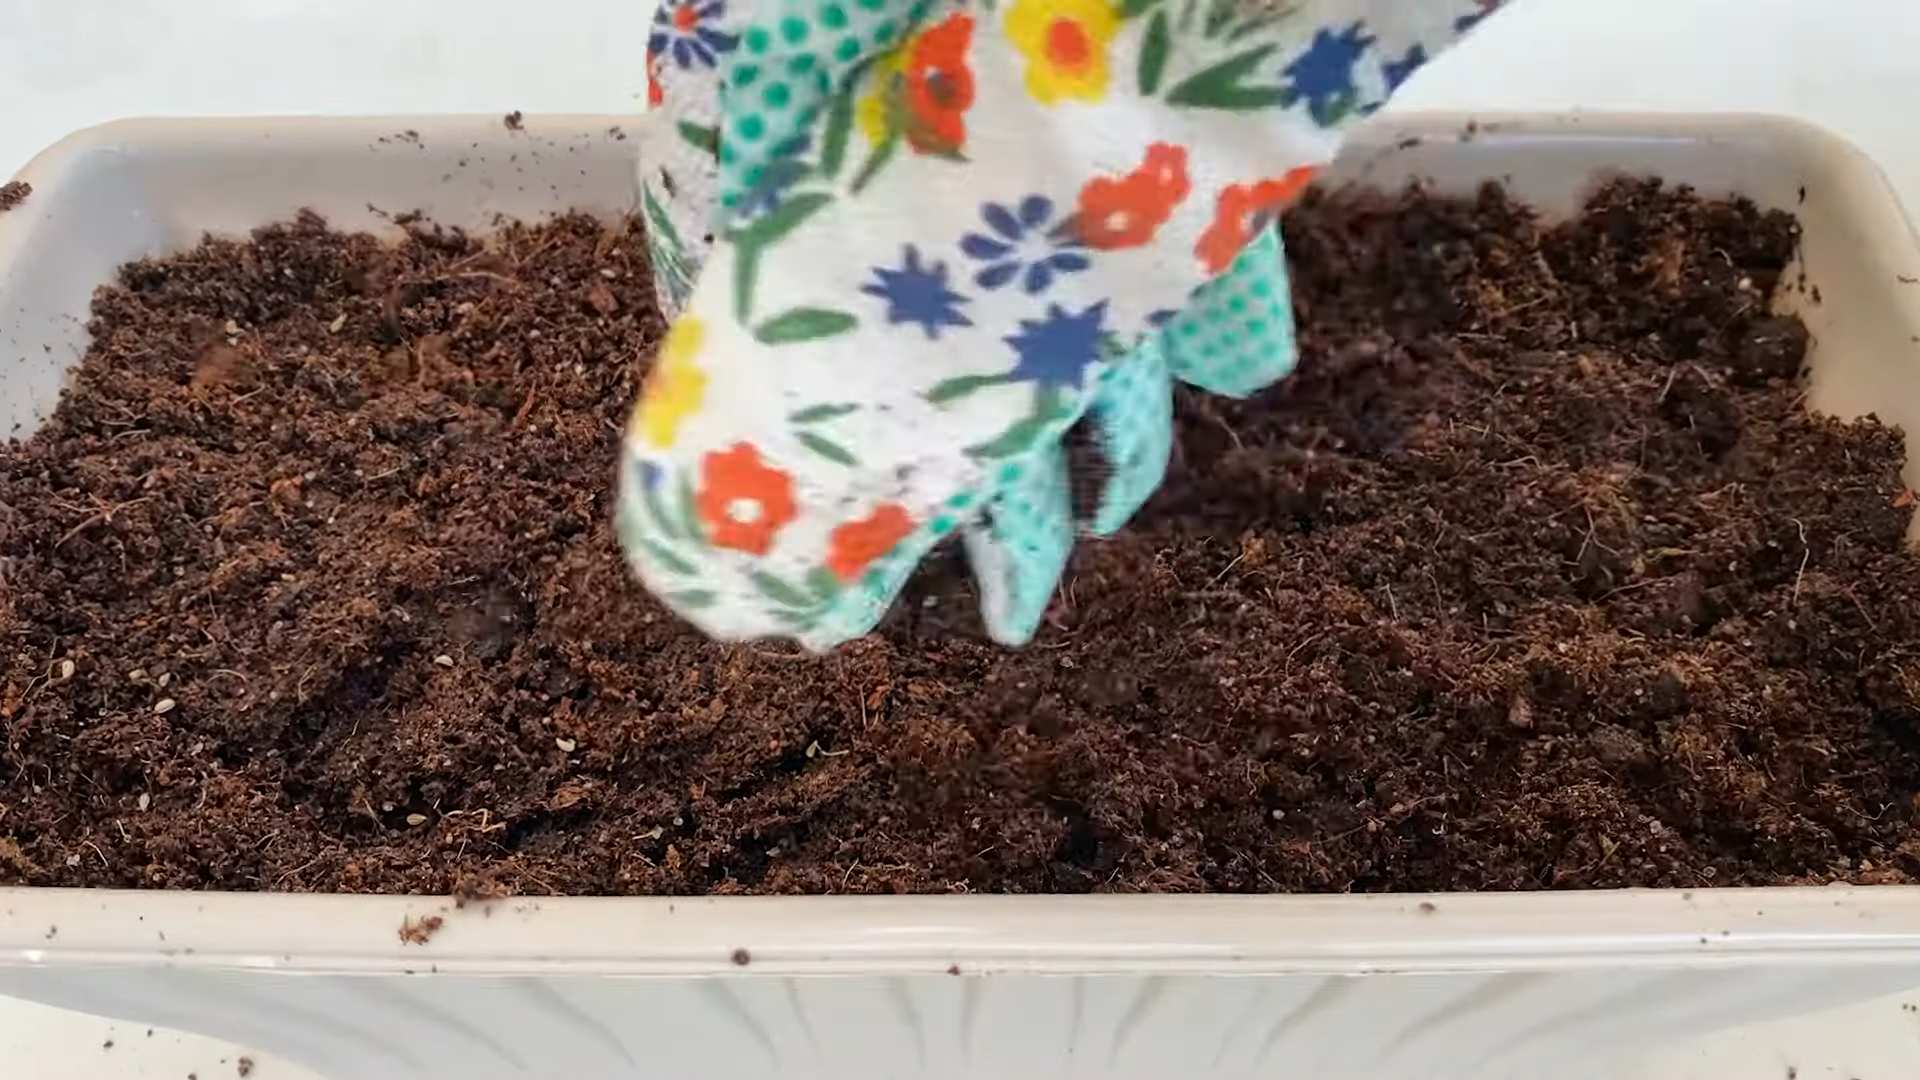
* Potting Mix: Don’t just grab any old dirt from your backyard! Parsley needs well-draining soil that’s rich in nutrients. A good quality potting mix specifically designed for containers is your best bet.
* Container: Choose a pot that’s at least 6 inches deep and wide. Parsley needs room for its roots to grow. Make sure the pot has drainage holes! Soggy roots are a parsley’s worst enemy.
* Grow Lights (Optional but Recommended): While parsley can grow indoors with enough sunlight, grow lights will give you the best results, especially during the darker months.
* Watering Can or Spray Bottle: For gentle watering.
* Small Shovel or Trowel: For planting the seeds.
* Plant Food (Optional): A balanced liquid fertilizer can help your parsley thrive.
Getting Started: Sowing the Seeds of Success
Parsley can be a bit slow to germinate, so don’t get discouraged if you don’t see sprouts right away. Patience is key!
1. Soaking the Seeds (Optional but Helpful): Parsley seeds have a hard outer shell, which can make germination a bit tricky. To speed things up, you can soak the seeds in warm water for 12-24 hours before planting. This helps soften the shell and encourages them to sprout. I usually put them in a small bowl with warm water and let them sit overnight.
2. Preparing the Pot: Fill your chosen container with the potting mix, leaving about an inch of space at the top. Gently pat down the soil to remove any air pockets.
3. Sowing the Seeds: Sprinkle the parsley seeds evenly over the surface of the soil. You don’t need to bury them too deep – about ¼ inch is perfect. You can either sow them broadcast (sprinkling them all over) or in rows. I usually go for the broadcast method because it’s easier.
4. Covering the Seeds: Lightly cover the seeds with a thin layer of potting mix.
5. Watering: Gently water the soil until it’s moist but not soggy. You can use a spray bottle to avoid disturbing the seeds.
6. Creating a Humid Environment (Optional): To help with germination, you can cover the pot with plastic wrap or a clear plastic bag. This will create a humid environment that the seeds will love. Just make sure to remove the plastic wrap once the seedlings start to emerge.
7. Finding the Perfect Spot: Place the pot in a warm, sunny location. A south-facing windowsill is ideal. If you’re using grow lights, position them a few inches above the soil surface.
Nurturing Your Parsley: From Seedling to Snippet
Once your parsley seedlings emerge, it’s time to provide them with the care they need to thrive.
1. Watering: Keep the soil consistently moist, but not waterlogged. Water when the top inch of soil feels dry to the touch. Overwatering can lead to root rot, so be careful!
2. Light: Parsley needs at least 6 hours of sunlight per day. If you’re not getting enough natural light, supplement with grow lights. I usually keep my grow lights on for about 12-14 hours a day.
3. Thinning: Once the seedlings are a few inches tall, you’ll need to thin them out. This means removing some of the seedlings to give the remaining ones more space to grow. Choose the strongest, healthiest-looking seedlings and snip off the weaker ones at the soil line. Aim for about 2-3 inches of space between each plant.
4. Fertilizing (Optional): If you want to give your parsley a boost, you can fertilize it every few weeks with a balanced liquid fertilizer. Follow the instructions on the fertilizer label. I usually dilute the fertilizer to half strength to avoid burning the roots.
5. Pinching Back: Pinching back the stems encourages bushier growth. Simply snip off the tips of the stems with your fingers or scissors. This will also prevent the parsley from flowering, which can make the leaves taste bitter.
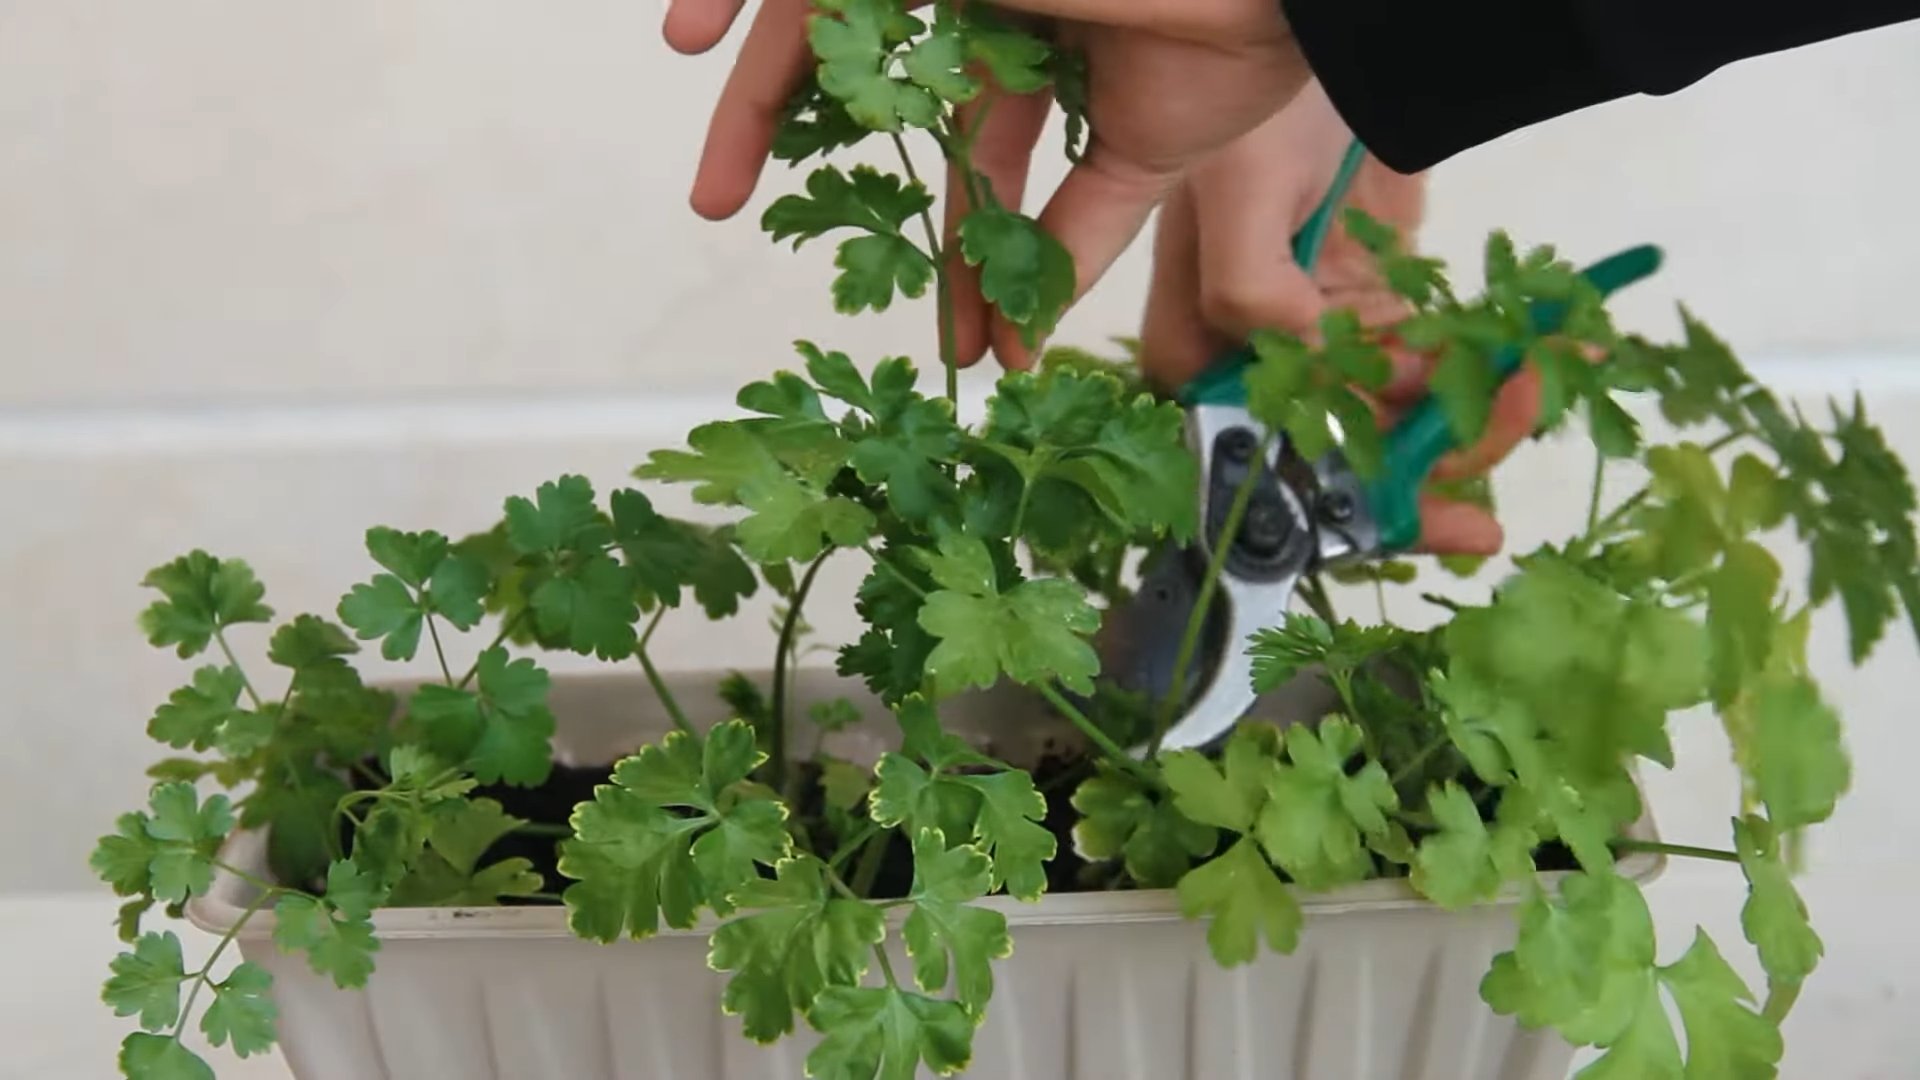
Harvesting Your Bounty: Snipping for Flavor
The best part of growing your own parsley is, of course, harvesting it!
1. When to Harvest: You can start harvesting parsley once the plants are about 6 inches tall.
2. How to Harvest: Use scissors or pruning shears to snip off the outer stems near the base of the plant. Avoid cutting more than one-third of the plant at a time, as this can weaken it.
3. Using Your Parsley: Freshly harvested parsley is best, but you can also store it in the refrigerator for a few days. To store it, wrap the parsley in a damp paper towel and place it in a plastic bag. You can also freeze parsley for longer storage. To freeze it, chop the parsley and place it in ice cube trays with water or olive oil. Once frozen, transfer the cubes to a freezer bag.
Troubleshooting: Common Parsley Problems and Solutions
Even with the best care, you might encounter some problems along the way. Here are a few common issues and how to fix them:
* Yellowing Leaves: This could be a sign of overwatering, underwatering, or nutrient deficiency. Check the soil moisture and adjust your watering accordingly. If the soil is dry, water more frequently. If it’s soggy, water less frequently. You can also try fertilizing your parsley with a balanced liquid fertilizer.
* Leggy Growth: This means your parsley isn’t getting enough light. Move it to a sunnier location or supplement with grow lights.
* Pests: Parsley is generally pest-resistant, but you might occasionally encounter aphids or spider mites. You can usually get rid of these pests by spraying the plants with a strong stream of water or using insecticidal soap.
* Slow Germination: Parsley seeds can be slow to germinate. Make sure the soil is warm and moist, and consider soaking the seeds before planting.
Extending the Harvest: Keeping Your Parsley Patch Productive
Parsley is a biennial plant, which means it typically lives for two years. However, it often bolts (goes to seed) in its second year, which can make the leaves taste bitter. To extend the harvest, you can:
* Pinch Back Regularly: Pinching back the stems will prevent the parsley from flowering and bolting.
* Succession Planting: Sow new seeds every few weeks to ensure a continuous supply of fresh parsley.
* Overwintering: In colder climates, you can bring your parsley plants indoors for the winter. Place them in a sunny location and water them regularly.
Parsley Varieties: Choosing the Right One for You
As I mentioned earlier, there are two main types of parsley: curly parsley and flat-leaf (Italian) parsley. Here’s a quick rundown of the differences:
* Curly Parsley: This is the type you often see used as a garnish. It has a milder flavor than flat-leaf parsley and is more decorative.
* Flat-Leaf (Italian) Parsley: This type has a stronger, more robust flavor and is often preferred for cooking.
There are also other, less common varieties of parsley, such as Hamburg parsley, which is grown for its edible root.
Parsley’s Perks: More Than Just a Pretty Garnish
Parsley isn’t just a pretty garnish; it’s also packed with nutrients! It’s a good source of vitamins A, C, and K, as well as folate and iron. It’s also a good source of antioxidants. Adding parsley to your diet can help boost your immune system, improve your digestion, and protect against chronic diseases.
Final Thoughts: Enjoying Your Homegrown Parsley
Growing your own parsley is a rewarding experience. Not only will you have a constant supply of fresh, flavorful herbs, but you’ll also enjoy the satisfaction of knowing that you grew it yourself. So, grab your seeds, get your hands dirty, and start growing your own kitchen
Conclusion
So, there you have it! Growing your own kitchen parsley isn’t just a fun little project; it’s a game-changer for your culinary life. Forget those sad, wilted bunches from the grocery store that cost a fortune and seem to lose their flavor the moment you get them home. With a little effort, you can have a constant supply of fresh, vibrant parsley right at your fingertips, ready to elevate any dish from ordinary to extraordinary.
Why is this DIY trick a must-try? Because it’s about more than just saving money (though that’s a definite perk!). It’s about connecting with your food, understanding where it comes from, and enjoying the unparalleled flavor of freshly harvested herbs. Imagine the satisfaction of snipping a handful of bright green parsley to garnish your pasta, sprinkle over roasted vegetables, or blend into a flavorful pesto. The aroma alone is enough to make your mouth water!
But the benefits don’t stop there. Growing your own parsley allows you to control the quality of what you’re consuming. You can avoid pesticides and herbicides, ensuring that your herbs are as healthy and natural as possible. Plus, it’s a sustainable practice that reduces your carbon footprint by eliminating the need for transportation and packaging.
Ready to take your parsley game to the next level? Consider these variations:
* Explore different varieties: Flat-leaf (Italian) parsley is known for its robust flavor, while curly parsley offers a milder taste and a decorative appeal. Experiment with both to find your favorite.
* Companion planting: Parsley is a great companion plant for tomatoes, peppers, and roses. Planting it near these vegetables can help deter pests and improve their growth.
* Grow it indoors: If you live in a colder climate or have limited outdoor space, you can easily grow parsley indoors in a pot near a sunny window. Just make sure to provide adequate drainage and water regularly.
* Preserve your harvest: If you end up with more parsley than you can use fresh, don’t let it go to waste! You can dry it, freeze it, or make parsley-infused oil or vinegar to enjoy its flavor year-round.
We’re confident that once you experience the joy of growing your own kitchen parsley, you’ll never go back to store-bought again. It’s a simple, rewarding, and delicious way to enhance your cooking and connect with nature. So, grab a pot, some seeds, and get ready to embark on your parsley-growing adventure!
We’d love to hear about your experiences! Share your tips, tricks, and photos in the comments below. Let’s create a community of parsley enthusiasts and inspire others to discover the magic of homegrown herbs. Happy growing!
Frequently Asked Questions (FAQ)
How long does it take for parsley seeds to germinate?
Parsley seeds are notoriously slow to germinate, often taking anywhere from 2 to 4 weeks, and sometimes even longer. Patience is key! To speed up the process, you can soak the seeds in warm water for 24 hours before planting. This helps to soften the seed coat and encourage germination. Keep the soil consistently moist but not waterlogged during this period. Maintaining a soil temperature between 70-75°F (21-24°C) can also help. Don’t be discouraged if you don’t see sprouts right away; just keep watering and wait it out.
What kind of soil is best for growing parsley?
Parsley thrives in well-draining, fertile soil that is rich in organic matter. A good potting mix specifically formulated for herbs or vegetables is ideal. You can also amend your garden soil with compost, aged manure, or other organic materials to improve its drainage and nutrient content. Parsley prefers a slightly acidic to neutral soil pH, ideally between 6.0 and 7.0. If you’re unsure about your soil’s pH, you can purchase a soil testing kit from your local garden center.
How much sunlight does parsley need?
Parsley needs at least 6 hours of sunlight per day to thrive. However, in hot climates, it can benefit from some afternoon shade to prevent the leaves from scorching. If you’re growing parsley indoors, place it near a sunny window that receives plenty of direct sunlight. You may also need to supplement with artificial grow lights, especially during the winter months. Rotate the pot regularly to ensure that all sides of the plant receive equal light exposure.
How often should I water my parsley plant?
Parsley prefers consistently moist soil, but it doesn’t like to be waterlogged. Water your parsley plant whenever the top inch of soil feels dry to the touch. Avoid overwatering, as this can lead to root rot. When watering, water deeply, allowing the water to soak into the soil and drain out of the bottom of the pot. During hot, dry weather, you may need to water more frequently. Check the soil moisture regularly and adjust your watering schedule accordingly.
How do I harvest parsley?
Harvest parsley by snipping off the outer stems near the base of the plant. This encourages new growth from the center. Avoid cutting off more than one-third of the plant at a
So, there you have it! Growing your own kitchen parsley isn’t just a fun little project; it’s a game-changer for your culinary life. Forget those sad, wilted bunches from the grocery store that cost a fortune and seem to lose their flavor the moment you get them home. With a little effort, you can have a constant supply of fresh, vibrant parsley right at your fingertips, ready to elevate any dish from ordinary to extraordinary.
Why is this DIY trick a must-try? Because it’s about more than just saving money (though that’s a definite perk!). It’s about connecting with your food, understanding where it comes from, and enjoying the unparalleled flavor of freshly harvested herbs. Imagine the satisfaction of snipping a handful of bright green parsley to garnish your pasta, sprinkle over roasted vegetables, or blend into a flavorful pesto. The aroma alone is enough to make your mouth water!
But the benefits don’t stop there. Growing your own parsley allows you to control the quality of what you’re consuming. You can avoid pesticides and herbicides, ensuring that your herbs are as healthy and natural as possible. Plus, it’s a sustainable practice that reduces your carbon footprint by eliminating the need for transportation and packaging.
Ready to take your parsley game to the next level? Consider these variations:
* Explore different varieties: Flat-leaf (Italian) parsley is known for its robust flavor, while curly parsley offers a milder taste and a decorative appeal. Experiment with both to find your favorite.
* Companion planting: Parsley is a great companion plant for tomatoes, peppers, and roses. Planting it near these vegetables can help deter pests and improve their growth.
* Grow it indoors: If you live in a colder climate or have limited outdoor space, you can easily grow parsley indoors in a pot near a sunny window. Just make sure to provide adequate drainage and water regularly.
* Preserve your harvest: If you end up with more parsley than you can use fresh, don’t let it go to waste! You can dry it, freeze it, or make parsley-infused oil or vinegar to enjoy its flavor year-round.
We’re confident that once you experience the joy of growing your own kitchen parsley, you’ll never go back to store-bought again. It’s a simple, rewarding, and delicious way to enhance your cooking and connect with nature. So, grab a pot, some seeds, and get ready to embark on your parsley-growing adventure!
We’d love to hear about your experiences! Share your tips, tricks, and photos in the comments below. Let’s create a community of parsley enthusiasts and inspire others to discover the magic of homegrown herbs. Happy growing!
Frequently Asked Questions (FAQ)
How long does it take for parsley seeds to germinate?
Parsley seeds are notoriously slow to germinate, often taking anywhere from 2 to 4 weeks, and sometimes even longer. Patience is key! To speed up the process, you can soak the seeds in warm water for 24 hours before planting. This helps to soften the seed coat and encourage germination. Keep the soil consistently moist but not waterlogged during this period. Maintaining a soil temperature between 70-75°F (21-24°C) can also help. Don’t be discouraged if you don’t see sprouts right away; just keep watering and wait it out.
What kind of soil is best for growing parsley?
Parsley thrives in well-draining, fertile soil that is rich in organic matter. A good potting mix specifically formulated for herbs or vegetables is ideal. You can also amend your garden soil with compost, aged manure, or other organic materials to improve its drainage and nutrient content. Parsley prefers a slightly acidic to neutral soil pH, ideally between 6.0 and 7.0. If you’re unsure about your soil’s pH, you can purchase a soil testing kit from your local garden center.
How much sunlight does parsley need?
Parsley needs at least 6 hours of sunlight per day to thrive. However, in hot climates, it can benefit from some afternoon shade to prevent the leaves from scorching. If you’re growing parsley indoors, place it near a sunny window that receives plenty of direct sunlight. You may also need to supplement with artificial grow lights, especially during the winter months. Rotate the pot regularly to ensure that all sides of the plant receive equal light exposure.
How often should I water my parsley plant?
Parsley prefers consistently moist soil, but it doesn’t like to be waterlogged. Water your parsley plant whenever the top inch of soil feels dry to the touch. Avoid overwatering, as this can lead to root rot. When watering, water deeply, allowing the water to soak into the soil and drain out of the bottom of the pot. During hot, dry weather, you may need to water more frequently. Check the soil moisture regularly and adjust your watering schedule accordingly.
How do I harvest parsley?
Harvest parsley by snipping off the outer stems near the base of the plant. This encourages new growth from the center. Avoid cutting off more than one-third of the plant at a time, as this can stress the plant and slow down its growth. You can harvest parsley throughout the growing season, as needed. For the best flavor, harvest parsley in the morning, after the dew has dried.
Can I grow parsley from cuttings?
While it’s more common to grow parsley from seeds, you can also propagate it from cuttings, although the success rate is lower. Take cuttings from healthy, non-flowering stems, about 4-6 inches long. Remove the lower leaves and place the cuttings in a glass of water. Change the water every few days. Once the cuttings have developed roots (usually within a few weeks), you can transplant them into pots filled with potting mix. Keep the soil moist and provide plenty of sunlight.
Why is my parsley turning yellow?
Yellowing parsley leaves can be caused by several factors, including overwatering, underwatering, nutrient deficiencies, or pests. Check the soil moisture to ensure that you’re not overwatering or underwatering. If the soil is consistently wet, allow it to dry out slightly before watering again. If the soil is dry, water deeply. You can also fertilize your parsley plant with a balanced fertilizer to provide it with the nutrients it needs. Inspect the leaves for signs of pests, such as aphids or spider mites, and treat accordingly.
How do I prevent parsley from bolting (flowering)?
Parsley is a biennial plant, meaning it typically flowers in its second year. However, it can sometimes bolt (flower) in its first year, especially during hot weather. Bolting causes the leaves to become bitter and less flavorful. To prevent bolting, keep your parsley plant well-watered and provide it with some afternoon shade during hot weather. You can also pinch off any flower buds as soon as you see them.
Can I freeze parsley?
Yes, freezing parsley is a great way to preserve its flavor and freshness. To freeze parsley, wash it thoroughly and pat it dry. You can either chop it finely or leave it in sprigs. Place the parsley in a freezer bag or airtight container and freeze for up to 6 months. You can also freeze parsley in ice cube trays. Simply chop the parsley, fill the ice cube trays with water or olive oil, and freeze. Once frozen, transfer the parsley cubes to a freezer bag or container.
Is growing kitchen parsley difficult?
No, growing kitchen parsley is not difficult, but it does require some patience, especially with germination. Once established, parsley is relatively easy to care for. The key is to provide it with the right conditions: well-draining soil, plenty of sunlight, and consistent moisture. With a little attention, you can enjoy a bountiful harvest of fresh, flavorful parsley all season long.

Leave a Comment