

Grow Radishes at Home? Absolutely! Imagine plucking crisp, peppery radishes straight from your own backyard, adding a vibrant crunch to your salads and snacks. It’s easier than you think, and this DIY guide will show you exactly how to make it happen, even if you’re a complete beginner. Forget those bland, store-bought radishes – homegrown is where it’s at!
Radishes have a surprisingly long and fascinating history. Believed to have originated in Asia, they were cultivated in ancient Egypt and Greece, prized for their medicinal properties and culinary versatility. From humble peasant fare to royal feasts, radishes have nourished people for centuries. Now, you can continue that tradition in your own home!
Why should you learn this DIY trick? Because fresh, organic produce is becoming increasingly important. Knowing how to grow radishes at home gives you control over what you eat, avoids harmful pesticides, and connects you to the natural world. Plus, it’s incredibly rewarding to nurture a tiny seed into a delicious, edible root. This guide will provide simple, step-by-step instructions, clever hacks, and troubleshooting tips to ensure your radish-growing journey is a success. Let’s get our hands dirty and start growing!
Grow Your Own Crunchy Radishes: A Beginner’s Guide
Hey there, fellow gardening enthusiasts! Ever wanted to grow your own food but felt intimidated? Radishes are your answer! They’re incredibly easy, super fast-growing, and add a peppery kick to salads and snacks. I’m going to walk you through everything you need to know to cultivate your own radish patch, even if you’ve never touched a trowel before. Let’s get started!
Choosing the Right Radish Variety
First things first, let’s talk about radish varieties. There’s more to radishes than just the classic red globe! Choosing the right variety depends on your taste, climate, and the time of year you’re planting.
* Cherry Belle: These are your classic, round, bright red radishes. They’re quick to mature (about 22 days) and have a mild flavor. Perfect for beginners!
* French Breakfast: These are elongated, red radishes with a white tip. They have a slightly milder flavor than Cherry Belle and mature in about 25 days. I love them sliced on buttered bread with a sprinkle of sea salt.
* Easter Egg: This is a mix of radishes in various colors – red, pink, purple, and white. They’re fun to grow and add a colorful touch to your garden. They mature in about 25 days.
* Black Spanish: These are larger, round radishes with black skin and white flesh. They have a stronger, more pungent flavor and take longer to mature (around 55 days). These are great for winter storage.
* Daikon: While technically a radish, daikon is much larger and milder in flavor. They’re long and white, and often used in Asian cuisine. They take about 60 days to mature.
I usually recommend starting with Cherry Belle or French Breakfast. They’re reliable and quick, giving you almost instant gratification!
Preparing Your Radish Bed
Radishes are pretty forgiving, but they do appreciate well-drained soil and plenty of sunlight. Here’s how to get your radish bed ready:
* Sunlight: Radishes need at least 6 hours of sunlight per day. Choose a spot in your garden that gets plenty of sunshine.
* Soil: Radishes prefer loose, well-drained soil. If your soil is heavy clay, amend it with compost or other organic matter to improve drainage. I like to use a mix of compost, peat moss, and perlite.
* pH: The ideal soil pH for radishes is between 6.0 and 7.0. You can test your soil pH with a soil testing kit, which you can find at most garden centers.
* Fertilizer: Radishes don’t need a lot of fertilizer. In fact, too much nitrogen can cause them to grow leafy tops at the expense of the roots. Before planting, I like to work in a small amount of balanced fertilizer (like 10-10-10) into the soil.
Planting Your Radish Seeds
Now for the fun part – planting! Radishes are best grown directly from seed, as they don’t transplant well.
1. Timing is Key: Radishes are a cool-season crop, meaning they grow best in spring and fall. Plant your seeds as soon as the soil can be worked in the spring, usually a few weeks before the last frost. You can also plant them in late summer for a fall harvest. I usually do succession planting, sowing a new batch of seeds every 2 weeks, to ensure a continuous supply of radishes.
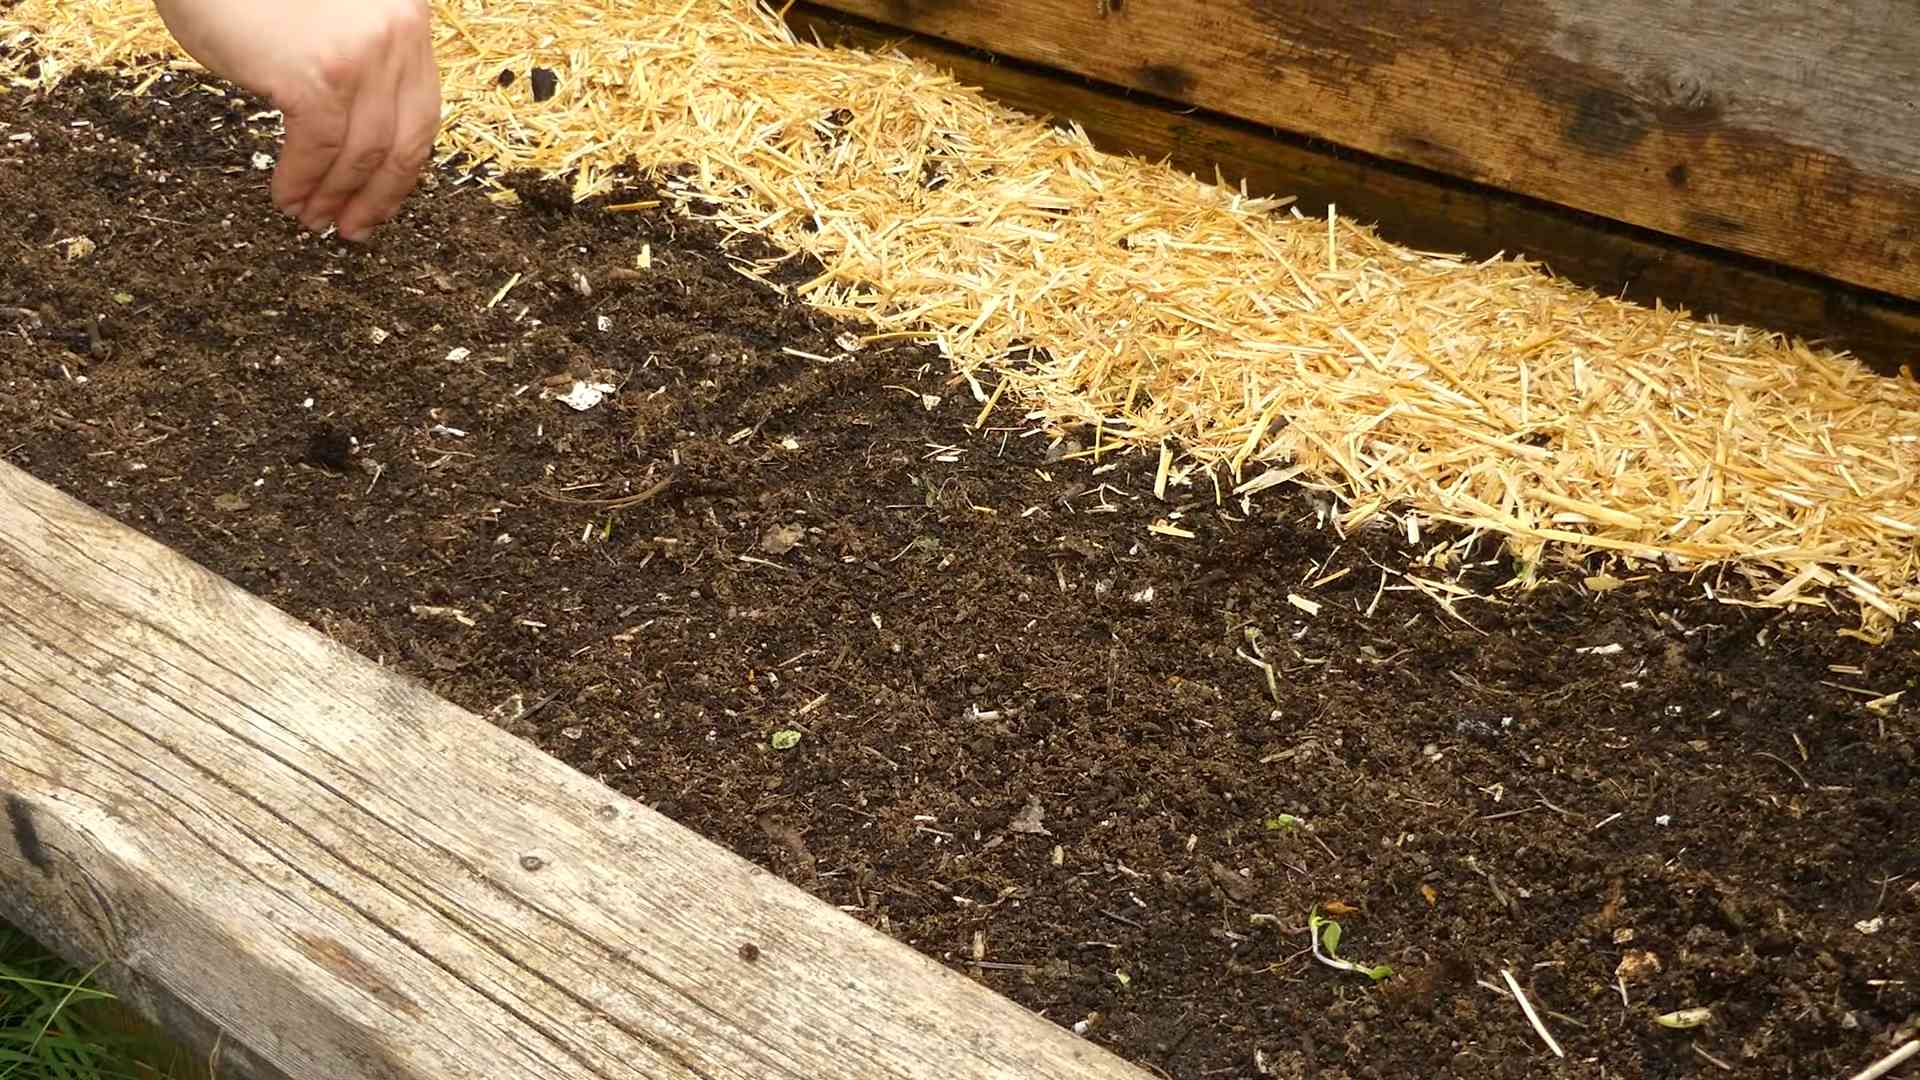
2. Sowing the Seeds: Sow the seeds about ½ inch deep and 1 inch apart in rows that are 6 inches apart. I like to use a dibber (a small pointed tool) to make the holes, but you can also use your finger.
3. Cover and Water: Gently cover the seeds with soil and water thoroughly. Keep the soil moist until the seeds germinate, which usually takes about 3-7 days. I find that using a gentle spray nozzle on my hose prevents the seeds from being washed away.
4. Thinning Seedlings: Once the seedlings emerge, thin them to about 2 inches apart. This will give the radishes enough room to grow. Don’t just pull them out! Gently snip the unwanted seedlings at the soil line with scissors to avoid disturbing the roots of the remaining plants.
Caring for Your Radishes
Radishes are relatively low-maintenance, but there are a few things you can do to ensure a successful harvest.
* Watering: Radishes need consistent moisture to grow quickly and develop crisp, flavorful roots. Water them regularly, especially during dry spells. Aim for about 1 inch of water per week. I like to water deeply and less frequently, rather than shallowly and often.
* Weeding: Keep your radish bed free of weeds. Weeds compete with radishes for water and nutrients. I prefer to hand-weed, as it’s less likely to damage the radish roots.
* Pest Control: Radishes are generally pest-resistant, but they can be susceptible to flea beetles and root maggots. Flea beetles are tiny, jumping insects that chew small holes in the leaves. Root maggots are fly larvae that feed on the roots. To prevent flea beetles, you can cover your radish bed with row covers. To prevent root maggots, avoid planting radishes in the same spot year after year. I also find that companion planting with marigolds helps to deter pests.
* Bolting: If the weather gets too hot, radishes may bolt, meaning they send up a flower stalk and the roots become tough and bitter. To prevent bolting, plant radishes in a shady spot during the hottest part of the summer. Also, make sure to harvest them promptly when they’re ready.
Harvesting Your Radishes
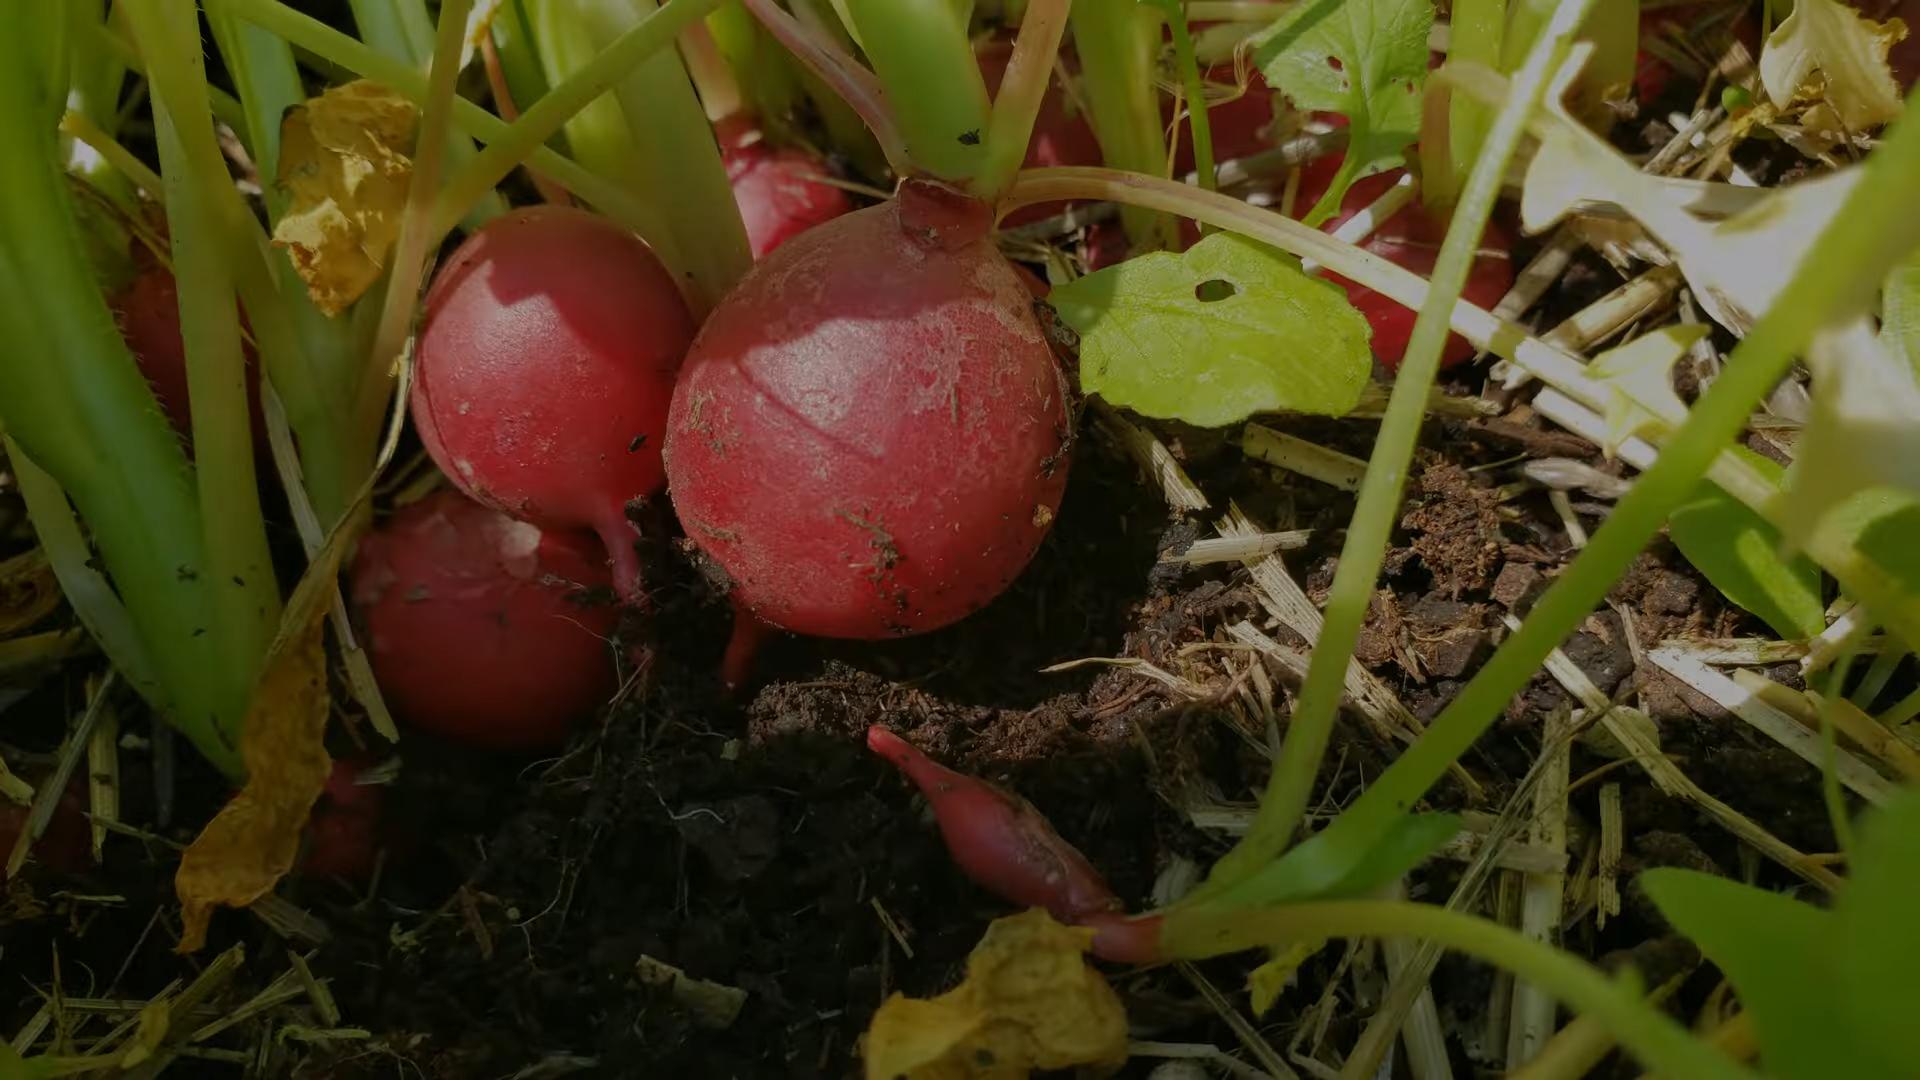
This is the most rewarding part! Radishes are ready to harvest when they reach the size specified on the seed packet. This is usually about 3-4 weeks after planting.
1. Check for Size: Gently brush away the soil around the base of the radish to check its size. If it’s the right size, grasp the leaves near the base of the radish and pull it straight out of the ground.
2. Harvest Promptly: Don’t leave radishes in the ground too long, as they can become tough and bitter. Harvest them as soon as they’re ready.
3. Wash and Store: Wash the radishes thoroughly and trim off the leaves. Store them in a plastic bag in the refrigerator. They’ll keep for about a week. I like to store the leaves separately, as they can be used in salads or stir-fries.
Troubleshooting Common Radish Problems
Even with the best care, you might encounter a few problems when growing radishes. Here are some common issues and how to fix them:
* Radishes are too small: This is usually caused by overcrowding or lack of water. Thin your seedlings to give them more room to grow, and make sure to water them regularly.
* Radishes are cracked: This is usually caused by inconsistent watering. Water your radishes regularly, especially during dry spells.
* Radishes are tough and bitter: This is usually caused by bolting or leaving the radishes in the ground too long. Harvest your radishes promptly when they’re ready, and plant them in a shady spot during the hottest part of the summer.
* Radishes have holes in the leaves: This is usually caused by flea beetles. Cover your radish bed with row covers to prevent flea beetles.
* Radishes have tunnels in the roots: This is usually caused by root maggots. Avoid planting radishes in the same spot year after year.
Creative Ways to Use Your Radish Harvest
Okay, you’ve got a beautiful bounty of radishes. Now what? Here are some of my favorite ways to enjoy them:
* Salads: Thinly sliced radishes add a peppery crunch to salads. I love them in a simple salad with lettuce, cucumber, and a vinaigrette dressing.
* Snacks: Radishes are delicious on their own as a snack. I like to slice them and dip them in hummus or guacamole.
* Sandwiches: Radishes add a refreshing crunch to sandwiches. I love them on a turkey and avocado sandwich.
* Roasted Radishes: Roasting radishes mellows their flavor and brings out their sweetness. Toss them with olive oil, salt, and pepper, and roast them at 400°F (200°C) for about 20 minutes.
* Radish Greens: Don’t throw away the radish greens! They’re edible and nutritious. You can use them in salads, stir-fries, or soups. I like to sauté them with garlic and olive oil.
* Radish Butter: Finely chop radishes and mix them with softened butter, salt, and pepper. Spread on bread or crackers for a delicious and unique appetizer
Conclusion
So, there you have it! Growing radishes at home is not only surprisingly simple, but it’s also incredibly rewarding. Forget those bland, store-bought radishes that lack that peppery zing. With just a few simple steps, you can cultivate a vibrant crop of fresh, crisp radishes right in your own backyard, balcony, or even windowsill. This DIY trick is a must-try for anyone looking to add a burst of flavor to their salads, sandwiches, or crudité platters.
Why is this a must-try? Because the difference in taste between homegrown and store-bought radishes is truly remarkable. You’ll experience a level of freshness and intensity you simply can’t find anywhere else. Plus, you’ll have the satisfaction of knowing exactly where your food comes from and that it’s free from harmful pesticides. It’s a win-win!
But the fun doesn’t stop there. Feel free to experiment with different varieties of radishes. Try the classic Cherry Belle for its bright red color and mild flavor, or go for the French Breakfast radish with its elongated shape and delicate taste. For a spicier kick, consider growing Black Spanish radishes. You can also play around with companion planting. Radishes are known to deter pests from other vegetables, making them excellent companions for carrots, lettuce, and cucumbers.
Don’t have a garden? No problem! Radishes thrive in containers, making them perfect for apartment dwellers or anyone with limited space. Just make sure to choose a pot that’s at least 6 inches deep and fill it with well-draining potting mix.
We’re confident that once you try growing radishes at home, you’ll be hooked. It’s a quick, easy, and incredibly satisfying way to add fresh, flavorful produce to your diet. So, grab some seeds, get your hands dirty, and prepare to be amazed by the deliciousness of homegrown radishes.
We encourage you to embark on this gardening adventure and share your experiences with us! Let us know what varieties you tried, what challenges you faced, and what successes you celebrated. Share your photos and tips in the comments below. We can’t wait to hear about your radish-growing journey! Happy gardening!
Frequently Asked Questions (FAQs)
Q: How long does it take for radishes to grow?
A: One of the best things about growing radishes is their quick turnaround time. Most varieties mature in just 20-30 days, making them one of the fastest-growing vegetables you can cultivate. This makes them ideal for impatient gardeners or those who want to see results quickly. The exact time can vary slightly depending on the variety and growing conditions, but you can generally expect to harvest your radishes within a month of planting.
Q: What kind of soil do radishes need?
A: Radishes prefer loose, well-draining soil that is rich in organic matter. Heavy clay soil can hinder root development and result in misshapen radishes. Before planting, amend your soil with compost or other organic matter to improve drainage and fertility. A slightly acidic to neutral soil pH (around 6.0 to 7.0) is ideal. If you’re growing radishes in containers, use a high-quality potting mix specifically formulated for vegetables.
Q: How much sunlight do radishes need?
A: Radishes need at least 6 hours of sunlight per day to thrive. While they can tolerate some shade, especially in hot climates, insufficient sunlight can result in leggy growth and smaller radishes. Choose a sunny location for your radish patch or container. If you’re growing radishes indoors, place them near a sunny window or use grow lights to supplement natural light.
Q: How often should I water radishes?
A: Radishes need consistent moisture to grow quickly and develop crisp, flavorful roots. Water them regularly, especially during dry spells. Aim to keep the soil consistently moist but not waterlogged. Overwatering can lead to root rot, while underwatering can cause the radishes to become tough and bitter. A good rule of thumb is to water deeply whenever the top inch of soil feels dry to the touch.
Q: How far apart should I plant radish seeds?
A: Space radish seeds about 1 inch apart in rows that are 6 inches apart. This allows the radishes enough room to develop without overcrowding. If you’re broadcasting seeds, thin them out after they germinate so that the seedlings are spaced about 1 inch apart. Thinning is important to ensure that each radish has enough space to grow to its full potential.
Q: Do I need to fertilize radishes?
A: Radishes don’t require heavy fertilization, but a light feeding can help them grow faster and produce larger roots. Before planting, amend the soil with compost or other organic matter. You can also side-dress the radishes with a balanced fertilizer a few weeks after they germinate. Avoid using fertilizers that are high in nitrogen, as this can promote leafy growth at the expense of root development.
Q: What are some common pests and diseases that affect radishes?
A: Radishes are generally pest-resistant, but they can be susceptible to certain pests and diseases, such as flea beetles, root maggots, and fungal diseases. Flea beetles can chew small holes in the leaves, while root maggots can damage the roots. Fungal diseases can cause the leaves to develop spots or rot. To prevent these problems, practice good garden hygiene, such as removing weeds and debris, and avoid overwatering. You can also use row covers to protect the radishes from pests.
Q: How do I know when radishes are ready to harvest?
A: Radishes are ready to harvest when their roots reach the desired size. This typically takes about 20-30 days, depending on the variety. Check the seed packet for specific size guidelines. To harvest, gently pull the radishes from the soil. If the soil is dry, water it beforehand to make pulling easier. Harvest radishes promptly, as they can become tough and bitter if left in the ground too long.
Q: Can I eat radish greens?
A: Yes, radish greens are edible and nutritious! They have a peppery flavor similar to the roots. You can use them in salads, soups, or stir-fries. Choose young, tender greens for the best flavor. Wash the greens thoroughly before using them.
Q: How do I store radishes?
A: To store radishes, remove the greens and store them separately in the refrigerator. Place the radishes in a plastic bag or container with a damp paper towel to keep them from drying out. Radishes can be stored in the refrigerator for up to two weeks.

Leave a Comment