

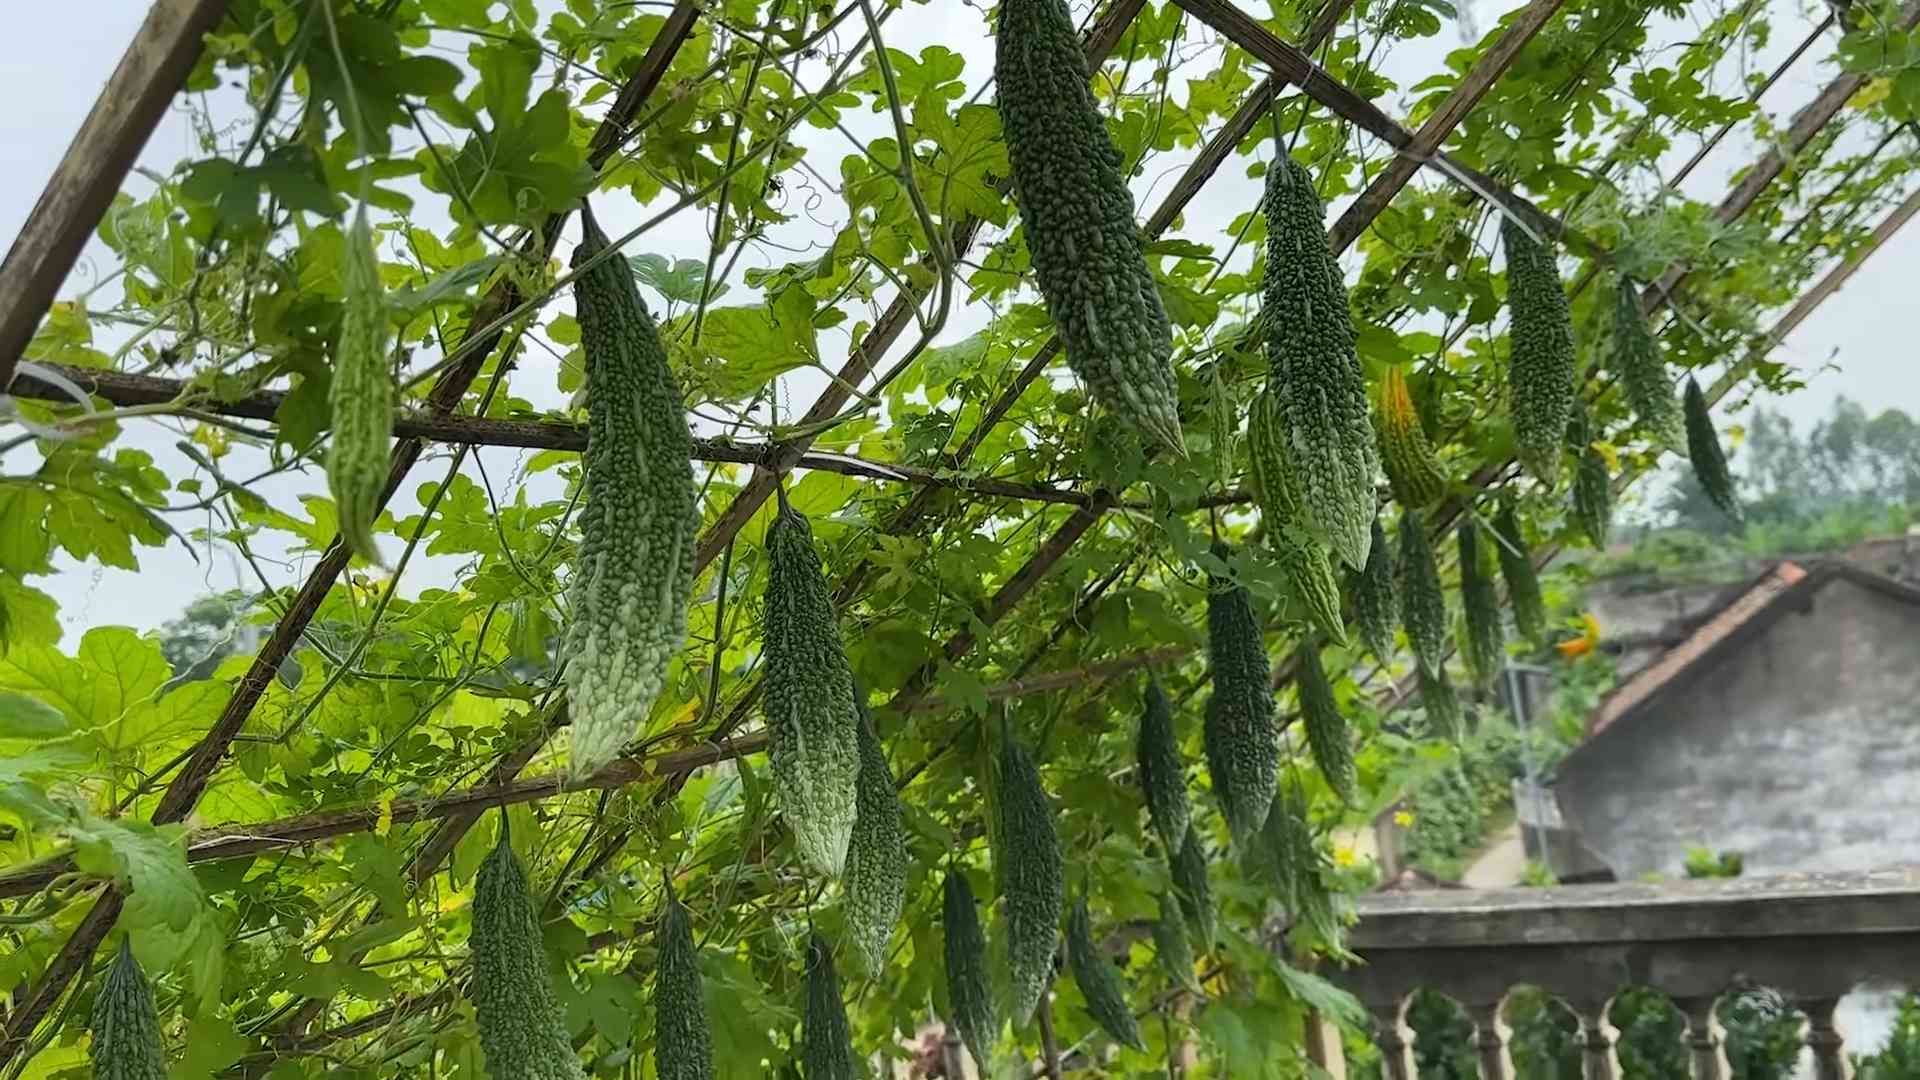
Bitter Gourd Trellis DIY: Ready to ditch the sprawling vines and embrace a vertical garden bursting with healthy, homegrown bitter gourds? I’m so excited to share this simple, yet incredibly effective, DIY project that will transform your gardening experience! For centuries, cultures across Asia, particularly in India and China, have revered the bitter gourd, not just for its unique flavor, but also for its impressive medicinal properties. Traditionally, these vigorous vines were often left to ramble across the ground, taking up valuable space and making harvesting a prickly challenge.
But what if I told you there’s a better way? A way to maximize your yield, protect your precious gourds from soil-borne diseases, and add a touch of architectural beauty to your garden? That’s where this bitter gourd trellis DIY comes in! Many gardeners struggle with managing the unruly growth of bitter gourd vines. They end up with tangled messes, reduced airflow, and fruits hidden beneath a dense canopy. This DIY trellis solves all of that. It provides the support the vines need to climb, allowing for better sunlight penetration, improved air circulation, and easier harvesting. Plus, it’s a fantastic way to save space, especially if you’re gardening in a small area. So, let’s get started and create a thriving vertical garden that will have you enjoying fresh, homegrown bitter gourds in no time!
DIY Bitter Gourd Trellis: Grow Up, Not Out!
Hey there, fellow gardeners! Are you tired of your bitter gourd vines sprawling all over the place, taking up precious garden space and making it a pain to harvest those bumpy green goodies? Well, I’ve got just the solution for you: a DIY bitter gourd trellis! Building your own trellis is not only a cost-effective way to support your plants, but it also allows you to customize it to perfectly fit your garden’s needs and aesthetic. Trust me, once you see your bitter gourd climbing gracefully up your handmade trellis, you’ll wonder why you didn’t do this sooner!
Why Build a Trellis for Bitter Gourd?
Before we dive into the how-to, let’s quickly touch on why trellising bitter gourd is a fantastic idea:
* Space Saving: Bitter gourd vines can get quite long and unruly. A trellis allows them to grow vertically, maximizing your garden space.
* Improved Air Circulation: By lifting the vines off the ground, you’ll improve air circulation around the plants, reducing the risk of fungal diseases.
* Easier Harvesting: No more bending and searching through tangled vines! Harvesting becomes a breeze when the gourds are hanging neatly from the trellis.
* Better Sunlight Exposure: Trellising ensures that all parts of the plant receive adequate sunlight, leading to healthier growth and more abundant fruit production.
* Aesthetic Appeal: Let’s be honest, a well-designed trellis adds a touch of beauty to your garden. It’s a win-win!
Choosing Your Trellis Design
There are several trellis designs you can choose from, depending on your preferences and available materials. Here are a few popular options:
* A-Frame Trellis: This is a sturdy and self-supporting option, perfect for larger gardens. It provides ample space for the vines to climb.
* Arched Trellis: An arched trellis adds a touch of elegance to your garden. It can be used as a focal point or to create a beautiful entryway.
* Flat Panel Trellis: This is a simple and versatile option that can be attached to a wall or fence. It’s ideal for smaller gardens or balconies.
* Teepee Trellis: A teepee trellis is a fun and easy-to-build option, especially for beginners. It’s also a great way to add a whimsical touch to your garden.
For this guide, I’ll show you how to build a simple yet effective A-Frame Trellis. It’s relatively easy to construct, sturdy, and provides plenty of climbing space for your bitter gourd.
Materials You’ll Need
Okay, let’s gather our supplies! Here’s what you’ll need to build your A-Frame Bitter Gourd Trellis:
* Wooden Stakes or Posts: (6) 6-foot long stakes (2×2 inch or similar) – These will form the frame of your trellis. Cedar or redwood are great choices for durability, but pressure-treated pine works too.
* Wooden Crossbars: (3) 4-foot long pieces of wood (1×2 inch or similar) – These will connect the A-frame legs and provide additional support.
* Chicken Wire or Garden Twine: Enough to cover the climbing surface of the A-frame. Chicken wire is more durable, while garden twine is a more natural and biodegradable option.
* Staple Gun and Staples (if using chicken wire): For attaching the chicken wire to the frame.
* Drill and Screws: For attaching the crossbars to the stakes. I recommend using exterior-grade screws to withstand the elements.
* Measuring Tape: To ensure accurate measurements.
* Saw: To cut the wood to the desired lengths (if necessary).
* Gloves: To protect your hands.
* Safety Glasses: To protect your eyes.
* Optional: Wood Stain or Paint: To protect the wood and add a decorative touch.
Building Your A-Frame Trellis: Step-by-Step
Alright, let’s get building! Follow these steps to create your very own A-Frame Bitter Gourd Trellis:
Phase 1: Assembling the A-Frames
1. Prepare the Stakes: If your stakes are longer than 6 feet, cut them to the desired length using a saw. Make sure all six stakes are the same length.
2. Form the First A-Frame: Take two stakes and lean them against each other at the top, forming an “A” shape. Adjust the angle until the base of the “A” is about 3-4 feet wide. This will give your bitter gourd plenty of room to grow.
3. Secure the Top: Where the two stakes meet at the top, pre-drill holes and then screw them together using two or three screws. This will create a strong and stable joint.
4. Repeat for the Second A-Frame: Repeat steps 2 and 3 with another pair of stakes to create your second A-frame.
5. Create the Third A-Frame: Repeat steps 2 and 3 with the last pair of stakes to create your third A-frame.
Phase 2: Connecting the A-Frames
1. Position the A-Frames: Place the two A-frames parallel to each other, about 4 feet apart. This distance will determine the length of your trellis.
2. Attach the First Crossbar: Take one of the 4-foot crossbars and position it horizontally across the bottom of the A-frames, connecting the legs. Make sure the crossbar is level.
3. Secure the Crossbar: Pre-drill holes through the crossbar and into the stakes, then screw the crossbar to each stake using two screws per stake.
4. Attach the Second Crossbar: Repeat steps 2 and 3, positioning the second crossbar about halfway up the A-frames.
5. Attach the Third Crossbar: Repeat steps 2 and 3, positioning the third crossbar near the top of the A-frames, just below the point where the stakes are joined.
6. Repeat for the Third A-Frame: Repeat steps 1-5 to connect the third A-frame to the structure. This will add stability and strength to the trellis.
Phase 3: Adding the Climbing Surface
1. Prepare the Chicken Wire or Twine: If using chicken wire, unroll it and cut it to the desired length and width to cover one side of the A-frame. If using garden twine, cut several long strands.
2. Attach the Chicken Wire (if using): Starting at the bottom of one side of the A-frame, staple the chicken wire to the stakes and crossbars using a staple gun. Make sure the wire is taut and secure. Overlap the edges of the chicken wire slightly for added strength.
3. Attach the Twine (if using): Tie one end of a strand of twine to the bottom stake. Then, weave the twine back and forth between the stakes and crossbars, creating a grid pattern. Secure the twine at each intersection with a knot. Repeat this process with the remaining strands of twine until the entire side of the A-frame is covered.
4. Repeat for the Other Side: Repeat steps 2 or 3 for the other side of the A-frame.
5. Optional: Add Extra Support: For added support, you can add additional horizontal or vertical strands of chicken wire or twine to the climbing surface.
Phase 4: Finishing Touches (Optional)
1. Sand the Wood: If desired, sand down any rough edges or splinters on the wood.
2. Stain or Paint the Trellis: Apply a coat of wood stain or paint to protect the wood from the elements and add a decorative touch. Let the stain or paint dry completely before moving on to the next step.
3. Reinforce the Base: For added stability, especially in windy areas, you can bury the bottom of the trellis legs a few inches into the ground or attach them to concrete blocks.
Installing Your Bitter Gourd Trellis
1. Choose a Sunny Location: Select a location in your garden that receives at least 6-8 hours of sunlight per day. Bitter gourd thrives in full sun.
2. Prepare the Soil: Amend the soil with compost or other organic matter to improve drainage and fertility.
3. Position the Trellis: Carefully place the trellis in the desired location. Make sure it’s stable and secure.
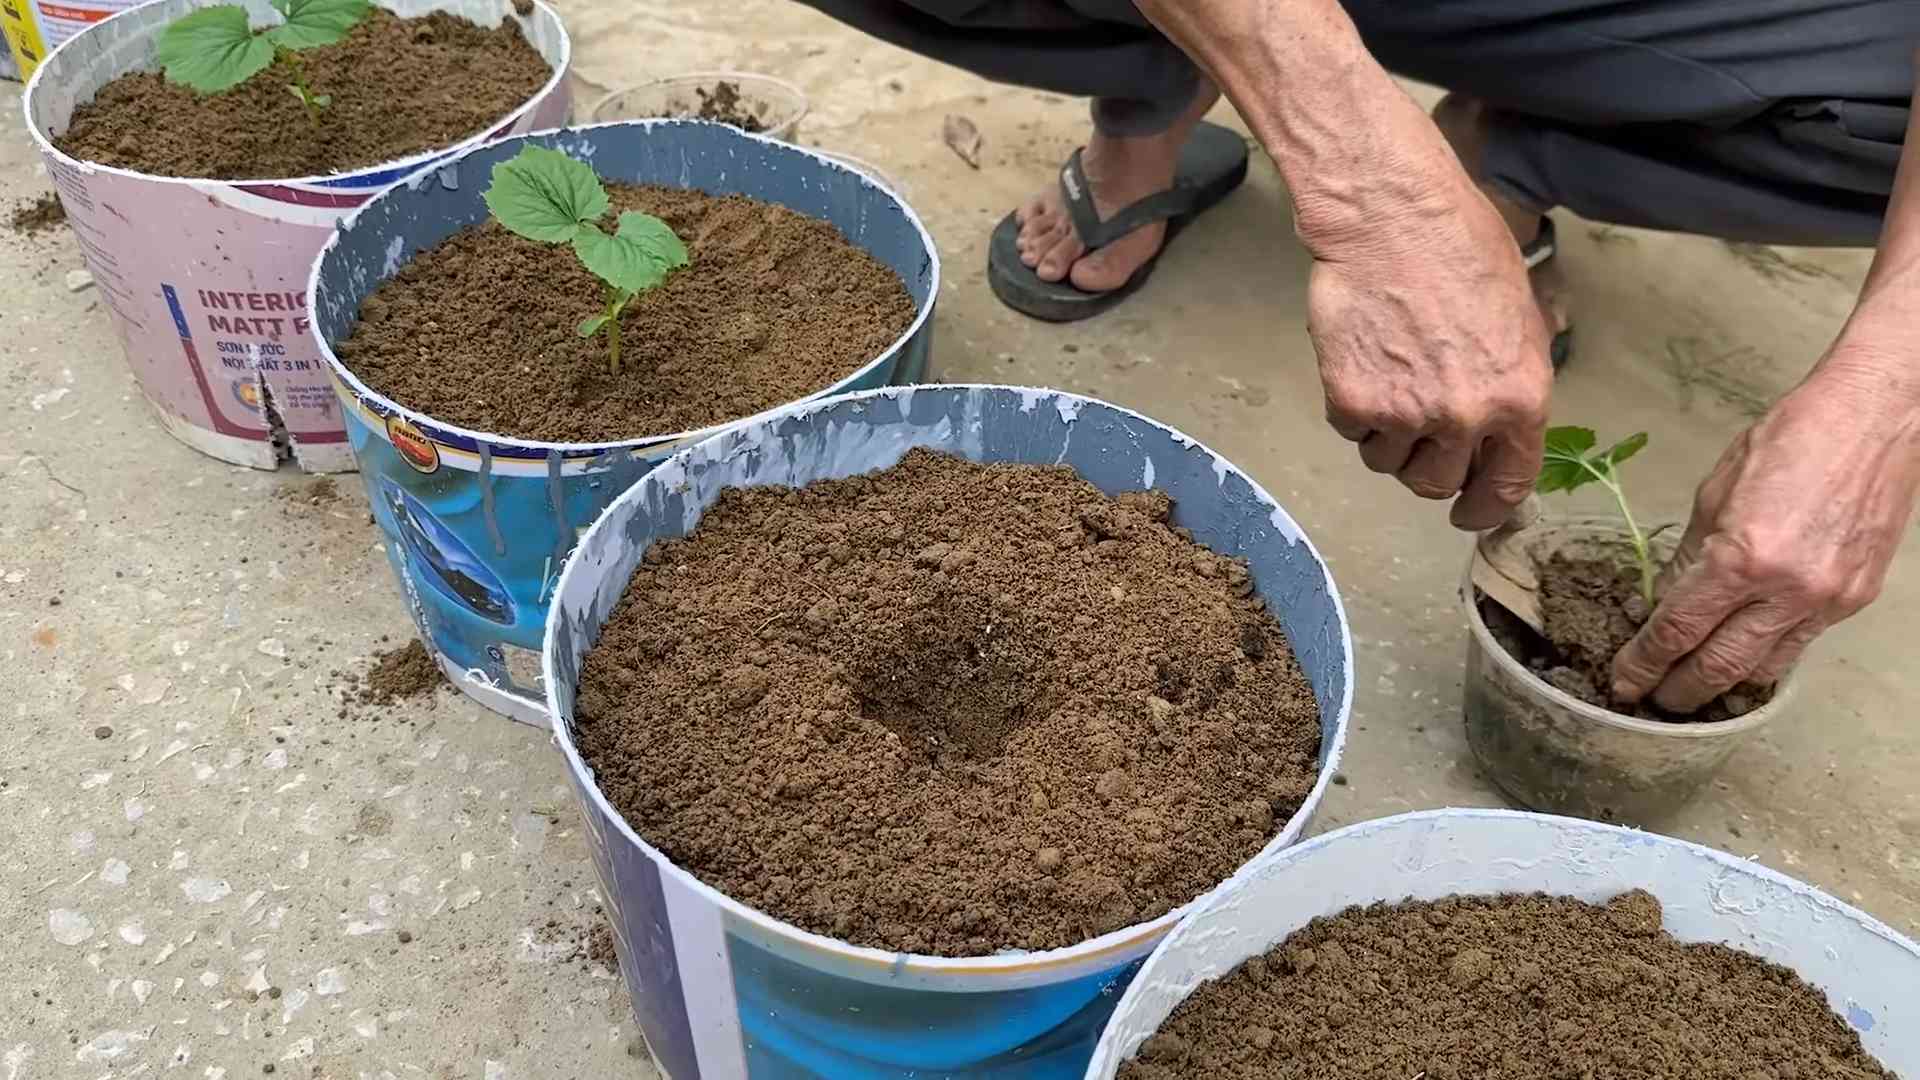
4. Plant Your Bitter Gourd: Plant your bitter gourd seedlings or seeds at the base of the trellis, spacing them about 12-18 inches apart.
5. Guide the Vines: As the bitter gourd vines grow, gently guide them onto the trellis and encourage them to climb. You may need to tie the vines to the trellis with soft twine or plant
Conclusion
So, there you have it! Creating your own bitter gourd trellis DIY isn’t just a fun weekend project; it’s a game-changer for your garden and your harvest. We’ve walked you through the simple steps, highlighted the benefits, and hopefully, inspired you to ditch the expensive store-bought options and embrace the satisfaction of building something yourself.
Why is this a must-try? Because it’s about more than just supporting your bitter gourd vines. It’s about creating a thriving ecosystem in your backyard. A well-constructed trellis allows for better air circulation, reducing the risk of fungal diseases that can plague these plants. It maximizes sunlight exposure, leading to healthier, more productive vines and a significantly larger yield of those wonderfully bitter gourds. Plus, it keeps the gourds off the ground, preventing rot and making harvesting a breeze.
But the beauty of this DIY project lies in its adaptability. Feel free to experiment with different materials. Bamboo poles can add a rustic charm, while repurposed metal pipes offer a more industrial aesthetic. You can also adjust the size and shape of the trellis to perfectly fit your garden space and the specific variety of bitter gourd you’re growing. Consider adding decorative elements like painted accents or climbing flowers to make your trellis a true focal point in your garden.
Don’t be afraid to get creative with the design! Maybe you want to build an archway trellis for a dramatic entrance to your garden, or perhaps a simple A-frame trellis is more your style. The possibilities are endless. Think about incorporating other climbing vegetables like cucumbers or beans into your trellis design for a multi-functional growing structure.
Beyond the practical benefits, building your own bitter gourd trellis is an incredibly rewarding experience. It connects you to the growing process in a deeper way, allowing you to appreciate the effort and care that goes into producing your own food. And let’s be honest, there’s nothing quite like the feeling of accomplishment that comes from building something with your own two hands.
We truly believe that this bitter gourd trellis DIY is a project that anyone can tackle, regardless of their experience level. It’s a simple, cost-effective, and incredibly beneficial way to enhance your garden and enjoy a bountiful harvest of delicious, homegrown bitter gourds.
So, what are you waiting for? Gather your materials, put on your gardening gloves, and get ready to build your own amazing bitter gourd trellis. We’re confident that you’ll be thrilled with the results.
And most importantly, we want to hear about your experience! Share your photos, tips, and challenges with us in the comments below. Let’s create a community of DIY gardeners who are passionate about growing their own food and sharing their knowledge with others. We can’t wait to see what you create! Let us know if you tried this bitter gourd trellis DIY and how it worked out for you.
Frequently Asked Questions (FAQ)
What are the best materials to use for a bitter gourd trellis?
The best materials for your bitter gourd trellis DIY depend on your budget, aesthetic preferences, and the resources available to you. Some popular options include:
* **Bamboo:** A sustainable and readily available option, bamboo is lightweight yet strong. It adds a natural, rustic look to your garden. Ensure the bamboo is treated to prevent rot and insect infestation.
* **Wood:** Untreated lumber, like cedar or redwood, is naturally rot-resistant and can last for several years. Pressure-treated lumber is another option, but consider its environmental impact.
* **Metal:** Metal pipes or rebar are incredibly durable and can withstand harsh weather conditions. They offer a more industrial look and can be painted to match your garden decor.
* **Repurposed Materials:** Get creative and repurpose old ladders, fencing, or even bed frames to create a unique and eco-friendly trellis.
How tall should my bitter gourd trellis be?
The ideal height for your bitter gourd trellis depends on the variety of bitter gourd you’re growing. Most varieties can grow quite long, so aim for a trellis that is at least 6-8 feet tall. This will provide ample space for the vines to climb and spread. If you’re growing a particularly vigorous variety, you may even want to consider a taller trellis.
How do I attach the bitter gourd vines to the trellis?
As your bitter gourd vines grow, you’ll need to gently guide them and attach them to the trellis. You can use several methods for this:
* **Garden Twine:** Soft garden twine is a gentle and effective way to tie the vines to the trellis.
* **Plant Clips:** Plastic plant clips are easy to use and can be repositioned as the vines grow.
* **Zip Ties:** Small zip ties can be used to secure the vines, but be careful not to overtighten them, as this can damage the stems.
* **Natural Tendrils:** Some bitter gourd varieties have tendrils that will naturally cling to the trellis. Simply guide the tendrils towards the trellis and they will usually attach on their own.
How far apart should I plant my bitter gourd seedlings from the trellis?
Plant your bitter gourd seedlings about 12-18 inches away from the base of the trellis. This will give them enough space to establish their roots without being crowded. As the vines grow, they will naturally reach out and climb the trellis.
What kind of maintenance does a bitter gourd trellis require?
Once your bitter gourd trellis is built, it requires minimal maintenance. Regularly inspect the trellis for any signs of damage or weakness. Repair any broken or loose supports as needed. Also, prune the vines as necessary to maintain good air circulation and prevent overcrowding. At the end of the growing season, remove the dead vines and clean the trellis to prevent the spread of diseases.
Can I use this trellis for other climbing vegetables?
Absolutely! A well-built trellis can be used for a variety of climbing vegetables, such as cucumbers, beans, peas, and even small pumpkins or melons. Just make sure the trellis is strong enough to support the weight of the mature plants and fruits.
How do I protect my bitter gourd plants from pests and diseases?
To protect your bitter gourd plants from pests and diseases, practice good garden hygiene. Remove any dead or diseased leaves promptly. Use organic pest control methods, such as neem oil or insecticidal soap, to control common pests like aphids and squash bugs. Ensure your plants have good air circulation to prevent fungal diseases.
What if I don’t have a lot of space for a large trellis?
If you have limited space, consider building a smaller, more compact trellis. A simple A-frame trellis or a vertical trellis attached to a wall or fence can be a great option for small gardens or balconies. You can also grow bitter gourd in containers with a small trellis support.
How long will my DIY bitter gourd trellis last?
The lifespan of your DIY bitter gourd trellis depends on the materials you use and the weather conditions in your area. A well-constructed trellis made from durable materials like treated wood or metal can last for several years. Regularly inspect and maintain your trellis to extend its lifespan.
Is it really worth it to DIY a bitter gourd trellis?
Absolutely! While you can purchase pre-made trellises, building your own bitter gourd trellis DIY is a more cost-effective, customizable, and rewarding option. You’ll save money, gain a sense of accomplishment, and have a trellis that perfectly fits your garden’s needs and your personal style. Plus, you’ll have the satisfaction of knowing that you created something beautiful and functional with your own two hands.


Leave a Comment