

More Bean Yield – that’s the dream, isn’t it? Imagine baskets overflowing with fresh, crisp green beans, enough to share with neighbors, freeze for winter, and still have plenty for your own delicious meals. But sometimes, despite our best efforts, our bean plants just don’t seem to produce as much as we’d hoped. Don’t worry, I’ve been there!
For centuries, beans have been a staple crop in cultures around the world, from the ancient civilizations of the Americas to the bustling farms of Europe and Asia. They’re packed with nutrients and relatively easy to grow, making them a vital source of sustenance. But even the most experienced gardeners can face challenges in maximizing their bean harvest.
That’s where these simple, yet effective, DIY tricks and hacks come in. We’re going to unlock the secrets to achieving a truly bountiful bean harvest. I’m going to share some of my favorite tips and techniques that have helped me consistently get more bean yield from my garden. These aren’t complicated, expensive solutions – just clever ways to optimize your growing conditions and give your bean plants the boost they need. So, grab your gardening gloves, and let’s get started on the path to a bean bonanza!
Maximize Your Bean Harvest: A DIY Guide to More Beans Than You Can Eat!
Okay, bean lovers, let’s talk about getting serious bean yields. I’m talking about a bumper crop that will have you canning, freezing, and giving beans away to all your friends and neighbors. This isn’t just about planting beans and hoping for the best; it’s about actively working *with* your plants to encourage maximum production. I’ve learned these tricks over years of gardening, and I’m excited to share them with you!
Understanding Bean Growth for Better Yields
Before we dive into the DIY hacks, let’s quickly cover some bean basics. Knowing how beans grow will help you understand *why* these techniques work.
* **Bean Types:** We’re mainly talking about bush beans and pole beans here. Bush beans are compact and produce all their beans at once, while pole beans climb and produce over a longer period. The techniques below can be adapted for both, but some are more suited to one type than the other.
* **Sunlight:** Beans are sun-worshippers! They need at least 6-8 hours of direct sunlight daily.
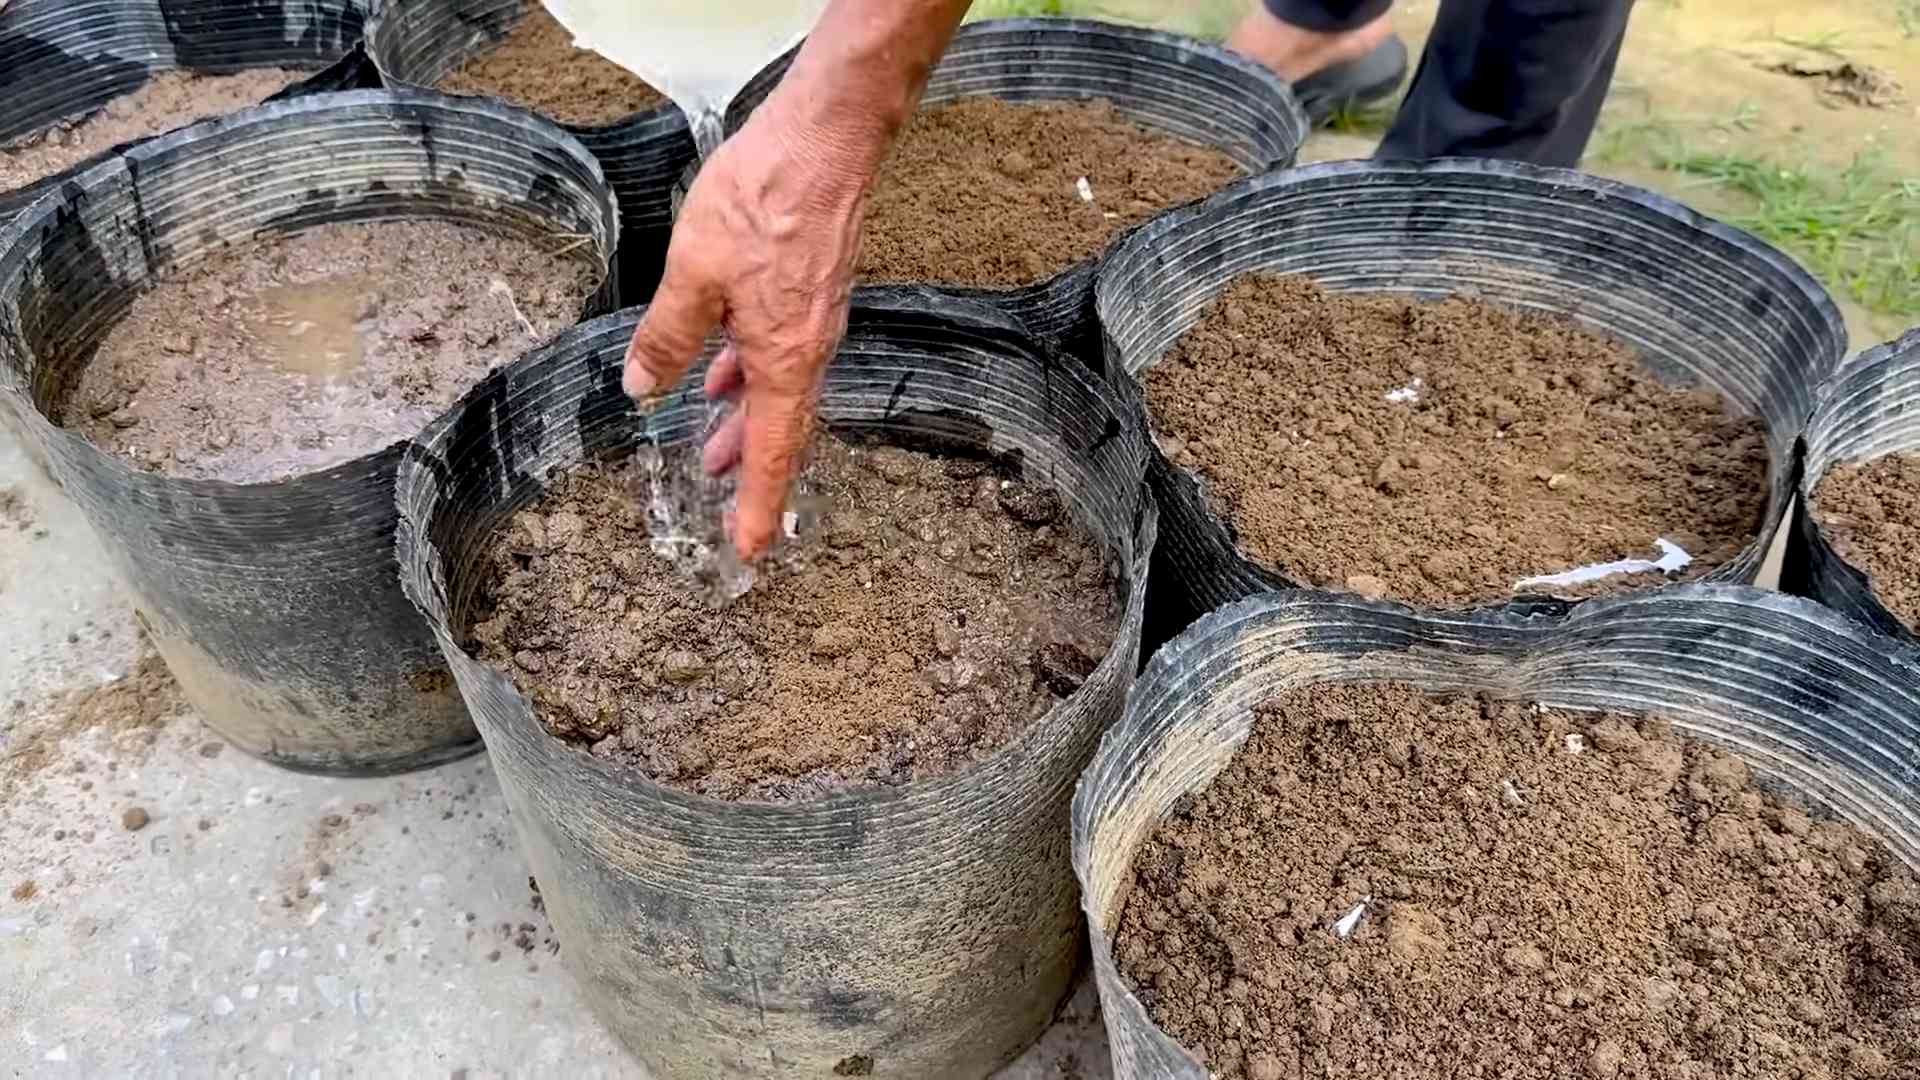
* **Soil:** Well-drained soil is crucial. Beans hate soggy feet!
* **Pollination:** Beans are self-pollinating, which is great! But a little help from bees and other pollinators never hurts.
* **Nitrogen Fixation:** Beans are legumes, meaning they can fix nitrogen from the air into the soil. This is a huge benefit for your garden!
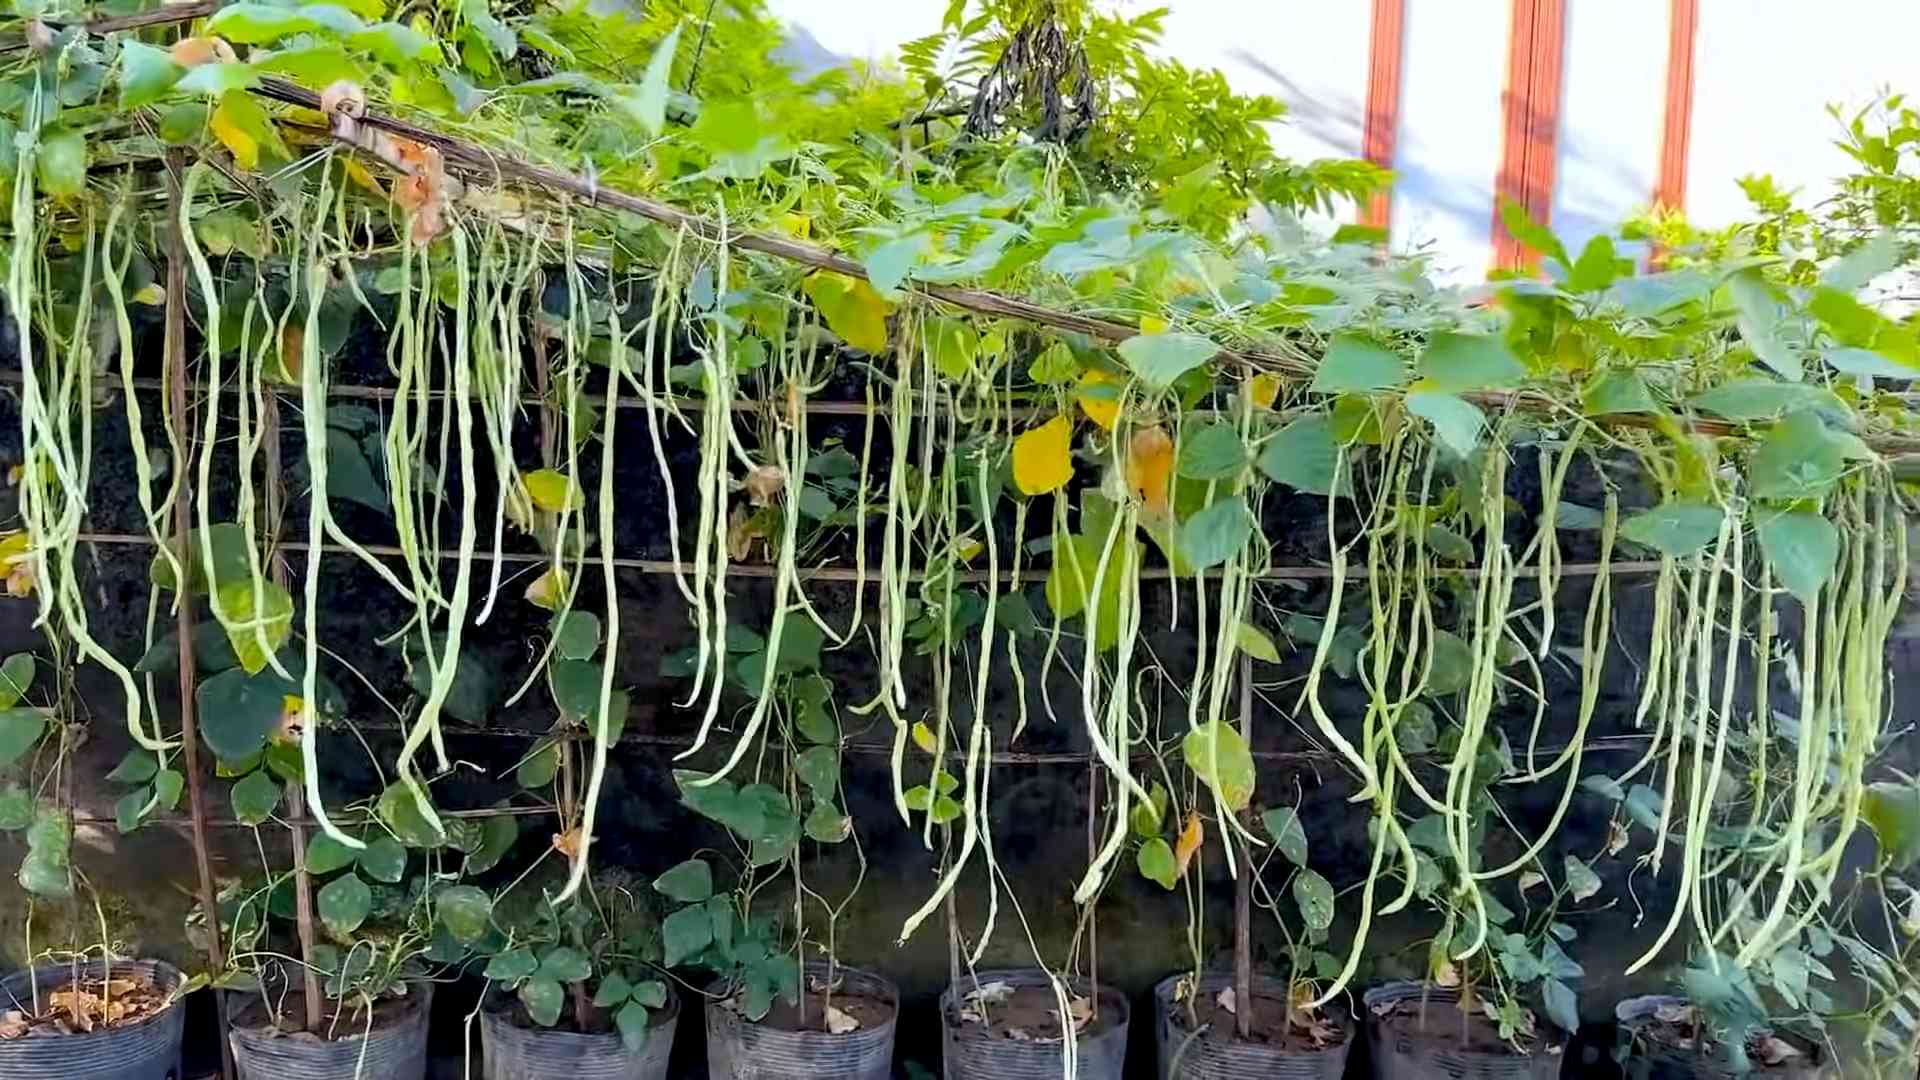
DIY Hack #1: The Bean Teepee (Perfect for Pole Beans!)
This is a classic for a reason! A bean teepee provides excellent support for pole beans, allowing them to climb and produce more beans. Plus, it looks super cool in your garden!
**Materials You’ll Need:**
* 6-8 bamboo poles (or sturdy branches) about 8-10 feet long
* Twine or garden ties
* Bean seeds (pole bean varieties like Kentucky Wonder or Blue Lake are great)
**Step-by-Step Instructions:**
1. **Choose Your Location:** Pick a sunny spot in your garden with well-drained soil.
2. **Arrange the Poles:** Push the bamboo poles into the ground in a circle, spacing them evenly apart. The diameter of the circle should be about 4-5 feet. Make sure the poles are securely planted.
3. **Tie the Top:** Gather the tops of the poles together and tie them securely with twine. This will form the peak of your teepee.
4. **Add Horizontal Support (Optional but Recommended):** For extra support, weave twine horizontally around the poles, starting a few inches above the ground and working your way up. This will give the bean vines something to grab onto as they climb. Space the twine about 12 inches apart.
5. **Plant Your Beans:** Plant 2-3 bean seeds at the base of each pole, about 1 inch deep. Water them gently.
6. **Train the Vines:** As the bean vines grow, gently guide them to climb the poles. You may need to tie them loosely to the poles at first.
7. **Water Regularly:** Keep the soil consistently moist, especially during hot weather.
8. **Harvest Your Beans:** Harvest the beans when they are young and tender. Regular harvesting will encourage the plant to produce more beans.
DIY Hack #2: Epsom Salt Boost for Bush Beans (and Pole Beans Too!)
Epsom salt (magnesium sulfate) can give your bean plants a boost, leading to more flowers and, ultimately, more beans. Magnesium is essential for chlorophyll production, which is vital for photosynthesis.
**Materials You’ll Need:**
* Epsom salt
* Watering can or hose
**Step-by-Step Instructions:**
1. **Mix the Solution:** Dissolve 1 tablespoon of Epsom salt in 1 gallon of water.
2. **Apply the Solution:** Once your bean plants have started to flower, water them with the Epsom salt solution every two weeks. Be sure to water the base of the plants, avoiding the foliage as much as possible.
3. **Observe Your Plants:** Keep an eye on your plants for any signs of magnesium deficiency, such as yellowing leaves. If you see these signs, you can increase the frequency of Epsom salt applications.
4. Important Note: Don’t overdo it with the Epsom salt! Too much magnesium can be harmful to your plants. Stick to the recommended dosage and frequency.
DIY Hack #3: Companion Planting for Bean Bonanza
Companion planting is the practice of planting different plants together that benefit each other. Certain plants can help beans grow better by attracting beneficial insects, repelling pests, or improving soil conditions.
**Beneficial Bean Companions:**
* **Marigolds:** These beautiful flowers repel bean beetles and other pests.
* **Nasturtiums:** Similar to marigolds, nasturtiums deter pests and attract beneficial insects.
* **Summer Savory:** This herb is said to improve the flavor of beans and repel bean beetles.
* **Carrots:** Carrots loosen the soil, making it easier for bean roots to grow.
* **Cucumbers:** Cucumbers provide shade for bean roots, helping to keep them cool and moist.
**Step-by-Step Instructions:**
1. **Choose Your Companions:** Select the companion plants that best suit your needs and preferences.
2. **Plant Strategically:** Plant the companion plants around your bean plants, taking into account their growth habits and sunlight requirements. For example, plant marigolds and nasturtiums around the perimeter of your bean patch, and plant carrots between rows of beans.
3. **Observe and Adjust:** Monitor your plants regularly and adjust your companion planting strategy as needed. For example, if you notice a particular pest problem, you may need to add more of the corresponding repellent plant.
DIY Hack #4: Pruning for Productivity (Mostly for Pole Beans)
While bush beans don’t typically require pruning, pole beans can benefit from a little trimming to encourage more bean production.
**When and How to Prune:**
* **After the Initial Harvest:** Once your pole beans have started producing beans, you can prune them to encourage new growth.
* **Remove Yellowing or Damaged Leaves:** Prune away any yellowing, damaged, or diseased leaves. This will help to prevent the spread of disease and improve air circulation.
* **Pinch Back the Growing Tips:** Pinching back the growing tips of the vines will encourage the plant to branch out and produce more flowers and beans.
* Don’t Overdo It: Avoid pruning too heavily, as this can stress the plant and reduce bean production.
**Step-by-Step Instructions:**
1. **Use Clean Pruning Shears:** Make sure your pruning shears are clean and sharp to prevent the spread of disease.
2. **Identify the Areas to Prune:** Look for yellowing or damaged leaves, and identify the growing tips of the vines.
3. **Prune Carefully:** Use your pruning shears to carefully remove the unwanted leaves and pinch back the growing tips.
4. **Dispose of Prunings:** Dispose of the prunings properly to prevent the spread of disease.
DIY Hack #5: Consistent Watering and Feeding for Happy Beans
This might seem obvious, but consistent watering and feeding are crucial for maximizing bean yields.
**Watering:**
* **Water Deeply and Regularly:** Water your bean plants deeply and regularly, especially during hot, dry weather. Aim for about 1 inch of water per week.
* **Water at the Base of the Plants:** Water at the base of the plants to avoid wetting the foliage, which can lead to fungal diseases.
* **Mulch to Retain Moisture:** Apply a layer of mulch around your bean plants to help retain moisture and suppress weeds.
**Feeding:**
* **Side-Dress with Compost:** Side-dress your bean plants with compost every few weeks to provide them with essential nutrients.
* **Use a Balanced Fertilizer:** If your soil is poor, you can use a balanced fertilizer to supplement the compost. Choose a fertilizer with a ratio of 5-10-10 (nitrogen-phosphorus-potassium).
* Avoid Over-Fertilizing: Over-fertilizing can lead to excessive foliage growth and reduced bean production.
**Step-by-Step Instructions:**
1. **Water Regularly:** Check the soil moisture regularly and water when the top inch of soil feels dry.
2. **Apply Compost:** Spread a layer of compost around the base of your bean plants, being careful not to bury the stems.
3. **Fertilize as Needed:** If you choose to use fertilizer, follow the instructions on the package carefully.
DIY Hack #6: Succession Planting for a Continuous Harvest
Succession planting is the practice of planting crops at intervals to ensure a continuous harvest throughout the growing season. This is especially useful for bush beans, which produce all their beans at once.
**Step-by-Step Instructions:**
1. **Plant Your First Crop:** Plant your first crop of bush beans in the spring, after the last frost.
Conclusion
So, there you have it! This simple, yet incredibly effective DIY trick for achieving more bean yield is a game-changer for any gardener, whether you’re a seasoned pro or just starting out. We’ve walked you through the process, highlighting the ease and affordability of this method. It’s not just about getting more beans; it’s about maximizing your garden’s potential and enjoying the fruits (or rather, the legumes!) of your labor.
Think about it: a few simple steps, using materials you likely already have on hand, can lead to a significantly larger harvest. Imagine the satisfaction of filling your baskets with plump, healthy beans, knowing you played a direct role in their abundance. This isn’t some complicated, expensive gardening technique; it’s a practical, accessible solution that anyone can implement.
But the benefits extend beyond just quantity. By optimizing your bean plants’ growth, you’re also likely to see improvements in the overall health and vigor of your plants. Stronger plants are more resistant to pests and diseases, leading to a more sustainable and rewarding gardening experience. Plus, a larger harvest means more opportunities to experiment with delicious bean-based recipes, share your bounty with friends and neighbors, or even preserve your harvest for enjoyment throughout the year.
Don’t be afraid to experiment with variations on this DIY trick. For example, if you’re growing pole beans, consider using a taller trellis or support system to accommodate their vigorous growth. You could also try different types of organic fertilizers or soil amendments to further enhance your bean plants’ health and productivity. If you live in a particularly hot climate, providing some afternoon shade can help prevent your bean plants from overheating and stressing.
We’re confident that this DIY trick will revolutionize your bean-growing efforts. It’s a testament to the power of simple, sustainable gardening practices. So, grab your supplies, get your hands dirty, and prepare to be amazed by the results.
We wholeheartedly encourage you to try this DIY trick for achieving more bean yield in your own garden. Once you’ve experienced the difference it can make, we’d love to hear about your results! Share your photos, tips, and experiences in the comments section below. Let’s build a community of gardeners who are passionate about maximizing their harvests and sharing their knowledge with others. Happy gardening!
Frequently Asked Questions (FAQ)
What exactly does this DIY trick do to increase bean yield?
This DIY trick focuses on optimizing the growing conditions for your bean plants. It typically involves improving soil drainage, providing adequate support for climbing varieties, ensuring proper spacing for air circulation, and potentially using techniques like pinching or pruning to encourage bushier growth and more flower production. By addressing these key factors, you create an environment where your bean plants can thrive and produce a larger number of beans. The specific methods used will vary depending on the type of bean you are growing (bush or pole) and your local climate conditions.
Is this DIY trick suitable for all types of beans?
While the core principles of this DIY trick can be applied to most types of beans, there might be slight variations depending on the specific variety. For example, bush beans require different support systems (or none at all) compared to pole beans. Similarly, the spacing requirements might differ based on the size and growth habit of the bean plant. It’s always a good idea to research the specific needs of the bean variety you’re growing and adjust the DIY trick accordingly. Generally, the principles of good soil, adequate sunlight, proper watering, and support (if needed) will benefit all bean types.
What if I don’t have all the materials suggested for this DIY trick? Can I still try it?
Absolutely! The beauty of this DIY trick is its flexibility. You can often substitute materials based on what you have available. For example, if you don’t have bamboo stakes for supporting your bean plants, you can use sturdy branches, repurposed metal rods, or even create a simple trellis using twine and wooden posts. The key is to provide adequate support that allows your bean plants to climb and prevents them from sprawling on the ground. Similarly, if you don’t have a specific type of fertilizer, you can use compost or other organic soil amendments to enrich the soil and provide essential nutrients. Don’t let a lack of specific materials deter you from trying this DIY trick. Get creative and adapt it to your own resources.
How long does it take to see results from this DIY trick?
The time it takes to see results will depend on several factors, including the type of bean you’re growing, the growing conditions in your area, and the overall health of your plants. Generally, you should start to see improvements in your bean plants’ growth and vigor within a few weeks of implementing this DIY trick. You might notice that your plants are growing taller, producing more leaves, and developing more flowers. The actual bean yield will depend on the specific variety and the length of the growing season. Be patient and consistent with your gardening efforts, and you’ll eventually be rewarded with a bountiful harvest.
Can I use this DIY trick in a container garden?
Yes, this DIY trick can be adapted for container gardening. The key is to choose a container that is large enough to accommodate the root system of your bean plants. Make sure the container has drainage holes to prevent waterlogging. You can also use a potting mix that is well-draining and rich in nutrients. When growing pole beans in containers, provide a trellis or other support system that is securely anchored to the container. Monitor the moisture levels in the soil regularly and water as needed. With a little planning and attention, you can successfully grow beans in containers and enjoy a plentiful harvest.
What are some common mistakes to avoid when trying this DIY trick?
One common mistake is overcrowding your bean plants. Ensure that you provide adequate spacing between plants to allow for proper air circulation and prevent the spread of diseases. Another mistake is overwatering or underwatering your bean plants. Monitor the moisture levels in the soil and water accordingly. Avoid using excessive amounts of fertilizer, as this can lead to nutrient imbalances and harm your plants. Finally, be sure to provide adequate support for climbing varieties to prevent them from sprawling on the ground and becoming susceptible to pests and diseases. By avoiding these common mistakes, you can maximize your chances of success with this DIY trick.
What if I encounter pests or diseases while trying this DIY trick?
Pests and diseases can be a challenge for any gardener, but there are several steps you can take to mitigate these problems. Regularly inspect your bean plants for signs of pests or diseases, such as aphids, bean beetles, or powdery mildew. If you detect any problems, take action immediately. You can use organic pest control methods, such as insecticidal soap or neem oil, to control pests. For diseases, ensure good air circulation around your plants and avoid overhead watering. You can also use organic fungicides to prevent or treat fungal infections. In severe cases, you might need to remove and destroy infected plants to prevent the spread of the disease.
How can I improve the soil quality for my bean plants?
Improving soil quality is crucial for achieving more bean yield. Start by conducting a soil test to determine the pH level and nutrient content of your soil. Beans prefer a slightly acidic to neutral soil pH (around 6.0 to 7.0). Amend your soil with compost or other organic matter to improve its drainage, aeration, and nutrient content. You can also add specific nutrients, such as phosphorus and potassium, based on the results of your soil test. Avoid using excessive amounts of nitrogen fertilizer, as this can promote leafy growth at the expense of bean production. Consider using cover crops or green manures to improve soil health and fertility over time.
Can I save the seeds from my bean harvest to plant next year?
Yes, you can save the seeds from your bean harvest to plant next year, but there are a few things to keep in mind. Choose healthy, mature bean pods that are fully dried on the plant. Shell the beans and allow them to dry completely in a cool, dry place for several weeks. Store the dried beans in an airtight container in a cool, dark location. Keep in mind that if you are growing hybrid bean varieties, the seeds you save might not produce plants that are identical to the parent plants. For best results, save seeds from open-pollinated or heirloom bean varieties.
What are some delicious ways to use my abundant bean harvest?
With a larger bean harvest, the culinary possibilities are endless! You can use your beans in a variety of dishes, such as soups, stews, salads, and casseroles. Fresh green beans can be steamed, sautéed, or grilled. Dried beans can be used to make chili, refried beans, or bean dips. You can also preserve your bean harvest by canning, freezing, or drying them. Experiment with different bean varieties and recipes to discover your favorite ways to enjoy your bountiful harvest. Don’t forget to share your delicious bean dishes with friends and family!

Leave a Comment