

Sweet Potato Growing Tips: Ever dreamt of harvesting a bounty of vibrant, earthy sweet potatoes right from your own backyard? Imagine the satisfaction of roasting those homegrown beauties, knowing you nurtured them from tiny slips to deliciousness! This isn’t just a pipe dream; it’s an achievable reality with the right know-how. For centuries, sweet potatoes have been a staple in diets across the globe, from their origins in Central and South America to their widespread cultivation in Asia and Africa. They’re more than just a tasty treat; they’re packed with nutrients and represent a connection to the earth and sustainable living.
But let’s be honest, sometimes gardening feels more like a battle than a blissful experience. That’s where these DIY tricks and hacks come in! I’m here to share my tried-and-true secrets to successful sweet potato cultivation, even if you’re a beginner gardener. We’ll tackle everything from preparing the perfect soil to warding off pesky pests, ensuring you get the most out of your sweet potato patch. Why struggle with lackluster yields when you can unlock the potential of your garden with these simple, effective strategies? Let’s dive into these sweet potato growing tips and transform your garden into a sweet potato paradise!
Grow Your Own Sweet Potatoes: A Beginner’s Guide to a Bountiful Harvest
Hey there, fellow gardening enthusiasts! I’m so excited to share my experience with growing sweet potatoes. It’s surprisingly rewarding, and nothing beats the taste of homegrown goodness. This guide will walk you through every step, from sprouting slips to harvesting your delicious tubers. Let’s get started!
What You’ll Need
Before we dive in, let’s gather our supplies. Here’s a list of everything you’ll need to successfully grow sweet potatoes:
* Sweet Potatoes: Choose organic sweet potatoes from the grocery store or use ones you’ve saved from a previous harvest. Make sure they are healthy and free from blemishes.
* Glass Jars or Containers: Wide-mouthed jars work best for suspending the sweet potatoes.
* Toothpicks: These will help suspend the sweet potato in the water.
* Potting Mix: A well-draining potting mix is crucial for starting your slips.
* Garden Soil: Amend your garden soil with compost or aged manure for optimal growth.
* Gardening Gloves: Protect your hands!
* Watering Can or Hose: For keeping your plants hydrated.
* Shovel or Garden Fork: For planting and harvesting.
* Optional:
* Rooting hormone (to encourage faster root development)
* Black plastic mulch (to warm the soil and suppress weeds)
* Row covers (to protect against pests and frost)
Sprouting Sweet Potato Slips: The First Step to Success
Sweet potato slips are the leafy sprouts that grow from the sweet potato itself. You’ll need to grow these slips before you can plant them in your garden. This process takes a few weeks, so plan accordingly.
Step 1: Preparing the Sweet Potato
1. Wash your sweet potatoes thoroughly to remove any dirt or debris.
2. Decide whether to sprout the whole sweet potato or cut it in half. Cutting it in half can sometimes yield more slips, but it’s not necessary.
3. If cutting, use a clean knife to cut the sweet potato in half crosswise.
Step 2: Suspending the Sweet Potato in Water
1. Insert toothpicks around the middle of the sweet potato, spacing them evenly. These toothpicks will act as supports to hold the sweet potato in the jar.
2. Fill your glass jar with water, leaving about an inch of space at the top.
3. Carefully place the sweet potato in the jar, with the toothpicks resting on the rim. The bottom half of the sweet potato should be submerged in water. If you cut the sweet potato in half, submerge the cut side.
Step 3: Finding the Right Spot
1. Place the jar in a warm, sunny location. A windowsill is ideal.
2. Change the water every few days to prevent mold and bacteria growth.
Step 4: Waiting for Slips to Sprout
1. Be patient! It can take several weeks for slips to start sprouting. You’ll see small roots emerging from the bottom of the sweet potato and leafy sprouts appearing on top.
2. Keep the water level consistent and continue to change it regularly.
Step 5: Separating the Slips
1. Once the slips are 6-8 inches long, they’re ready to be separated from the sweet potato.
2. Gently twist or cut the slips off the sweet potato. Try to get a little bit of root with each slip.
3. Place the slips in a glass of water to encourage further root development. You can add a rooting hormone to the water at this stage, but it’s not essential.
Planting Your Sweet Potato Slips: From Water to Garden
Now that you have your sweet potato slips, it’s time to get them in the ground! This is where the magic really happens.
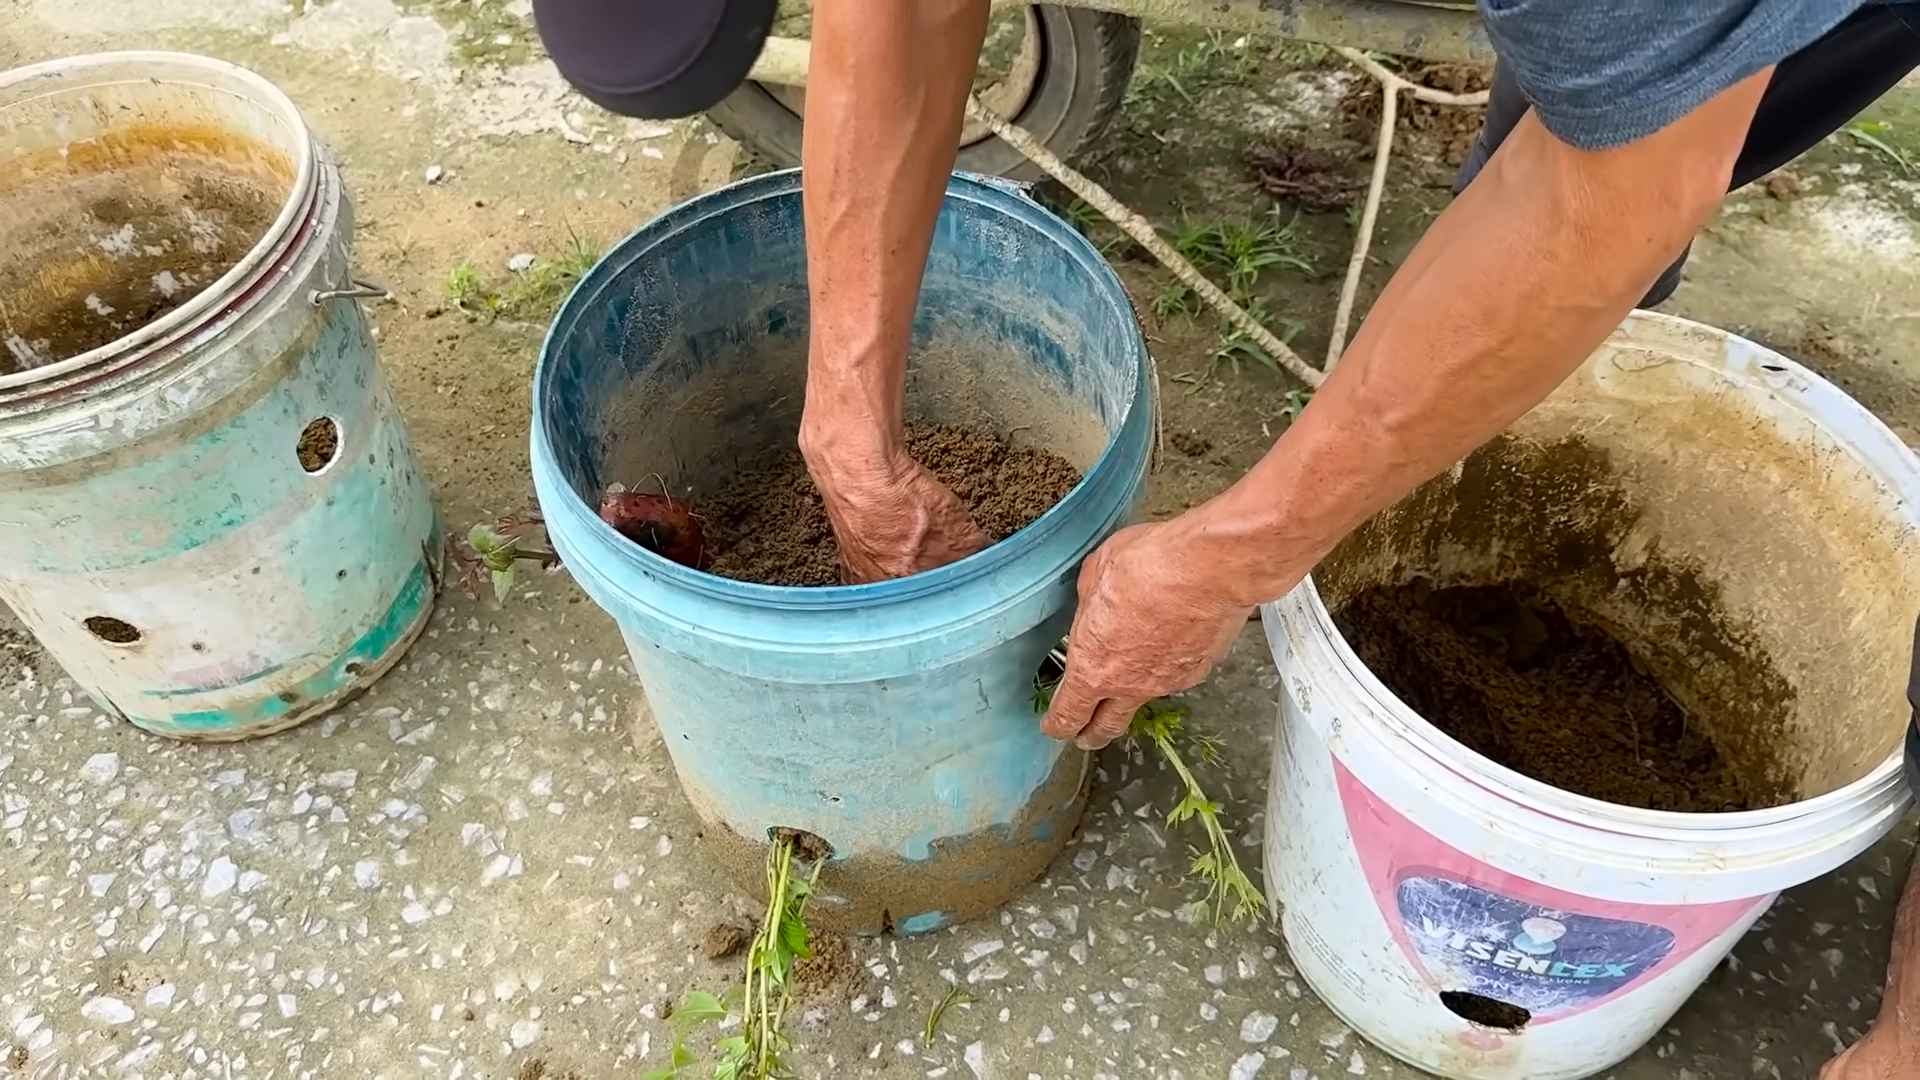
Step 1: Preparing the Garden Bed
1. Choose a sunny location with well-draining soil. Sweet potatoes need at least 6-8 hours of sunlight per day.
2. Amend the soil with compost or aged manure to improve its fertility and drainage. Sweet potatoes prefer slightly acidic soil.
3. Create raised rows or mounds about 12 inches high and 3-4 feet apart. This will help with drainage and allow the sweet potatoes to develop properly.
4. Optional: Lay down black plastic mulch to warm the soil and suppress weeds.
Step 2: Planting the Slips
1. Water the garden bed thoroughly before planting.
2. Dig small holes about 12 inches apart along the top of the raised rows or mounds.
3. Carefully remove the slips from the water and plant them in the holes, burying the roots and the bottom part of the stem. Leave the top leaves exposed.
4. Water the newly planted slips gently but thoroughly.
Step 3: Providing Support (Optional)
1. If you live in an area with strong winds, you may want to provide support for your sweet potato vines.
2. Use stakes or a trellis to support the vines as they grow.
Caring for Your Sweet Potato Plants: Nurturing Your Crop
Once your sweet potato slips are planted, it’s important to provide them with the care they need to thrive.
Step 1: Watering
1. Water your sweet potato plants regularly, especially during dry periods.
2. Keep the soil consistently moist, but avoid overwatering, which can lead to root rot.
3. Water deeply and less frequently, rather than shallowly and often.
Step 2: Fertilizing
1. Sweet potatoes don’t need a lot of fertilizer, but a light feeding can help them grow.
2. Use a balanced fertilizer or a fertilizer specifically formulated for root vegetables.
3. Apply the fertilizer according to the package directions.
Step 3: Weeding
1. Keep the garden bed free of weeds, which can compete with your sweet potato plants for nutrients and water.
2. Hand-pull weeds regularly or use a hoe to cultivate the soil.
3. Mulching can help suppress weed growth.
Step 4: Pest and Disease Control
1. Sweet potatoes are generally resistant to pests and diseases, but it’s still important to monitor your plants regularly.
2. Common pests include sweet potato weevils and flea beetles.
3. If you notice any pests, treat them with an appropriate insecticide or organic pest control method.
4. Common diseases include fungal infections like stem rot.
5. Prevent fungal diseases by providing good air circulation and avoiding overwatering.
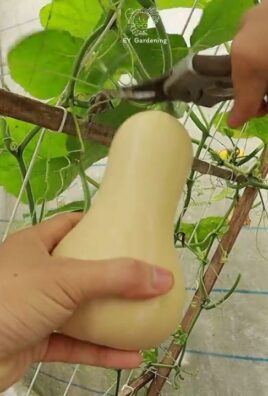
Harvesting Your Sweet Potatoes: The Grand Finale
After months of care and anticipation, it’s finally time to harvest your sweet potatoes!
Step 1: Knowing When to Harvest
1. Sweet potatoes are typically ready to harvest about 90-120 days after planting.
2. The leaves will start to turn yellow and the vines will begin to die back.
3. You can also dig up a test potato to check its size and maturity.
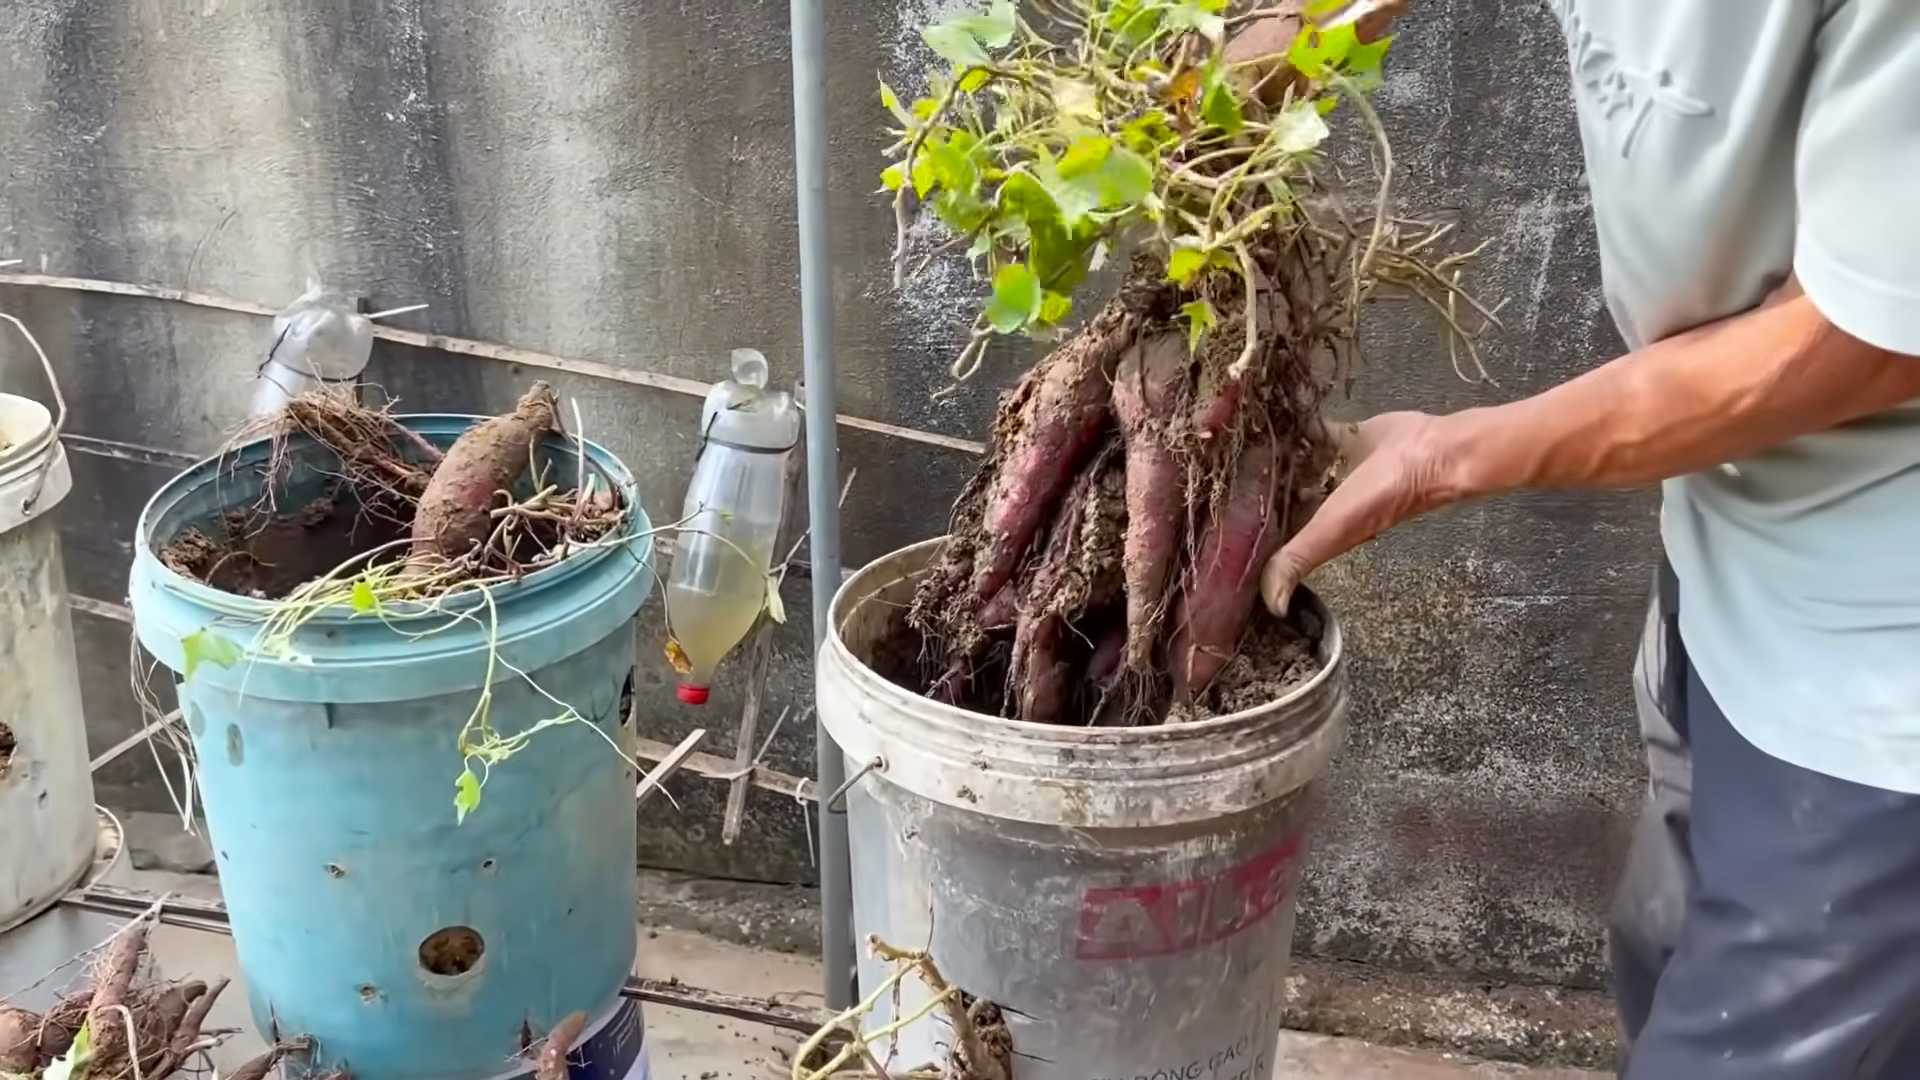
Step 2: Digging Up the Sweet Potatoes
1. Choose a dry day for harvesting.
2. Use a shovel or garden fork to carefully dig around the sweet potato plants.
3. Be careful not to damage the tubers.
4. Gently lift the sweet potatoes out of the ground.
Step 3: Curing the Sweet Potatoes
1. Curing is an essential step for improving the flavor and storage life of sweet potatoes.
2. Brush off any excess dirt from the sweet potatoes, but don’t wash them.
3. Place the sweet potatoes in a warm, humid place (80-85°F and 85-90% humidity) for 7-10 days. A greenhouse or a warm, enclosed porch works well.
4. This process allows the skins to harden and any minor cuts or bruises to heal.
Step 4: Storing the Sweet Potatoes
1. After curing, store the sweet potatoes in a cool, dry, and dark place (55-60°F).
2. Avoid storing them in the refrigerator, as this can cause them to develop a hard core.
3. Properly cured and stored sweet potatoes can last for several months.
Troubleshooting Common Problems
Even with the best care, you might encounter some challenges along the way. Here are a few common problems and how to address them:
* Slips not sprouting: Make sure the sweet potato is in a warm, sunny location and that the water is changed regularly. Try using a different sweet potato.
* Yellowing leaves: This could be a sign of nutrient deficiency or overwatering. Adjust your watering and fertilizing accordingly.
* Pest infestations: Identify the pest and treat it with an appropriate insecticide or organic pest control method.
* Root rot: This is caused by overwatering. Improve drainage and
Conclusion
So, there you have it! Mastering the art of growing sweet potatoes doesn’t require a green thumb blessed by the gardening gods. It’s about understanding their needs, providing the right environment, and embracing a little patience. This DIY approach, focusing on creating your own slips and nurturing them through their growth cycle, offers a deeply rewarding experience that connects you to the food you eat in a profound way.
Why is this a must-try? Because beyond the satisfaction of harvesting your own delicious, nutrient-rich sweet potatoes, you’re gaining valuable knowledge and skills that can be applied to other gardening endeavors. You’re becoming more self-sufficient, reducing your reliance on store-bought produce, and potentially saving money in the long run. Plus, homegrown sweet potatoes simply taste better! They’re fresher, more flavorful, and haven’t traveled miles to reach your plate.
But the beauty of this DIY sweet potato growing journey lies in its adaptability. Feel free to experiment with different varieties of sweet potatoes to find your favorites. Beauregard, Covington, and Japanese sweet potatoes are all popular choices, each with its unique flavor profile and texture. Consider growing them in containers if you have limited space, or try different soil amendments to see how they impact the yield and quality of your harvest.
Don’t be afraid to get creative with your slip-starting methods. While the water propagation method is widely used, you can also try burying the sweet potato halfway in a pot of soil. Just ensure the soil is kept consistently moist. You can even experiment with different lighting conditions during the slip-starting phase to see if it affects their growth rate.
The key to successful sweet potato growing is observation. Pay close attention to your plants, noting any changes in their leaves, stems, or roots. This will help you identify potential problems early on and take corrective action. Remember, gardening is a learning process, and every season brings new challenges and opportunities.
We wholeheartedly encourage you to embark on this DIY sweet potato adventure. It’s a fantastic way to connect with nature, learn new skills, and enjoy the fruits (or rather, roots!) of your labor. And most importantly, we want to hear about your experiences! Share your successes, your challenges, and any tips or tricks you discover along the way. Let’s build a community of sweet potato enthusiasts who are passionate about growing their own food. Post pictures of your sweet potato slips, your thriving vines, and your bountiful harvests on social media using relevant hashtags. Let’s inspire others to join the fun!
So, grab a sweet potato, gather your supplies, and get ready to experience the joy of growing your own delicious and nutritious sweet potatoes. Happy gardening!
Frequently Asked Questions (FAQ)
What is the best time to start growing sweet potato slips?
The ideal time to start your sweet potato slips is approximately 6-8 weeks before the last expected frost in your area. This typically falls around late winter or early spring. Starting early allows the slips to develop a strong root system before transplanting them outdoors. Check your local frost dates to determine the optimal starting time for your region. If you live in a warmer climate with a longer growing season, you can start your slips later in the spring.
How long does it take for sweet potato slips to grow?
Generally, it takes about 4-6 weeks for sweet potato slips to develop enough to be transplanted. The exact timeframe can vary depending on factors such as temperature, humidity, and the variety of sweet potato you’re using. Keep an eye on the slips and transplant them when they are about 6-8 inches long and have a well-developed root system.
What kind of soil is best for growing sweet potatoes?
Sweet potatoes thrive in well-drained, sandy loam soil. This type of soil allows for good aeration and drainage, which is essential for healthy root development. Avoid heavy clay soils, as they can become waterlogged and hinder growth. If you have clay soil, amend it with organic matter such as compost or well-rotted manure to improve drainage and fertility. A slightly acidic soil pH of 6.0 to 6.5 is ideal.
How often should I water my sweet potato plants?
Sweet potatoes need consistent moisture, especially during the first few weeks after transplanting. Water deeply and regularly, ensuring the soil remains moist but not waterlogged. Once the plants are established, you can reduce watering frequency, allowing the soil to dry out slightly between waterings. Avoid overhead watering, as it can promote fungal diseases. Instead, water at the base of the plants.
What are some common pests and diseases that affect sweet potatoes?
Some common pests that can affect sweet potatoes include sweet potato weevils, flea beetles, and aphids. Diseases such as stem rot, scurf, and black rot can also be problematic. To prevent pest and disease problems, practice good garden hygiene, such as removing weeds and debris. Use row covers to protect young plants from pests. Choose disease-resistant varieties of sweet potatoes. If you encounter pest or disease problems, treat them promptly with appropriate organic or chemical control methods.
How do I know when my sweet potatoes are ready to harvest?
Sweet potatoes are typically ready to harvest about 90-120 days after transplanting. The leaves will start to turn yellow and the vines will begin to die back. To check for maturity, dig up a test potato. If the skin is thick and the flesh is firm, the potatoes are ready to harvest. Harvest before the first frost, as frost can damage the potatoes.
How should I cure and store my sweet potatoes?
Curing sweet potatoes is essential for improving their flavor and storage life. After harvesting, gently brush off any excess soil and allow the potatoes to dry in a warm, humid place (80-85°F and 85-90% humidity) for 7-10 days. This process helps to heal any wounds and convert starches into sugars. After curing, store the sweet potatoes in a cool, dry, and dark place (55-60°F) with good ventilation. Avoid storing them in the refrigerator, as this can cause them to develop a hard core. Properly cured and stored sweet potatoes can last for several months.
Can I grow sweet potatoes in containers?
Yes, sweet potatoes can be successfully grown in containers. Choose a large container (at least 20 gallons) with good drainage. Fill the container with a well-draining potting mix. Plant one or two slips per container. Provide adequate sunlight and water regularly. Container-grown sweet potatoes may not produce as large of a yield as those grown in the ground, but they can still provide a delicious harvest.
What are some creative ways to use my homegrown sweet potatoes?
The possibilities are endless! Beyond the classic roasted sweet potatoes, consider making sweet potato fries, sweet potato pie, sweet potato soup, or sweet potato casserole. You can also add sweet potatoes to stews, curries, and salads. Sweet potato puree can be used as a healthy and delicious ingredient in baked goods such as muffins, breads, and cakes. Get creative and experiment with different recipes to discover your favorite ways to enjoy your homegrown sweet potatoes.
Leave a Comment