

Growing Backyard Melons Easily – sounds like a dream, right? Imagine stepping into your backyard and harvesting juicy, sweet melons that you nurtured from tiny seeds. It’s not just a dream; it’s an achievable reality with a few clever tricks and DIY hacks! For centuries, melons have been cultivated across various cultures, from ancient Egypt where they were buried with pharaohs, to the sun-drenched fields of Italy where they are a staple of summer feasts. This rich history proves that the allure of a perfectly ripe melon is timeless.
But let’s be honest, growing melons can sometimes feel like a gamble. Pests, diseases, and unpredictable weather can quickly turn your melon dreams into a frustrating mess. That’s where these DIY tricks come in! I’m going to share some simple, effective strategies that will help you overcome common challenges and maximize your yield. Whether you’re a seasoned gardener or just starting out, these tips will empower you to successfully growing backyard melons easily, even in less-than-ideal conditions.
Why do you need these tricks? Because store-bought melons simply can’t compare to the taste of a homegrown, vine-ripened melon. Plus, knowing exactly where your food comes from and how it was grown gives you peace of mind. So, let’s dive in and unlock the secrets to a bountiful melon harvest!
Growing Backyard Melons Easily: A Step-by-Step Guide
Okay, melon lovers, let’s get down to business! I’m going to walk you through how to grow delicious, juicy melons right in your own backyard. It might seem intimidating, but trust me, with a little planning and effort, you’ll be enjoying homegrown melons in no time. We’ll cover everything from choosing the right variety to harvesting your sweet reward.
Choosing Your Melon Variety
First things first, you need to decide what kind of melon you want to grow. This choice will influence everything from the space you need to the length of the growing season. Here’s a quick rundown of some popular options:
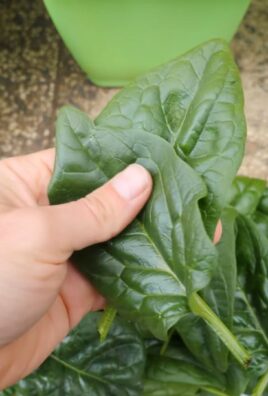
* Watermelon: The classic summer treat! Watermelons need a lot of space and a long growing season (70-90 days). Look for bush varieties if you’re short on space. Some popular choices include ‘Sugar Baby’ (smaller, early maturing) and ‘Crimson Sweet’ (classic, large watermelon).
* Cantaloupe: These fragrant melons are relatively easy to grow. They also need a decent amount of space and a growing season of 75-85 days. ‘Hales Best Jumbo’ is a reliable and flavorful variety.
* Honeydew: Similar to cantaloupe in terms of growing requirements, honeydews offer a different, sweeter flavor profile. Expect a growing season of 80-90 days.
* Galia Melon: A cross between a cantaloupe and a honeydew, these melons are known for their sweet, aromatic flesh. They typically have a shorter growing season than honeydews, around 70-80 days.
* Personal-Sized Melons: If you’re limited on space or just want smaller portions, look for varieties like ‘Sugar Kiss’ cantaloupe or ‘Mini Love’ watermelon.
Consider your climate and growing season when making your choice. Check the seed packet or plant tag for specific information on the variety you choose.
Preparing the Soil
Melons are heavy feeders, meaning they need nutrient-rich soil to thrive. Here’s how to get your soil ready:
* Sunlight: Melons need at least 6-8 hours of direct sunlight per day. Choose a location in your yard that gets plenty of sun.
* Soil Testing: Ideally, you should test your soil to determine its pH and nutrient levels. Your local extension office can provide information on soil testing services. Melons prefer a slightly acidic to neutral soil pH (6.0-7.0).
* Amendments: Regardless of your soil test results, it’s always a good idea to amend your soil with organic matter. This will improve drainage, aeration, and nutrient content.
* Compost: Add a generous layer of compost (2-4 inches) to your planting area. Compost is a fantastic all-around soil amendment.
* Aged Manure: Aged manure is another excellent source of nutrients. Be sure it’s well-aged to avoid burning your plants.
* Other Organic Matter: You can also use other organic materials like shredded leaves, grass clippings (untreated with herbicides), or cover crops.
* Tilling or Digging: Once you’ve added your amendments, till or dig them into the soil to a depth of at least 12 inches. This will create a loose, well-drained planting bed.
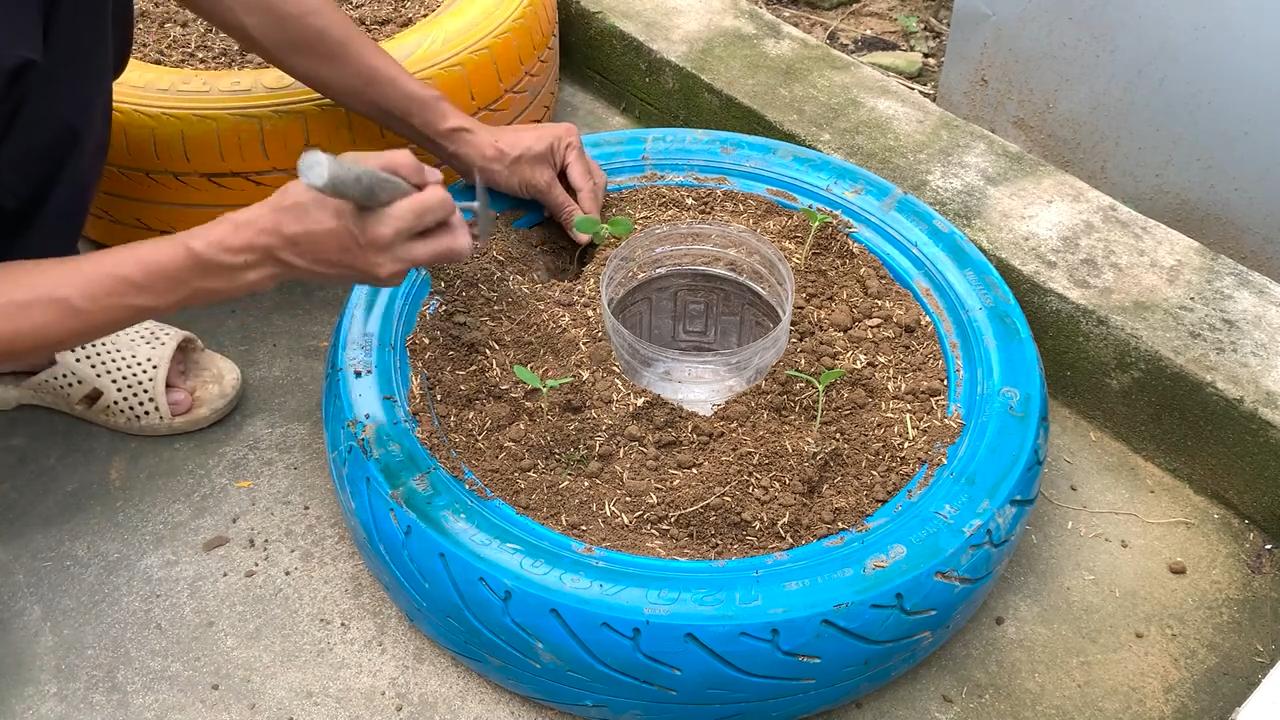
* Raised Beds (Optional): If your soil is heavy clay or poorly drained, consider growing your melons in raised beds. Raised beds provide better drainage and warmer soil temperatures.
Starting Your Melon Seeds
You have two options for starting your melon plants: direct sowing or starting seeds indoors.
* Direct Sowing: This involves planting the seeds directly into the garden soil. It’s the easiest method, but it’s only suitable for warmer climates with a long growing season.
* Starting Seeds Indoors: This gives you a head start on the growing season, especially if you live in a cooler climate.
Let’s focus on starting seeds indoors, as it’s the more versatile option:
1. Timing: Start your melon seeds indoors about 3-4 weeks before the last expected frost in your area.
2. Containers: Use individual peat pots or biodegradable containers. Melons don’t like to have their roots disturbed, so transplanting them in biodegradable pots minimizes root shock.
3. Potting Mix: Use a high-quality seed-starting mix.
4. Planting: Plant 2-3 seeds per pot, about 1 inch deep.
5. Watering: Water gently to moisten the soil. Don’t overwater, as this can lead to damping-off disease.
6. Warmth: Keep the pots in a warm location (70-80°F) until the seeds germinate. You can use a heat mat to speed up germination.
7. Light: Once the seeds germinate, move the pots to a sunny window or under grow lights.
8. Thinning: Once the seedlings have a few true leaves, thin them to one plant per pot by snipping off the weaker seedlings at the soil line.
9. Hardening Off: Before transplanting your seedlings outdoors, you need to harden them off. This involves gradually exposing them to outdoor conditions over a period of 7-10 days. Start by placing them in a sheltered location for a few hours each day, gradually increasing the amount of time they spend outdoors.
Transplanting Your Melon Seedlings
Once the danger of frost has passed and your seedlings have been hardened off, it’s time to transplant them into the garden.
1. Timing: Choose a warm, sunny day to transplant your seedlings.
2. Spacing: Space your melon plants according to the variety you’re growing. Watermelons typically need 2-3 feet between plants, while cantaloupes and honeydews need 1-2 feet. Check your seed packet for specific recommendations.
3. Planting: Dig a hole slightly larger than the pot. Gently remove the seedling from the pot (if using peat pots, you can plant the entire pot). Place the seedling in the hole and backfill with soil.
4. Watering: Water thoroughly after transplanting.
5. Mulching: Apply a layer of mulch around your melon plants. Mulch helps to retain moisture, suppress weeds, and regulate soil temperature. Straw, hay, or black plastic mulch are all good options.
Caring for Your Melon Plants
Now that your melon plants are in the ground, it’s time to provide them with the care they need to thrive.
* Watering: Melons need consistent moisture, especially during fruit development. Water deeply and regularly, especially during dry spells. Avoid overhead watering, as this can lead to fungal diseases. Drip irrigation is the best way to water melons.
* Fertilizing: Feed your melon plants with a balanced fertilizer every 2-3 weeks. Look for a fertilizer that’s high in phosphorus and potassium, which are essential for fruit development. You can also use organic fertilizers like compost tea or fish emulsion.
* Weeding: Keep your melon patch free of weeds. Weeds compete with your melon plants for water and nutrients. Hand-pull weeds or use a hoe to remove them.
* Pest Control: Melons can be susceptible to various pests, including aphids, squash bugs, and cucumber beetles. Inspect your plants regularly for signs of pests. Use insecticidal soap or neem oil to control infestations.
* Disease Control: Melons can also be affected by fungal diseases like powdery mildew and downy mildew. To prevent these diseases, provide good air circulation, avoid overhead watering, and apply a fungicide if necessary.
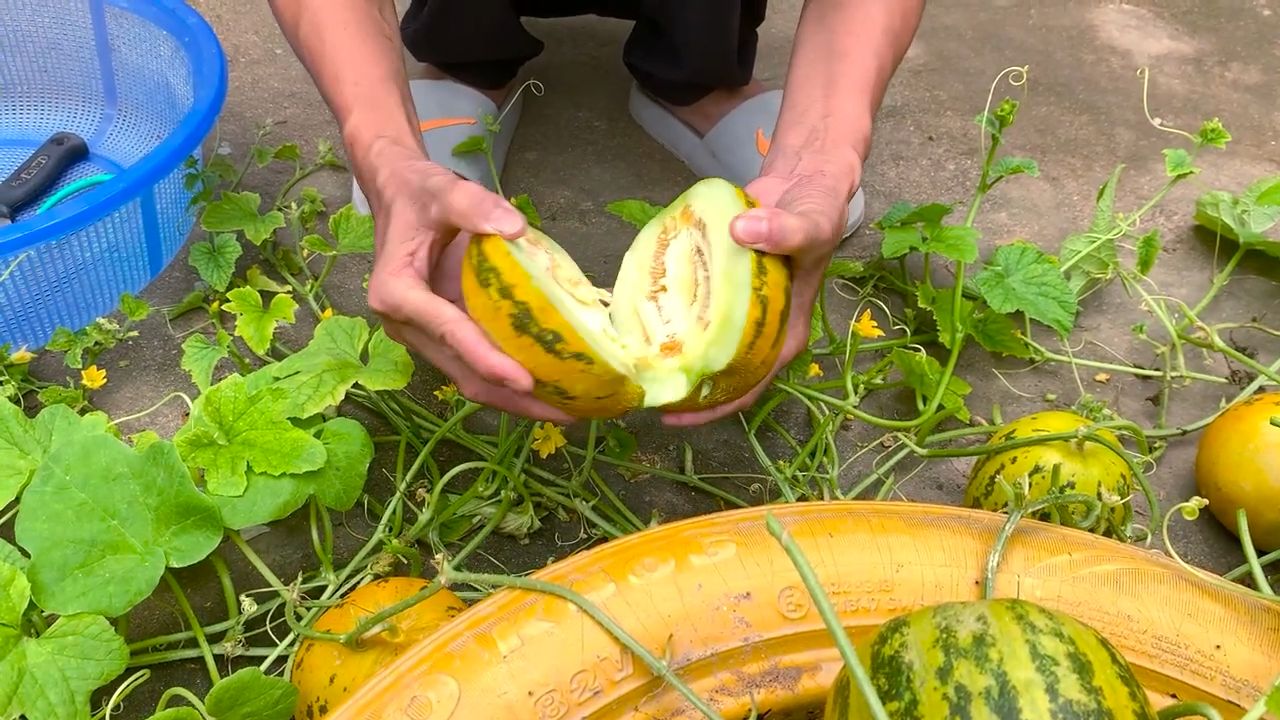
* Pollination: Melons need to be pollinated in order to produce fruit. Bees are the primary pollinators of melons. To attract bees to your garden, plant flowering herbs and vegetables nearby. If you’re not seeing enough bees, you can hand-pollinate your melon flowers. To hand-pollinate, use a small paintbrush to transfer pollen from the male flowers to the female flowers. Female flowers have a small fruit behind the flower, while male flowers do not.
Training Your Melon Vines
Melon vines can spread out quite a bit, so it’s important to train them to keep them under control.
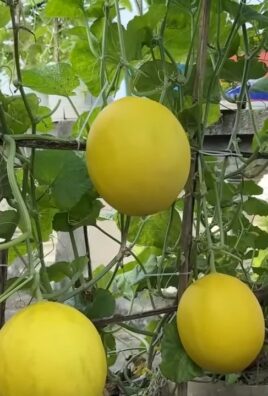
* Trellising: You can train your melon vines to grow on a trellis. This is a good option for smaller gardens or for growing melons vertically. Use soft ties to attach the vines to the trellis.
* Pruning: You can also prune your melon vines to encourage fruit production. Remove any suckers (small shoots that grow from the base of the plant) and any dead or diseased leaves.
* Protecting Developing Melons: As your melons grow, you may want to protect them from pests and diseases. You can place them on a bed of straw or use melon cradles to keep them off the ground
Conclusion
So, there you have it! Growing backyard melons easily isn’t just a pipe dream; it’s an achievable reality with a little planning, preparation, and the right techniques. We’ve explored everything from selecting the perfect melon variety for your climate to nurturing those precious seedlings and providing them with the support they need to thrive. The key takeaway is that with a bit of effort, you can enjoy the unparalleled satisfaction of harvesting your own juicy, flavorful melons right from your backyard.
Why is this DIY trick a must-try? Because store-bought melons simply can’t compare to the taste and freshness of homegrown ones. You control the entire process, ensuring they’re ripened to perfection on the vine and bursting with natural sweetness. Plus, there’s an undeniable sense of accomplishment that comes with nurturing a plant from seed to fruit. It’s a rewarding experience that connects you to nature and provides a delicious, healthy treat for you and your family.
Don’t be afraid to experiment with different melon varieties to find your favorites. Consider trying cantaloupe, honeydew, watermelon, or even some of the more exotic varieties like Galia or Charentais. You can also adjust the growing techniques to suit your specific garden conditions. For example, if you have limited space, try growing melons vertically on a trellis. Or, if you live in a cooler climate, consider using black plastic mulch to warm the soil and extend the growing season.
Remember to pay close attention to your plants and adjust your care as needed. Watch for signs of pests or diseases and take action promptly. With a little patience and attention, you’ll be rewarded with a bountiful harvest of delicious, homegrown melons.
We encourage you to give this DIY trick a try and experience the joy of growing your own melons. It’s a fun, rewarding, and delicious way to connect with nature and enjoy the fruits (literally!) of your labor. And most importantly, share your experiences with us! We’d love to hear about your successes, challenges, and favorite melon varieties. Post pictures of your homegrown melons on social media and tag us. Let’s create a community of backyard melon growers and inspire others to try this amazing DIY project. Happy gardening!
Frequently Asked Questions (FAQ)
What is the best time to start growing melons?
The best time to start growing melons depends on your climate. In general, you should start seeds indoors about 4-6 weeks before the last expected frost. If you live in a warmer climate with a longer growing season, you can direct sow seeds outdoors after the last frost. However, starting indoors gives your plants a head start and allows them to mature more quickly. Check your local frost dates and adjust your planting schedule accordingly.
What kind of soil do melons need?
Melons thrive in well-drained, fertile soil that is rich in organic matter. The ideal soil pH is between 6.0 and 7.0. Before planting, amend your soil with compost, aged manure, or other organic materials to improve drainage and fertility. You can also add a slow-release fertilizer to provide your plants with the nutrients they need throughout the growing season. Avoid heavy clay soils, as they can retain too much moisture and lead to root rot. If you have clay soil, consider growing melons in raised beds or containers.
How much sunlight do melons need?
Melons need at least 6-8 hours of direct sunlight per day to thrive. Choose a planting location that receives plenty of sunlight throughout the day. If you live in a hot climate, some afternoon shade may be beneficial to prevent the plants from overheating. However, avoid planting melons in areas that are heavily shaded, as this can reduce fruit production and increase the risk of disease.
How often should I water my melon plants?
Melons need consistent moisture, especially during fruit development. Water deeply and regularly, aiming to keep the soil consistently moist but not waterlogged. The frequency of watering will depend on your climate, soil type, and the size of your plants. In general, you should water melons 2-3 times per week, or more often during hot, dry weather. Use a soaker hose or drip irrigation to deliver water directly to the roots and avoid wetting the foliage, which can increase the risk of disease.
How do I know when my melons are ripe?
Determining when a melon is ripe can be tricky, but there are a few telltale signs to look for. For watermelons, look for a dull, rather than shiny, rind and a yellowish spot on the underside where the melon rested on the ground. Thumping the melon should produce a deep, hollow sound. For cantaloupes, the stem should slip easily from the vine when the melon is ripe. The melon should also have a fragrant aroma. Honeydew melons are ripe when the rind turns a creamy yellow color and the blossom end feels slightly soft. Remember that each variety has slightly different indicators, so research your specific melon type.
What are some common pests and diseases that affect melons?
Melons can be susceptible to a variety of pests and diseases, including aphids, squash bugs, cucumber beetles, powdery mildew, and fusarium wilt. To prevent pest and disease problems, practice good garden hygiene, such as removing weeds and debris from around your plants. You can also use insecticidal soap or neem oil to control aphids and other pests. For fungal diseases like powdery mildew, use a fungicide or try a homemade remedy like baking soda spray. Choose disease-resistant melon varieties whenever possible.
Can I grow melons in containers?
Yes, you can grow melons in containers, but you’ll need to choose a large container (at least 20 gallons) and use a well-draining potting mix. Dwarf or bush varieties of melons are best suited for container growing. Be sure to provide your container-grown melons with plenty of sunlight, water, and fertilizer. You may also need to provide support for the vines, such as a trellis or stake.
How can I improve the sweetness of my melons?
Several factors can influence the sweetness of your melons, including variety, soil fertility, sunlight, and watering practices. Choose a melon variety that is known for its sweetness. Ensure that your soil is rich in potassium, which is essential for fruit development and sweetness. Provide your plants with plenty of sunlight and water consistently, especially during fruit development. Avoid overwatering, as this can dilute the sugars in the fruit. Finally, allow the melons to ripen fully on the vine for the best flavor.
Is it necessary to hand-pollinate melons?
While melons are typically pollinated by bees and other insects, hand-pollination can increase fruit set, especially in areas with low pollinator activity. To hand-pollinate melons, use a small paintbrush to transfer pollen from the male flowers to the female flowers. Female flowers have a small fruit at the base, while male flowers do not. Hand-pollinate in the morning, when the pollen is most viable.
What are some creative ways to use homegrown melons?
Beyond simply eating them fresh, homegrown melons can be used in a variety of creative ways. Try making melon smoothies, salads, or salsas. You can also grill melon slices for a smoky, caramelized flavor. Melon sorbet or granita is a refreshing treat on a hot day. And don’t forget about melon rind pickles or preserves! The possibilities are endless.
How do I save seeds from my homegrown melons?
Saving seeds from your homegrown melons is a great way to ensure that you have seeds for next year’s crop. Choose a fully ripe melon and scoop out the seeds. Rinse the seeds thoroughly to remove any pulp. Spread the seeds out on a paper towel to dry completely. Once the seeds are dry, store them in an airtight container in a cool, dark place. Be aware that hybrid melon varieties may not produce true-to-type seeds, so you may not get the same results as the parent plant.
What if my melon vines are growing but not producing fruit?
There are several reasons why your melon vines might be growing but not producing fruit. One common reason is lack of pollination. Make sure there are plenty of bees and other pollinators in your garden. You can also try hand-pollinating the flowers. Another reason could be nutrient deficiency. Make sure your soil is rich in phosphorus and potassium, which are essential for fruit development. Overwatering or underwatering can also affect fruit production. Ensure that you are watering your plants consistently and deeply. Finally, check for pests or diseases that could be affecting the plants.
Can I grow different types of melons together?
Yes, you can grow different types of melons together, but be aware that they may cross-pollinate. This means that the seeds from the resulting melons may not produce true-to-type plants. If you want to save seeds from your melons, it’s best to grow only one variety of each type of melon (e.g., one variety of watermelon, one variety of cantaloupe) or to isolate the plants to prevent cross-pollination.
What is the best fertilizer for growing melons?
The best fertilizer for growing melons is one that is high in phosphorus and potassium, which are essential for fruit development. You can use a balanced fertilizer with an NPK ratio of 5-10-10 or 10-10-10, or you can use a fertilizer specifically formulated for fruiting plants. Apply the fertilizer according to the package directions. You can also amend your soil with compost or aged
Leave a Comment