

Grow cucumbers fast? Absolutely! Imagine biting into a crisp, refreshing cucumber you nurtured from seed to salad, all within a surprisingly short timeframe. That’s the magic we’re unlocking today! For centuries, cucumbers have been a staple in gardens worldwide, dating back to ancient civilizations in India. They’ve been prized not only for their delicious taste but also for their cooling properties and versatility in culinary dishes.
But let’s be honest, waiting for your cucumber plants to mature can feel like an eternity. That’s where these DIY tricks and hacks come in. I’m going to share some of my favorite, tried-and-true methods to help you grow cucumbers fast and enjoy a bountiful harvest sooner than you ever thought possible. Whether you’re a seasoned gardener or just starting out, these simple yet effective techniques will give your cucumber plants the boost they need to thrive. Say goodbye to cucumber cravings and hello to a garden overflowing with these green delights!
Grow Cucumbers Like a Pro: My Secret DIY Speed-Growing Hack!
Okay, cucumber lovers, listen up! I’m about to share my absolute favorite DIY hack for getting those crisp, refreshing cucumbers into your salads and sandwiches faster than you ever thought possible. Forget waiting all summer – with this method, you’ll be harvesting in record time. This isn’t just about planting seeds and hoping for the best; it’s about giving your cucumber plants a supercharged head start.
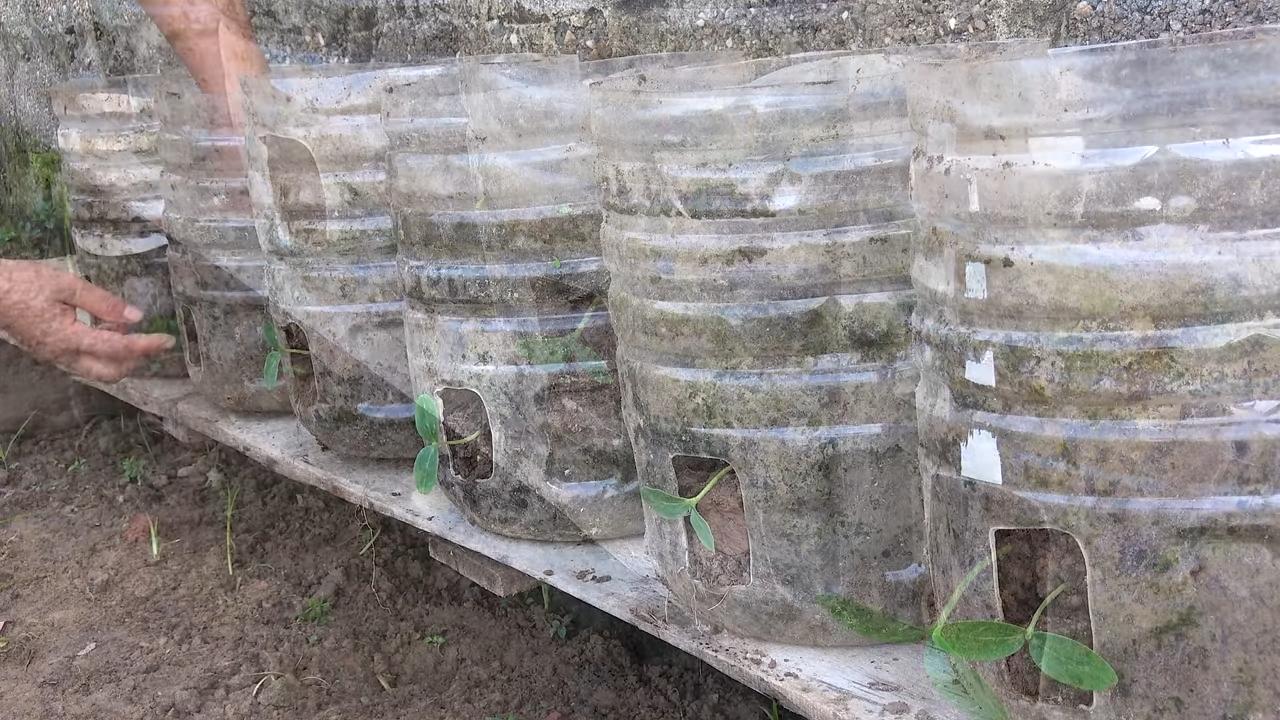
The Secret Weapon: The “Cucumber Condo”
The key to this fast-growing method is what I affectionately call the “Cucumber Condo.” It’s basically a mini-greenhouse environment that warms the soil and protects your seedlings, giving them the perfect conditions to thrive.
What you’ll need for the Cucumber Condo:
* Clear plastic bottles (2-liter soda bottles work great!) – one per plant
* Scissors or a utility knife
* Potting soil (a good quality mix is essential)
* Cucumber seeds (choose a variety suited to your climate)
* Watering can or hose with a gentle spray nozzle
* Small trowel or garden spade
* Optional: Heat mat (for even faster germination, especially in cooler climates)
* Optional: Seed starting tray
Phase 1: Seed Starting – Giving Them a Head Start Indoors
This is where the magic begins! Starting your cucumber seeds indoors gives them a significant advantage over direct sowing.
1. Prepare your seed starting tray (optional): If you’re using a seed starting tray, fill each cell with potting soil. Gently press down to remove air pockets. If you don’t have a seed starting tray, you can use small pots or even egg cartons with drainage holes.
2. Sow the seeds: Place 2-3 cucumber seeds in each cell or pot, about ½ inch deep. This increases your chances of at least one seed germinating.
3. Water gently: Use a watering can with a gentle spray nozzle to thoroughly moisten the soil. Avoid overwatering, which can lead to rot.
4. Provide warmth: Cucumber seeds germinate best in warm conditions (around 70-80°F). Place your seed starting tray or pots in a warm location, such as on top of your refrigerator or on a heat mat.
5. Maintain moisture: Keep the soil consistently moist, but not soggy. Check the soil daily and water as needed.
6. Wait for germination: Cucumber seeds typically germinate within 5-10 days. Once the seedlings emerge, move them to a sunny location or under grow lights.
7. Thin the seedlings: Once the seedlings have developed their first true leaves (the second set of leaves after the initial seed leaves), thin them to one strong seedling per cell or pot. Snip off the weaker seedlings at the soil line with scissors. Don’t pull them out, as this can disturb the roots of the remaining seedling.
Phase 2: Building the Cucumber Condo
While your seedlings are growing indoors, it’s time to prepare their future home – the Cucumber Condo!
1. Prepare the plastic bottles: Wash and dry the plastic bottles thoroughly. Remove the labels.
2. Cut off the bottom of the bottles: Using scissors or a utility knife, carefully cut off the bottom of each bottle. You want to create a cylinder that will fit over your cucumber seedling. I usually cut about 2-3 inches from the bottom.
3. Prepare the soil: Choose a sunny spot in your garden with well-draining soil. Cucumbers need at least 6-8 hours of sunlight per day. Amend the soil with compost or other organic matter to improve its fertility and drainage.
4. Dig the planting holes: Dig holes that are slightly larger than the root balls of your cucumber seedlings. Space the holes about 2-3 feet apart, depending on the variety of cucumber you’re growing. Check the seed packet for specific spacing recommendations.
Phase 3: Transplanting and Condo Installation
This is the crucial step where you introduce your seedlings to their new, protected environment.
1. Harden off the seedlings: Before transplanting, you need to “harden off” your seedlings. This means gradually exposing them to outdoor conditions to acclimate them to the sun, wind, and temperature changes. Start by placing them outdoors in a sheltered location for an hour or two each day, gradually increasing the amount of time they spend outside over the course of a week.
2. Transplant the seedlings: Carefully remove the seedlings from their cells or pots. Gently loosen the roots if they are tightly bound.
3. Plant the seedlings: Place each seedling in a planting hole and backfill with soil. Gently firm the soil around the base of the plant.
4. Water thoroughly: Water the seedlings well after transplanting.
5. Install the Cucumber Condos: Place a plastic bottle cylinder over each seedling, pressing it gently into the soil. Make sure the bottle is secure and won’t blow away in the wind. The bottle will act as a mini-greenhouse, trapping heat and moisture and protecting the seedling from pests and harsh weather.
Phase 4: Ongoing Care and Maintenance
Your Cucumber Condos are in place, but your work isn’t done yet! Consistent care is essential for maximizing growth and yield.
1. Water regularly: Cucumbers need consistent moisture, especially during hot weather. Water deeply and regularly, aiming for about 1 inch of water per week. Avoid overhead watering, which can lead to fungal diseases. I prefer to water at the base of the plant.
2. Fertilize: Feed your cucumber plants with a balanced fertilizer every 2-3 weeks. Follow the instructions on the fertilizer package. You can also use organic fertilizers like compost tea or fish emulsion.
3. Monitor for pests and diseases: Keep an eye out for common cucumber pests like aphids, cucumber beetles, and squash bugs. Treat infestations promptly with insecticidal soap or other appropriate methods. Also, watch for signs of fungal diseases like powdery mildew and downy mildew. Improve air circulation and avoid overhead watering to prevent these diseases.
4. Provide support: Most cucumber varieties are vining and need support to climb. Install a trellis, fence, or other support structure near your plants. This will help keep the fruits off the ground and improve air circulation.
5. Ventilate the Condos: On very hot days, you may need to ventilate the Cucumber Condos to prevent overheating. You can do this by removing the bottle caps or propping up the bottles slightly.
6. Remove the Condos: Once the cucumber plants have outgrown the bottles (usually after a few weeks), carefully remove the Cucumber Condos. By this point, the plants should be strong and established enough to thrive on their own.
Bonus Tip: Companion Planting
Consider planting companion plants near your cucumbers to attract beneficial insects and deter pests. Some good companion plants for cucumbers include:
* Marigolds: Repel nematodes and other pests.
* Nasturtiums: Attract aphids away from cucumbers.
* Dill: Attract beneficial insects like ladybugs and lacewings.
* Beans: Fix nitrogen in the soil, benefiting cucumber growth.
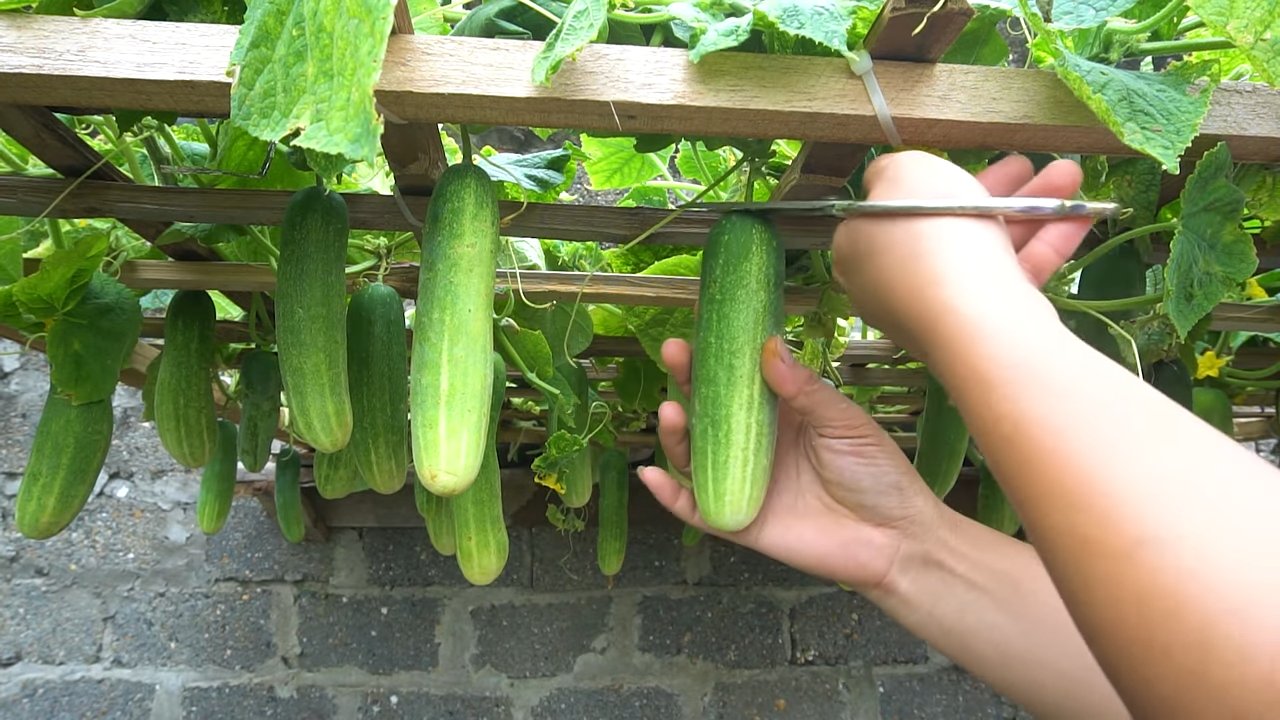
Harvesting Your Bountiful Crop
Now for the best part – harvesting your delicious, homegrown cucumbers!
1. Harvest at the right size: Harvest cucumbers when they are the desired size and color for your chosen variety. Check the seed packet for specific harvesting guidelines.
2. Use a sharp knife or scissors: Cut the cucumbers from the vine with a sharp knife or scissors, leaving a short stem attached.
3. Harvest regularly: Regular harvesting encourages the plant to produce more cucumbers.
4. Enjoy your harvest! Use your fresh cucumbers in salads, sandwiches, pickles, or any other way you like to enjoy them.
With this DIY Cucumber Condo hack, you’ll be amazed at how quickly you can grow your own delicious cucumbers. Happy gardening!
Conclusion
So, there you have it! Mastering the art of growing cucumbers fast isn’t some unattainable gardening dream. It’s a tangible reality within your reach, achievable with a few strategic tweaks and a dash of dedication. We’ve explored the key elements – from selecting the right cucumber varieties and preparing nutrient-rich soil to optimizing sunlight exposure and implementing efficient watering techniques. But the real game-changer, the secret weapon in your cucumber-growing arsenal, is the DIY trick we’ve unveiled: the homemade cucumber fertilizer booster.
Why is this DIY trick a must-try? Because it’s more than just a fertilizer; it’s a targeted nutrient delivery system designed to supercharge your cucumber plants’ growth. Commercial fertilizers can be expensive and often contain harsh chemicals. Our homemade solution is cost-effective, environmentally friendly, and packed with the essential nutrients cucumbers crave during their rapid growth phase. It’s a blend of readily available ingredients that work synergistically to promote vigorous vine development, abundant flowering, and, ultimately, a bountiful harvest of crisp, delicious cucumbers.
Think of it as giving your cucumber plants a personalized vitamin boost, tailored to their specific needs. The Epsom salts provide magnesium, crucial for chlorophyll production and efficient nutrient uptake. The baking soda helps regulate soil pH, creating an optimal environment for cucumber growth. And the ammonia, in diluted form, delivers a readily available source of nitrogen, the building block of plant growth. Together, these ingredients create a potent elixir that will transform your cucumber patch from a struggling garden to a thriving oasis.
But the beauty of this DIY trick lies not only in its effectiveness but also in its adaptability. Feel free to experiment with variations to suit your specific needs and preferences. For instance, if you’re growing organic cucumbers, you can substitute the ammonia with a diluted fish emulsion or compost tea for a natural nitrogen source. You can also add a tablespoon of bone meal to the mixture to provide an extra boost of phosphorus, which is essential for root development and flowering.
Consider adding a pinch of iron chelate if your soil is alkaline, as cucumbers prefer a slightly acidic environment. If you notice any signs of nutrient deficiencies, such as yellowing leaves or stunted growth, adjust the recipe accordingly. Remember, gardening is an art as much as it is a science, so don’t be afraid to get creative and experiment until you find what works best for your cucumber plants.
We wholeheartedly encourage you to try this DIY trick and witness the remarkable difference it can make in your cucumber-growing journey. Imagine the satisfaction of harvesting your own homegrown cucumbers, knowing that you nurtured them with a natural, homemade fertilizer that you created yourself. The taste of those freshly picked cucumbers will be all the sweeter, knowing that you played an active role in their growth and development.
Don’t just take our word for it; put this DIY trick to the test and see for yourself. We’re confident that you’ll be amazed by the results. And once you’ve experienced the magic of this homemade cucumber fertilizer booster, we’d love to hear about your experience. Share your success stories, tips, and variations in the comments section below. Let’s create a community of cucumber-growing enthusiasts who are passionate about sharing their knowledge and helping each other achieve gardening success. Together, we can unlock the secrets to growing cucumbers fast and enjoy a bountiful harvest of delicious, homegrown goodness. So, grab your ingredients, mix up a batch of this DIY fertilizer, and get ready to witness the transformation of your cucumber patch! Happy gardening!
Frequently Asked Questions (FAQ)
What exactly does this DIY fertilizer do for my cucumbers?
This homemade fertilizer is designed to provide your cucumber plants with a readily available source of essential nutrients, specifically nitrogen, magnesium, and a balanced soil pH. Nitrogen promotes vigorous vine growth and leaf development, magnesium is crucial for chlorophyll production (the green pigment that allows plants to photosynthesize), and a balanced pH ensures that the plants can efficiently absorb nutrients from the soil. By providing these key elements, the fertilizer helps your cucumbers grow faster, produce more flowers, and ultimately yield a larger and more flavorful harvest. It’s a targeted approach to addressing the specific nutritional needs of cucumbers during their rapid growth phase.
How often should I apply this DIY cucumber fertilizer?
The frequency of application depends on several factors, including the age of your plants, the type of soil you have, and the weather conditions. As a general guideline, you can apply the fertilizer every two to three weeks during the active growing season. For young seedlings, start with a diluted solution (half strength) and gradually increase the concentration as the plants mature. If you notice any signs of nutrient deficiencies, such as yellowing leaves or stunted growth, you can increase the frequency of application to once a week. However, be careful not to over-fertilize, as this can lead to nutrient burn and damage your plants. Always water your plants thoroughly after applying the fertilizer to help distribute the nutrients evenly and prevent salt buildup in the soil. Monitor your plants closely and adjust the frequency of application as needed based on their individual needs.
Can I use this fertilizer on other plants besides cucumbers?
While this DIY fertilizer is specifically formulated for cucumbers, it can also be beneficial for other plants that have similar nutrient requirements, such as squash, melons, and zucchini. These plants, like cucumbers, are heavy feeders and benefit from a boost of nitrogen, magnesium, and a balanced soil pH. However, it’s important to note that not all plants have the same nutritional needs, so it’s always best to research the specific requirements of each plant before applying any fertilizer. For example, tomatoes prefer a fertilizer that is higher in phosphorus and potassium than nitrogen, so this DIY fertilizer may not be the best choice for them. When in doubt, it’s always best to err on the side of caution and use a fertilizer that is specifically formulated for the type of plant you are growing.
Is it safe to use baking soda in the garden? Won’t it make the soil too alkaline?
Baking soda, when used in moderation, can actually be beneficial for the garden. It helps to regulate soil pH, creating a more favorable environment for cucumber growth. Cucumbers prefer a slightly acidic to neutral soil pH (around 6.0 to 7.0), and baking soda can help to buffer the soil and prevent it from becoming too acidic. However, it’s important to use baking soda sparingly, as excessive amounts can indeed make the soil too alkaline. The small amount of baking soda used in this DIY fertilizer is unlikely to cause any harm, especially when diluted with water. If you are concerned about the pH of your soil, you can test it using a soil testing kit and adjust the amount of baking soda accordingly. You can also add organic matter, such as compost or peat moss, to your soil to help buffer the pH and improve its overall health.
What if I don’t have Epsom salts or ammonia? Can I substitute them with something else?
Yes, you can substitute Epsom salts and ammonia with other ingredients, although the results may not be exactly the same. For Epsom salts, which provide magnesium, you can use magnesium sulfate, which is available at most garden centers. You can also use composted manure, which contains a variety of nutrients, including magnesium. For ammonia, which provides nitrogen, you can use a diluted fish emulsion or compost tea. These are both natural sources of nitrogen that are safe for organic gardening. You can also use urea, which is a synthetic source of nitrogen, but be sure to use it sparingly, as it can burn your plants if used in excess. Remember to adjust the amount of the substitute ingredient based on its nutrient content compared to Epsom salts and ammonia. Always err on the side of caution and start with a smaller amount to avoid over-fertilizing your plants.
My cucumber leaves are turning yellow. Is this fertilizer the solution?
Yellowing leaves, also known as chlorosis, can be a sign of several different problems, including nutrient deficiencies, overwatering, underwatering, pests, or diseases. While this DIY fertilizer can help address nutrient deficiencies, it’s important to first identify the underlying cause of the yellowing leaves before applying any treatment. If the yellowing is caused by a nutrient deficiency, such as magnesium or nitrogen deficiency, then this fertilizer may indeed help to correct the problem. However, if the yellowing is caused by overwatering, underwatering, pests, or diseases, then this fertilizer will not be effective and may even make the problem worse. Carefully examine your plants for any signs of pests or diseases, and check the moisture level of the soil to determine if you are overwatering or underwatering. Once you have identified the underlying cause of the yellowing leaves, you can take appropriate action to address the problem.


Leave a Comment