

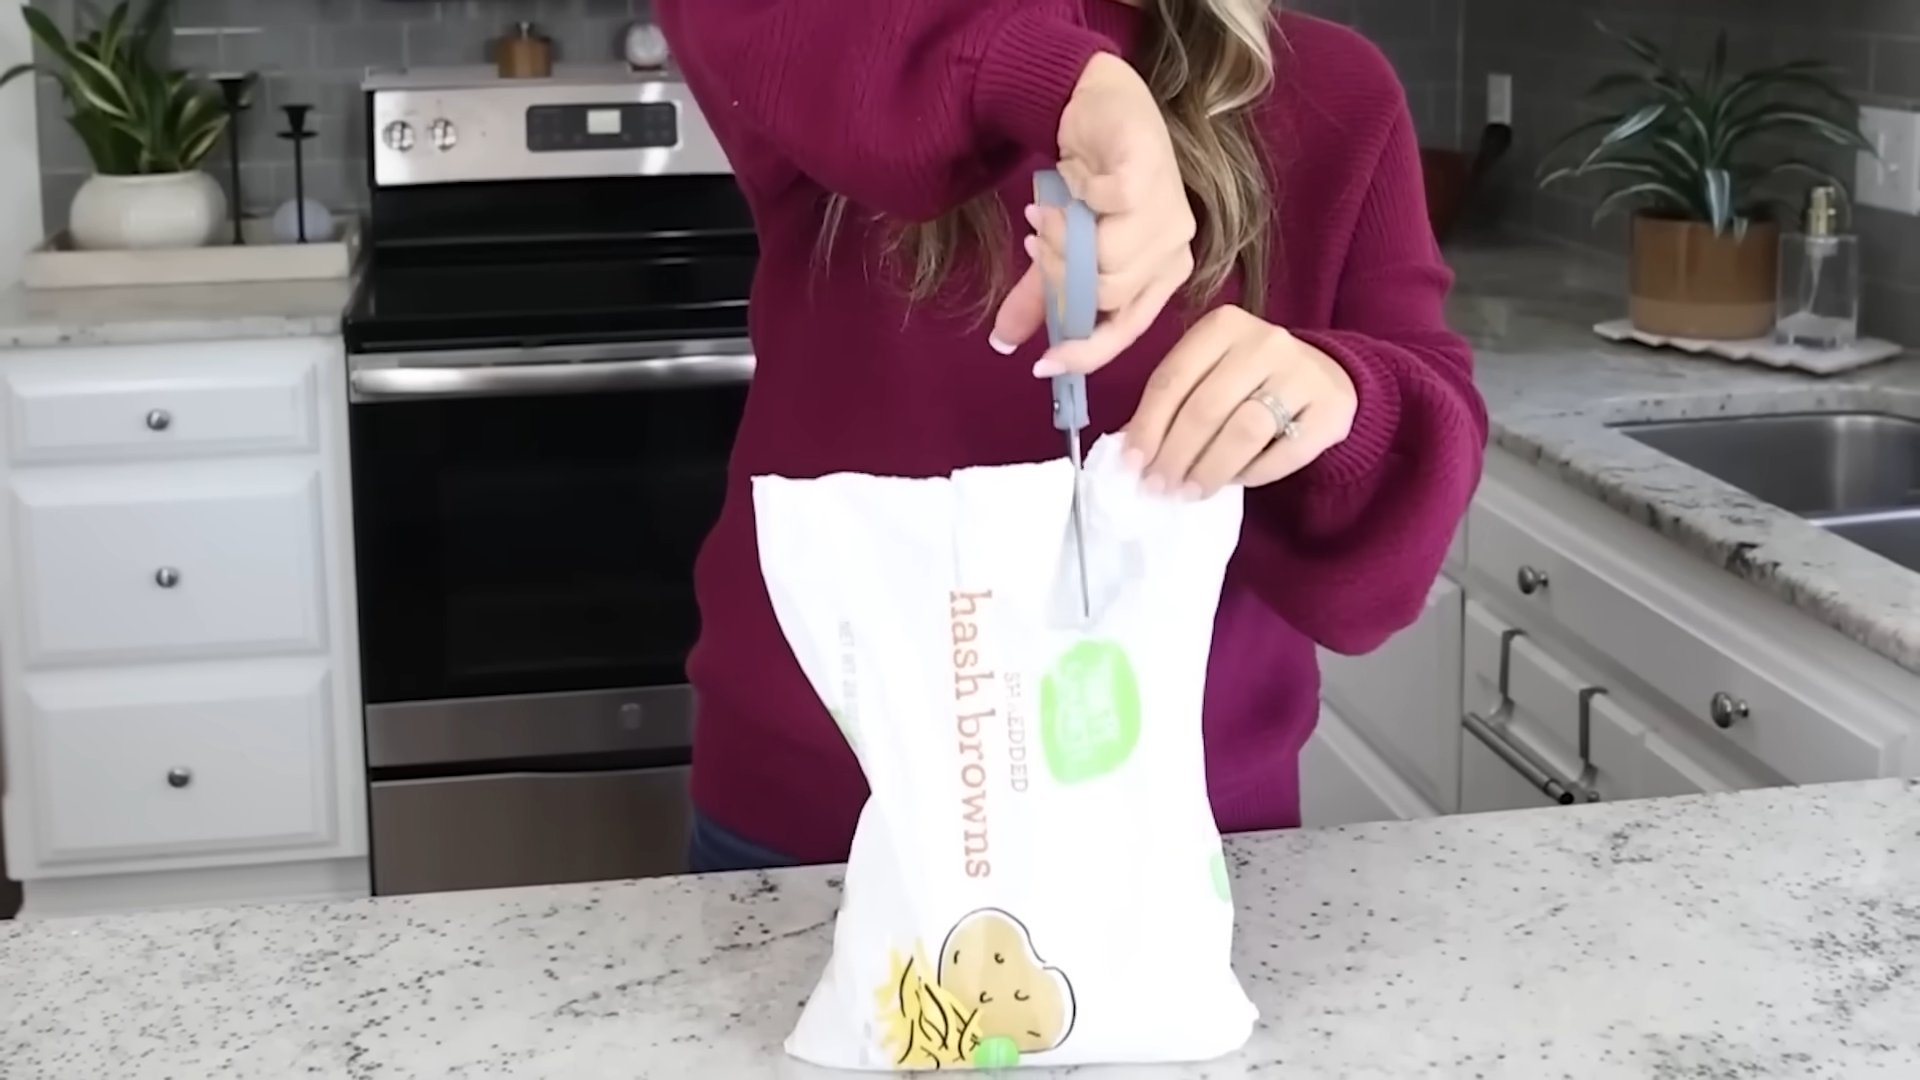
Effortless bag sealing hack: Ever feel like you’re wrestling with a stubborn bag of chips, desperately trying to keep them fresh? I know I have! We’ve all been there, haven’t we? Fumbling with clips, rubber bands, or even resorting to elaborate folding techniques that never quite seem to work. But what if I told you there’s a ridiculously simple, almost magical way to seal your bags airtight, using something you probably already have in your kitchen?
The quest for perfect food preservation is as old as civilization itself! From ancient Egyptians using clay pots to store grains to our grandmothers carefully canning fruits and vegetables, people have always sought ways to keep food fresh for longer. While our methods have evolved, the underlying desire remains the same: to minimize waste and enjoy delicious food at its peak.
That’s why I’m so excited to share this effortless bag sealing hack with you. In today’s world, where we’re all trying to be more mindful of our spending and reduce food waste, this trick is a game-changer. It’s not just about keeping your chips crispy; it’s about extending the life of your snacks, ingredients, and even pet food, saving you money and reducing your environmental impact. Plus, it’s so easy, even kids can do it! So, ditch the flimsy clips and get ready to learn a life-changing technique that will revolutionize your kitchen game.
Planting Bush Beans: A Comprehensive DIY Guide
Hey there, fellow gardening enthusiasts! Today, I’m super excited to share my tried-and-true method for planting bush beans. These little guys are incredibly rewarding to grow, offering a bountiful harvest with relatively little effort. Whether you’re a seasoned gardener or just starting out, this guide will walk you through every step, ensuring you have a thriving bean patch in no time.
Choosing the Right Bush Bean Variety
Before we even get our hands dirty, let’s talk about bean varieties. Bush beans come in a rainbow of colors and flavors, so picking the right one is crucial. Here’s a quick rundown of some popular choices:
* Provider: A reliable and early-maturing variety, known for its excellent yields and resistance to common bean diseases.
* Blue Lake Bush: A classic choice, producing stringless, dark green beans with a fantastic flavor.
* Contender: Another early producer, offering tender and flavorful beans that are perfect for canning or freezing.
* Roma II: A flat-podded Italian bean with a rich, buttery taste. Great for fresh eating or sauteing.
* Golden Wax: A yellow wax bean with a mild, sweet flavor. Adds a pop of color to your garden and your plate!
Consider your climate, soil type, and personal preferences when making your selection. I personally love the Blue Lake Bush for its consistent performance and delicious flavor.
Preparing Your Garden Bed
Bush beans thrive in well-drained soil that’s rich in organic matter. Here’s how to get your garden bed ready for planting:
* Timing is Key: Bush beans are warm-season crops, so wait until the danger of frost has passed and the soil temperature reaches at least 60°F (15°C). I usually aim for late spring or early summer, depending on my local climate.
* Sunlight: Choose a location that receives at least 6-8 hours of direct sunlight per day. More sun equals more beans!
* Soil Testing: It’s always a good idea to test your soil’s pH level. Bush beans prefer a slightly acidic to neutral pH of 6.0-7.0. You can purchase a soil testing kit at most garden centers.
* Clearing the Area: Remove any weeds, rocks, and debris from the planting area.
* Soil Amendment: Amend the soil with plenty of compost or well-rotted manure. This will improve drainage, fertility, and water retention. I like to add a generous layer of compost, about 2-3 inches thick, and then work it into the top 6-8 inches of soil.
* Tilling or Digging: Loosen the soil by tilling or digging to a depth of at least 8 inches. This will make it easier for the bean roots to penetrate the soil.
* Leveling: Rake the soil smooth to create a level planting surface.
Planting the Bush Bean Seeds
Now for the fun part – planting the seeds!
1. Spacing: Sow the bean seeds directly into the prepared soil, spacing them about 2-4 inches apart within the row. Rows should be spaced about 18-24 inches apart. I usually use my fingers to create small furrows in the soil.
2. Depth: Plant the seeds about 1 inch deep. Don’t plant them too deep, or they may have trouble emerging.
3. Covering: Gently cover the seeds with soil and pat it down lightly.
4. Watering: Water the planting area thoroughly, but be careful not to overwater. The soil should be moist but not soggy.
5. Marking: Label the rows with the variety of bean you planted and the date. This will help you keep track of your progress.
Caring for Your Bush Bean Plants
Once your bean seeds have sprouted, it’s important to provide them with the proper care to ensure a healthy and productive harvest.
* Watering: Water regularly, especially during dry spells. Bush beans need consistent moisture to thrive. Aim to water deeply once or twice a week, rather than shallowly every day. I usually check the soil moisture by sticking my finger into the soil. If the top inch feels dry, it’s time to water.
* Weeding: Keep the garden bed free of weeds, which can compete with the bean plants for nutrients and water. Hand-pull weeds regularly, or use a hoe to cultivate the soil between the rows.
* Fertilizing: Bush beans are relatively light feeders, but they can benefit from a side-dressing of fertilizer about 3-4 weeks after planting. Use a balanced fertilizer, such as 10-10-10, or an organic fertilizer like compost tea or fish emulsion. Follow the instructions on the fertilizer package.
* Pest Control: Keep an eye out for common bean pests, such as aphids, bean beetles, and spider mites. You can control these pests with insecticidal soap, neem oil, or by hand-picking them off the plants. I prefer to use organic pest control methods whenever possible.
* Disease Prevention: Bush beans can be susceptible to certain diseases, such as powdery mildew and bean rust. To prevent these diseases, provide good air circulation, avoid overhead watering, and choose disease-resistant varieties. If you notice any signs of disease, treat the plants with a fungicide.
Harvesting Your Bush Beans
The moment you’ve been waiting for – harvesting your delicious bush beans!
* Timing: Bush beans are typically ready to harvest about 50-60 days after planting, depending on the variety. The pods should be firm, plump, and snap easily when bent.
* Technique: Harvest the beans by gently snapping them off the plant. Be careful not to damage the plant or disturb the surrounding beans.
* Frequency: Harvest the beans regularly, about every 2-3 days, to encourage continued production. The more you harvest, the more beans the plant will produce.
* Storage: Freshly harvested bush beans can be stored in the refrigerator for up to a week. For longer storage, you can freeze, can, or dry the beans.
Troubleshooting Common Bush Bean Problems
Even with the best care, you may encounter some challenges when growing bush beans. Here are some common problems and how to address them:
* Poor Germination: If your bean seeds aren’t germinating, it could be due to several factors, such as cold soil, poor soil drainage, or old seeds. Make sure the soil temperature is at least 60°F (15°C) before planting, and use fresh seeds.
* Yellowing Leaves: Yellowing leaves can indicate a nutrient deficiency, such as nitrogen or iron. Amend the soil with compost or fertilizer to correct the deficiency.
* Stunted Growth: Stunted growth can be caused by poor soil, lack of sunlight, or pest infestations. Make sure the plants are getting enough sunlight and water, and control any pests that may be present.
* Blossom Drop: Blossom drop can occur if the plants are stressed by heat, drought, or poor pollination. Provide adequate water and shade during hot weather, and encourage pollinators by planting flowers nearby.
* Bean Beetle Damage: Bean beetles can quickly decimate a bean crop. Control them with insecticidal soap, neem oil, or by hand-picking them off the plants.
Extending the Harvest
Want to enjoy fresh bush beans for as long as possible? Here are a few tips for extending the harvest:
* Succession Planting: Plant a new batch of bean seeds every 2-3 weeks to ensure a continuous supply of beans throughout the growing season.
* Choose Early and Late Varieties: Plant a combination of early-maturing and late-maturing varieties to extend the harvest window.
* Provide Shade: During hot summer months, provide shade for the bean plants to prevent blossom drop and extend their productive life.
* Water Consistently: Consistent watering is crucial for maintaining a healthy and productive bean crop.
Saving Bush Bean Seeds
If you want to save seeds from your bush bean plants for next year’s garden, here’s how:
1. Select Healthy Plants: Choose the healthiest and most productive plants to save seeds from.
2. Allow Pods to Dry: Allow some of the bean pods to dry completely on the plant. The pods should turn brown and brittle.
3. Harvest the Pods: Harvest the dried pods and shell the beans.
4. Dry the Seeds: Spread the seeds out on a tray and allow them to dry completely in a cool, dry place for several weeks.
5. Store the Seeds: Store the dried seeds in an airtight container in a cool, dark place. They should remain viable for several years.
Enjoying Your Harvest
Now that you’ve harvested your bountiful crop of bush beans, it’s time to enjoy them! Here are a few
Conclusion
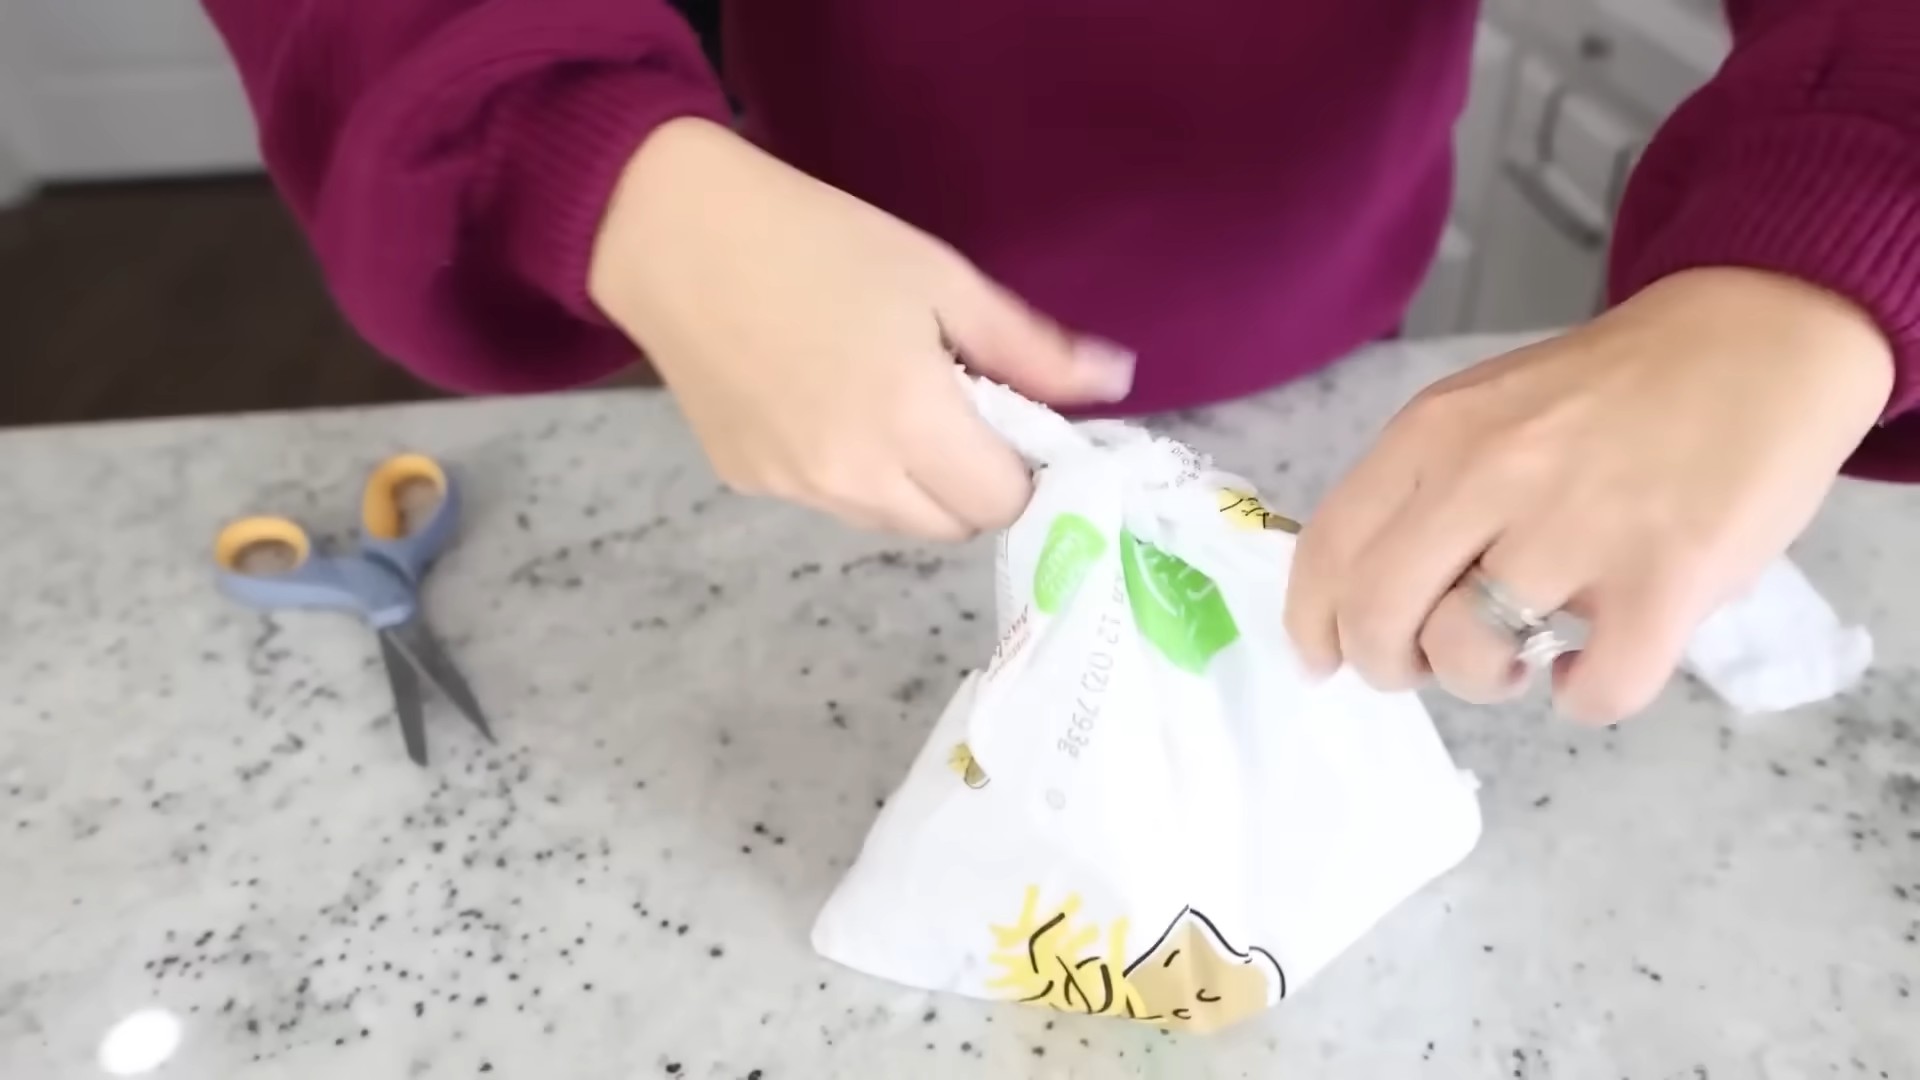
So, there you have it! This effortless bag sealing hack is more than just a clever trick; it’s a game-changer for anyone who wants to keep their food fresh, organized, and readily accessible. Forget fumbling with twist ties that always seem to disappear, or investing in expensive vacuum sealers that take up valuable counter space. This simple method, utilizing readily available materials, offers a cost-effective and incredibly efficient solution for sealing bags of all sizes.
Why is this a must-try? Because it saves you time, money, and frustration. Imagine effortlessly sealing your bags of chips, cereal, coffee, or even frozen vegetables in seconds, knowing that they’ll stay fresher for longer. No more stale snacks, freezer burn, or wasted food. This hack is particularly useful for those who buy in bulk, portion out meals, or simply want to extend the shelf life of their favorite ingredients.
But the beauty of this DIY trick lies not only in its simplicity but also in its adaptability. Feel free to experiment with different types of plastic bottles. While a standard soda or water bottle works perfectly, you can also try using bottles with wider mouths for sealing larger bags. Consider using bottles of different colors to color-code your sealed bags for easy identification in your pantry or freezer. For example, use a green bottle top for vegetables, a red one for meats, and a blue one for frozen fruits.
Another variation involves using a heat source other than a lighter. While a lighter provides a quick and controlled flame, you can also use a candle or even a hot glue gun (carefully!) to melt the plastic. Just remember to exercise caution and prioritize safety when working with heat.
This effortless bag sealing hack is also a fantastic way to reduce waste. By repurposing plastic bottles, you’re giving them a new life and preventing them from ending up in landfills. It’s a small step towards a more sustainable lifestyle that can make a big difference.
We are confident that once you try this effortless bag sealing hack, you’ll wonder how you ever lived without it. It’s a practical, efficient, and environmentally friendly solution that will simplify your life in the kitchen and beyond.
So, go ahead, give it a try! We encourage you to experiment with different variations and find what works best for you. And most importantly, we want to hear about your experience. Share your tips, tricks, and photos with us in the comments below. Let’s build a community of savvy savers and resourceful recyclers! Let us know how this effortless bag sealing hack has helped you in your daily life. We are eager to learn from your experiences and share them with others.
Frequently Asked Questions (FAQ)
What types of bags can I seal with this method?
This method works best with plastic bags, such as those used for chips, cereal, frozen vegetables, coffee, and pet food. The thickness of the bag can vary, but generally, thinner bags are easier to seal. Thicker bags might require a bit more heat and pressure. Avoid using it on bags made of paper or other materials that are not heat-sealable.
Is this method safe to use around food?
Yes, when done correctly, this method is safe to use around food. The key is to ensure that the melted plastic from the bottle neck does not come into direct contact with the food. The plastic is only used to create a seal around the bag, preventing air from entering and keeping the food fresh. Always use food-grade plastic bottles for this purpose.
How long will the seal last?
The longevity of the seal depends on several factors, including the type of bag, the quality of the seal, and the storage conditions. Generally, a well-executed seal can last for several weeks or even months, keeping your food fresh and preventing freezer burn. Regularly check the seal to ensure it remains intact.
What if the plastic bottle neck is too small for the bag I want to seal?
If the bottle neck is too small, you can try using a larger bottle with a wider mouth. Alternatively, you can cut the bag open further down to create a wider opening that fits around the bottle neck. You can also try stretching the bag slightly to fit over the bottle neck, but be careful not to tear it.
Can I reuse the sealed bags?
Yes, you can reuse the sealed bags multiple times. To open the bag, simply cut it open just above the plastic seal. You can then reseal the bag using the same method. However, over time, the plastic seal may become weaker, so it’s important to check it regularly and reapply heat if necessary.
What if I don’t have a lighter? What other heat sources can I use?
While a lighter is the most convenient heat source, you can also use a candle, a hot glue gun (with extreme caution), or even a stove burner. If using a candle, hold the plastic bottle neck close to the flame, rotating it slowly to ensure even heating. If using a hot glue gun, apply a small amount of hot glue to the plastic bottle neck and quickly press it against the bag. If using a stove burner, hold the plastic bottle neck above the burner, being careful not to let it touch the flame directly.
How do I prevent the plastic from burning or creating fumes?
To prevent the plastic from burning or creating fumes, use a low heat setting and avoid holding the plastic bottle neck in the flame for too long. Rotate the bottle neck slowly to ensure even heating and prevent any one spot from overheating. Work in a well-ventilated area to minimize the risk of inhaling any fumes.
Is this method environmentally friendly?
Yes, this method is environmentally friendly because it repurposes plastic bottles, giving them a new life and preventing them from ending up in landfills. By reducing waste and extending the shelf life of your food, you’re also contributing to a more sustainable lifestyle.
What are some other uses for this effortless bag sealing hack besides food storage?
Besides food storage, this hack can also be used to seal bags of other items, such as craft supplies, toiletries, and small electronic components. It’s a versatile solution for keeping items organized, protected, and free from moisture.
What if the seal isn’t strong enough?
If the seal isn’t strong enough, try applying more heat to the plastic bottle neck and pressing it firmly against the bag for a longer period. You can also try using a thicker plastic bottle or a bag with a thicker material. Make sure the surfaces are clean and dry before sealing. If all else fails, you can try adding a second layer of plastic to reinforce the seal.

Leave a Comment