

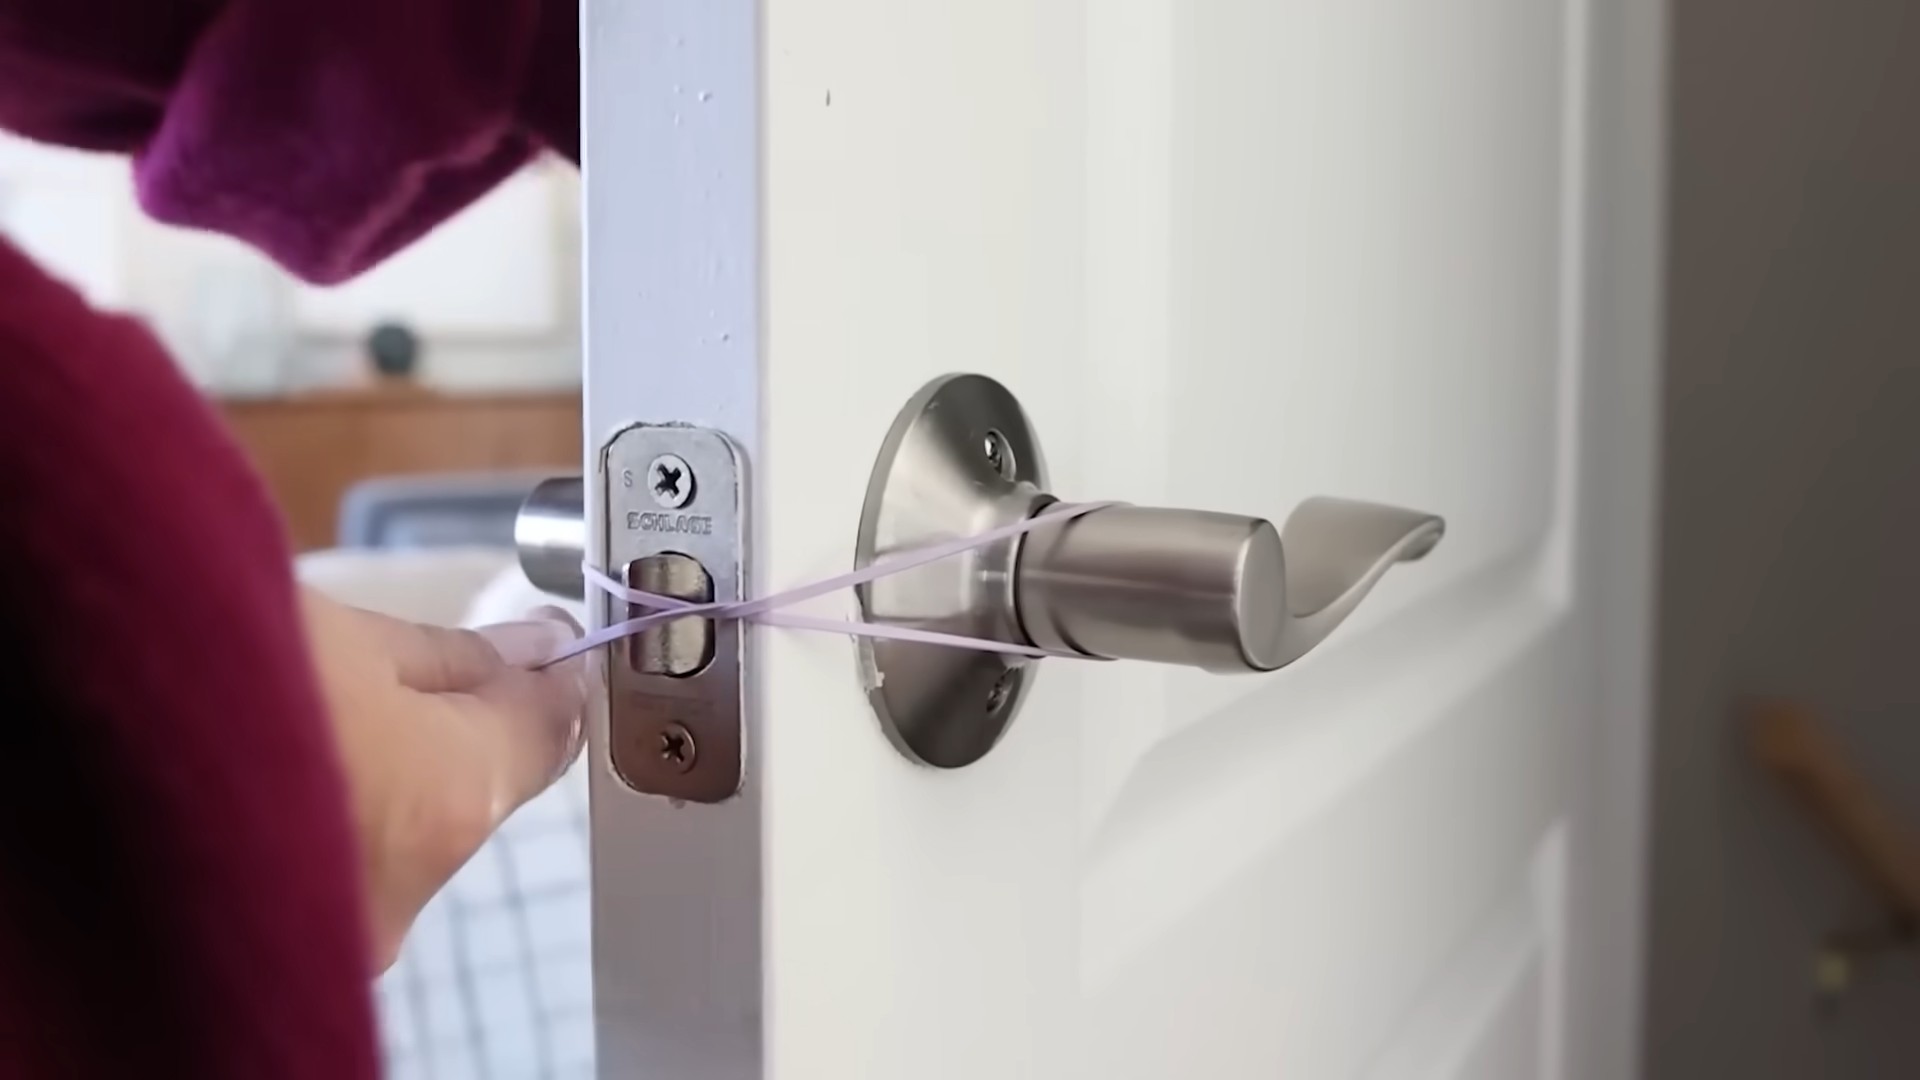
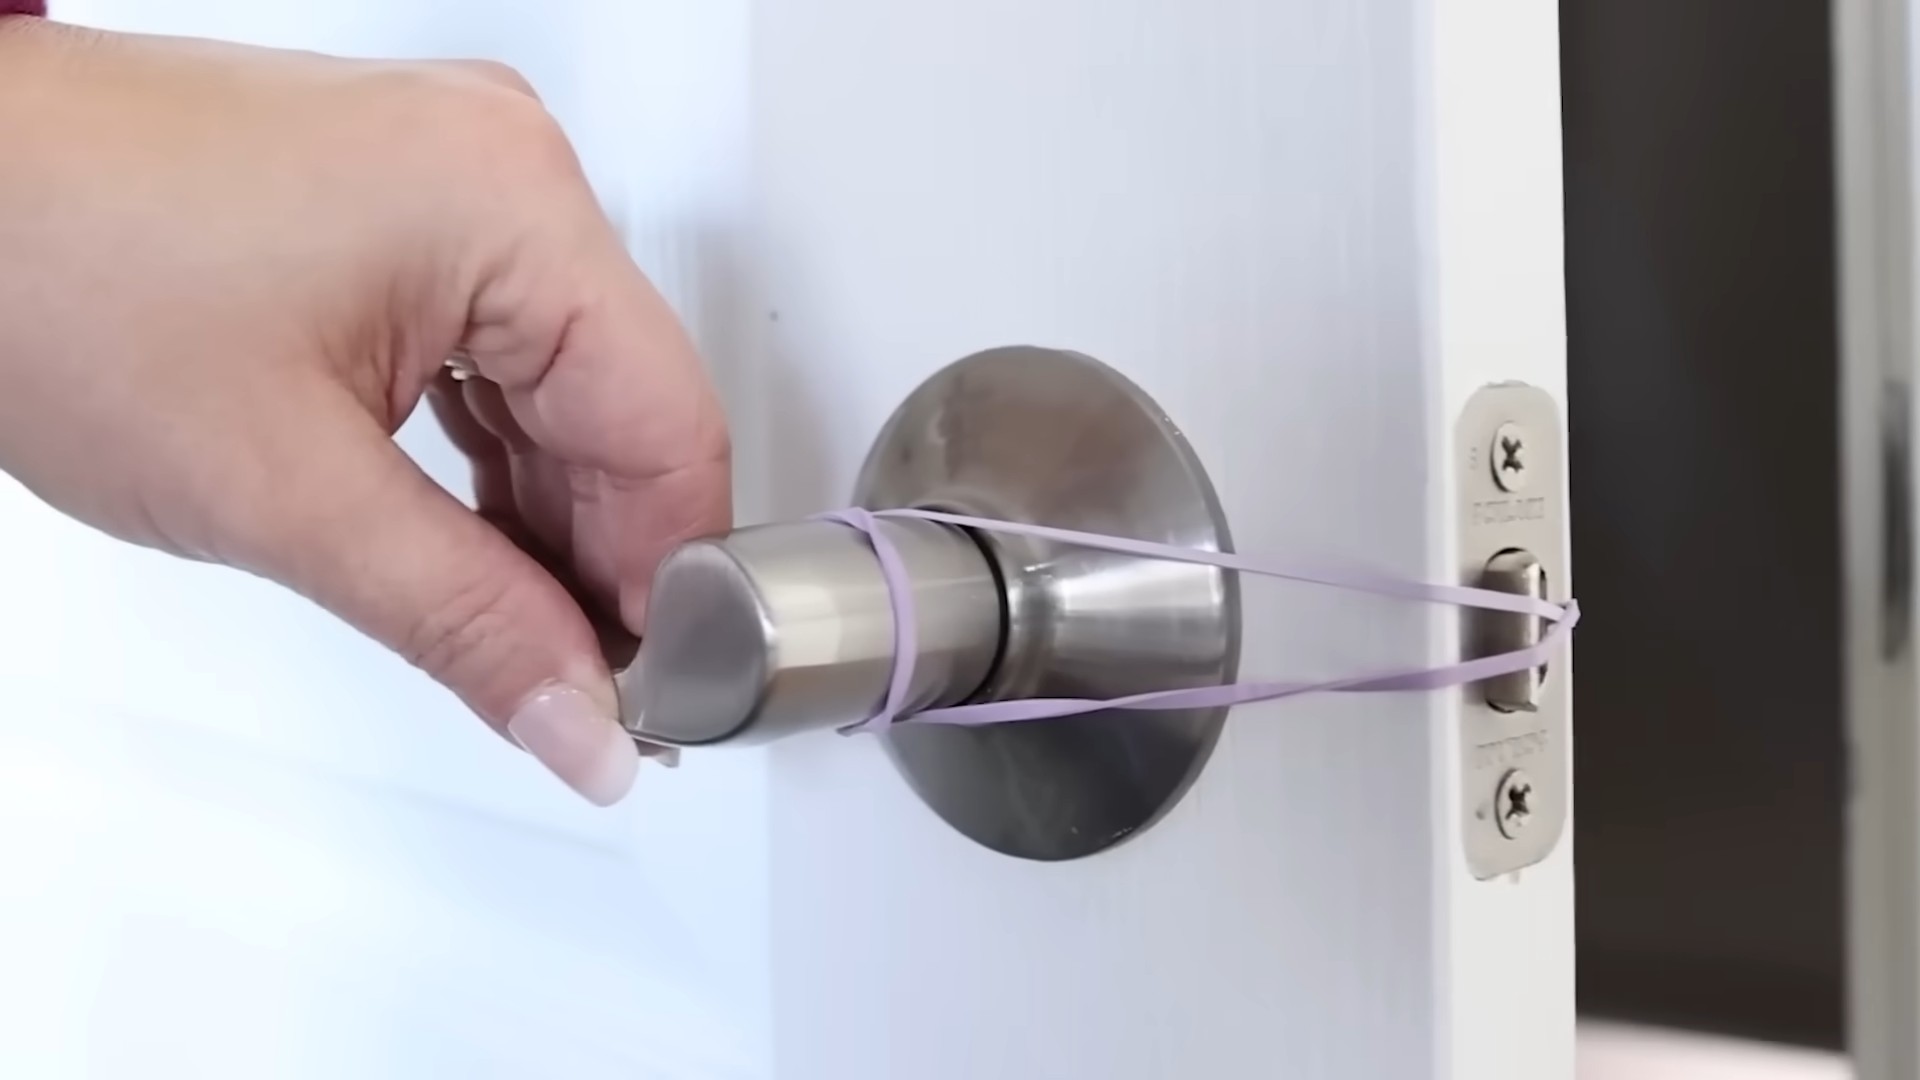
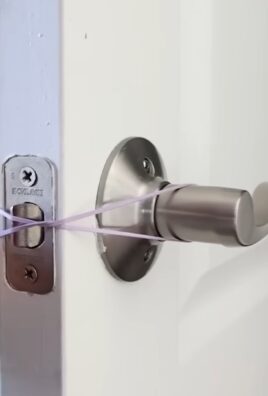
Rubber band crafts and hacks – who knew these humble little loops could unlock a world of creativity and problem-solving around your home? I’m always amazed by the ingenuity people display when finding new uses for everyday items, and rubber bands are no exception! From simple organization solutions to surprisingly artistic endeavors, these stretchy wonders are more versatile than you might think.
While the exact origins of rubber bands are a bit murky, their widespread use exploded in the late 19th century with the rise of mass production. They quickly became indispensable in offices, homes, and factories, holding everything together. But beyond their practical applications, rubber bands have also found their way into folk art and playful inventions throughout history. Think about childhood games, makeshift toys, and even intricate rubber band-powered contraptions – they’ve always been a source of fun and resourcefulness.
In today’s world, where sustainability and DIY projects are gaining popularity, mastering rubber band crafts and hacks is more relevant than ever. Why spend money on expensive gadgets or disposable organizers when you can repurpose something you likely already have lying around? This article is packed with clever ideas to help you declutter, create, and even add a touch of whimsy to your life, all with the help of these unassuming elastic bands. Get ready to unleash your inner MacGyver and discover the endless possibilities!
DIY Closet Organization: Transforming Chaos into Calm
Okay, let’s face it, we’ve all been there. You open your closet, and it’s like a monster is staring back at you – a monster made of clothes, shoes, and forgotten accessories. It’s overwhelming, frustrating, and definitely not conducive to a calm morning routine. But fear not! I’m here to guide you through a DIY closet organization project that will transform your chaotic closet into a haven of order and efficiency. This isn’t just about tidying up; it’s about creating a system that works for you and your lifestyle.
Phase 1: The Great Purge – Decluttering Your Closet
Before we even think about organizing, we need to tackle the elephant in the room: the clutter. This is arguably the most important step, so don’t skip it! Be ruthless, be honest with yourself, and get ready to say goodbye to items that are no longer serving you.
1. Empty Everything Out: Seriously, everything. Take all your clothes, shoes, accessories, and anything else lurking in your closet and pile it onto your bed or floor. This might seem daunting, but it’s essential to see the full scope of what you’re working with.
2. The Four-Pile Method: Create four distinct piles:
* Keep: These are the items you love, wear regularly, and are in good condition.
* Donate: These are items that are still in good condition but you no longer wear or need. Think about donating to a local charity or shelter.
* Sell: These are higher-value items that you could potentially sell online or at a consignment shop.
* Toss: These are items that are damaged, stained, or beyond repair. Don’t hold onto them out of guilt; it’s time to let them go.
3. Be Honest with Yourself: This is where the tough love comes in. Ask yourself these questions for each item:
* Have I worn this in the past year?
* Does it fit me properly?
* Is it in good condition?
* Do I love how I feel when I wear it?
* Would I buy it again today?
If the answer to any of these questions is no, it’s probably time to let it go.
4. Sentimental Items: We all have those items that hold sentimental value, even if we never wear them. Create a separate box for these items and store it somewhere other than your closet. This allows you to keep the memories without cluttering your everyday space.
5. Take Action Immediately: Don’t let those piles sit around for weeks! As soon as you’re done sorting, bag up the items for donation, gather the items for selling, and toss the items that are beyond repair. The sooner you get rid of the clutter, the sooner you can start organizing.
Phase 2: Planning Your Closet Layout – Maximizing Space
Now that you’ve decluttered, it’s time to assess your closet space and plan how to best utilize it. This is where you get to be creative and tailor your closet to your specific needs.
1. Measure Your Closet: Grab a measuring tape and measure the height, width, and depth of your closet. Note the location of shelves, rods, and any other existing features.
2. Assess Your Needs: Think about the types of clothing you have and how you like to store them. Do you have a lot of hanging clothes, folded clothes, shoes, or accessories? This will help you determine what kind of storage solutions you need.
3. Consider Vertical Space: Don’t forget to utilize the vertical space in your closet! Shelves, drawers, and hanging organizers can help you maximize every inch.
4. Draw a Plan: Sketch out a rough plan of your closet layout, including where you want to place shelves, rods, drawers, and other storage solutions. This will help you visualize the final result and make sure everything fits.
5. Choose Your Storage Solutions: Based on your needs and plan, choose the storage solutions that will work best for you. Here are some ideas:
* Shelves: Great for storing folded clothes, shoes, and accessories.
* Drawers: Perfect for storing underwear, socks, and other small items.
* Hanging Rods: Essential for hanging clothes, but consider adding a second rod to double your hanging space.
* Hanging Organizers: Great for storing shoes, sweaters, and other items that don’t need to be hung.
* Baskets and Bins: Perfect for storing accessories, scarves, and other small items.
* Shoe Racks: Keep your shoes organized and off the floor.
* Over-the-Door Organizers: Great for storing shoes, accessories, and cleaning supplies.
Phase 3: Implementing Your Organization Plan – Putting It All Together
Now for the fun part! It’s time to put your plan into action and transform your closet into an organized oasis.
1. Install Shelves and Rods: If you’re adding new shelves or rods, now is the time to install them. Follow the manufacturer’s instructions carefully and make sure everything is securely attached.
2. Organize Your Clothes by Category: Group your clothes by category, such as shirts, pants, skirts, dresses, and jackets. This will make it easier to find what you’re looking for.
3. Hang Your Clothes Strategically: Hang your clothes in a way that makes sense for you. Some people like to organize by color, while others prefer to organize by sleeve length or style.
4. Fold Your Clothes Neatly: Fold your clothes neatly and stack them on shelves or in drawers. This will help you maximize space and keep your clothes wrinkle-free. I personally love the KonMari folding method!
5. Organize Your Shoes: Place your shoes on shoe racks or in shoe boxes. Consider organizing them by style or color.
6. Organize Your Accessories: Use baskets, bins, or drawer dividers to organize your accessories, such as scarves, belts, and jewelry.
7. Utilize the Back of the Door: Install an over-the-door organizer to store shoes, accessories, or cleaning supplies.
8. Add Lighting: Good lighting is essential for a well-organized closet. Consider adding a battery-operated light or a strip of LED lights to illuminate your space.
9. Label Everything: Label your shelves, drawers, and bins so you know exactly where everything is. This will help you maintain your organization system in the long run.
10. Step Back and Admire Your Work: You did it! Take a moment to appreciate your newly organized closet. Doesn’t it feel amazing?
Phase 4: Maintaining Your Organized Closet – Staying on Track
The key to a truly organized closet is maintenance. It’s not a one-time fix; it’s an ongoing process. But don’t worry, it doesn’t have to be overwhelming.
1. The One-In, One-Out Rule: For every new item you bring into your closet, get rid of one old item. This will help prevent clutter from accumulating.
2. Regular Decluttering: Schedule a quick decluttering session every few months to get rid of any items you no longer need or wear.
3. Put Things Back Where They Belong: Make it a habit to put your clothes and accessories back in their designated spots after you wear them.
4. Make It a Routine: Incorporate closet organization into your regular cleaning routine. This will help you stay on top of things and prevent your closet from becoming chaotic again.
5. Adjust as Needed: Your needs may change over time, so don’t be afraid to adjust your organization system as needed.
Bonus Tips for Closet Organization Success
* Use Matching Hangers: This creates a cohesive and visually appealing look.
* Consider a Closet System: If you’re looking for a more permanent solution, consider investing in a closet system.
* Don’t Be Afraid to Ask for Help: If you’re feeling overwhelmed, don’t be afraid to ask a friend or family member for help.
* Make It Fun: Put on some music, grab a snack, and make closet organization a fun and enjoyable experience.
By following these steps, you can transform your chaotic closet into a calm and organized space that you’ll love. Happy organizing!
Conclusion
So, there you have it! This collection of rubber band crafts and hacks is more than just a fun way to pass the time; it’s a testament to the versatility and resourcefulness that can be unlocked with something as simple as a rubber band. From ingenious organizational solutions to creative crafting projects, the possibilities are truly endless.
Why is this DIY approach a must-try? Because it’s economical, eco-friendly, and empowering. Instead of throwing away those leftover rubber bands, you’re transforming them into something useful and beautiful. You’re reducing waste, saving money, and tapping into your own creative potential. Plus, many of these hacks offer a surprisingly effective solution to everyday problems, often outperforming more expensive or complicated alternatives.
Consider the organizational benefits alone. Imagine a clutter-free workspace, with cords neatly bundled, tools securely gripped, and pantry items perfectly sealed. Or picture the joy of creating personalized gifts, from vibrant bracelets to charming rubber band art, all made with your own two hands.
But don’t stop there! The beauty of these rubber band crafts and hacks lies in their adaptability. Feel free to experiment with different colors, sizes, and thicknesses of rubber bands to achieve unique results. Try incorporating other materials, such as beads, buttons, or fabric scraps, to add texture and visual interest. For the organizational hacks, think about how you can customize them to fit your specific needs and space. Perhaps you need a stronger grip for your gardening tools, or a more decorative way to organize your jewelry. Let your imagination be your guide!
We encourage you to dive into these projects and discover the magic of rubber band crafting for yourself. Start with the simplest hack, like the cord organizer, and gradually work your way up to more complex projects, like the woven rubber band basket. Don’t be afraid to make mistakes – that’s how you learn and grow.
Most importantly, we want to hear about your experiences! Share your creations, your modifications, and your own unique rubber band hacks in the comments below. Let’s build a community of resourceful crafters and problem-solvers, all united by the humble rubber band. Unleash your inner maker and discover the endless possibilities of rubber band crafts today!
Frequently Asked Questions (FAQs)
What types of rubber bands work best for these crafts and hacks?
The best type of rubber band depends on the specific project. For organizational hacks that require strength and durability, thicker, wider rubber bands are generally preferred. These offer a more secure grip and are less likely to break under pressure. For crafting projects, you can experiment with different colors, sizes, and thicknesses to achieve the desired aesthetic. Smaller, thinner rubber bands are ideal for intricate designs, while larger, thicker bands can be used for bolder, more textured creations. Consider the elasticity of the rubber band as well. Some rubber bands are more stretchy than others, which can affect the final result. For example, if you’re making a rubber band bracelet, you’ll want a rubber band that’s stretchy enough to comfortably fit around your wrist.
Are these rubber band crafts suitable for children?
Many rubber band crafts are suitable for children, but adult supervision is always recommended, especially for projects that involve sharp objects like scissors or needles. Some rubber band crafts, such as making bracelets or simple figures, can be a great way to encourage creativity and fine motor skills in children. However, it’s important to choose age-appropriate projects and to teach children how to use rubber bands safely. Avoid projects that involve small parts that could be a choking hazard, and always supervise children when they are using rubber bands to ensure they don’t stretch them too far or snap them in someone’s face.
How can I prevent rubber bands from breaking or deteriorating?
Rubber bands can deteriorate over time due to exposure to heat, sunlight, and air. To prolong their lifespan, store them in a cool, dark, and dry place. Avoid leaving them in direct sunlight or near sources of heat. You can also try storing them in an airtight container to protect them from air exposure. If you’re using rubber bands for outdoor projects, consider using UV-resistant rubber bands, which are specifically designed to withstand the damaging effects of sunlight. Regularly inspect your rubber bands for signs of wear and tear, such as cracks, brittleness, or loss of elasticity. Replace any damaged rubber bands immediately to prevent them from breaking and causing injury or damage.
Can I use recycled rubber bands for these projects?
Yes, you can definitely use recycled rubber bands for these projects! In fact, using recycled rubber bands is a great way to reduce waste and give new life to old materials. However, it’s important to inspect recycled rubber bands carefully before using them to ensure they are still in good condition. Avoid using rubber bands that are cracked, brittle, or have lost their elasticity. You may also want to wash recycled rubber bands before using them to remove any dirt or debris. Keep in mind that recycled rubber bands may not be as strong or durable as new rubber bands, so you may need to use more of them or choose projects that don’t require a lot of strength.
What are some other creative uses for rubber bands that aren’t mentioned in the article?
The possibilities for rubber band crafts and hacks are truly endless! Here are a few more creative ideas to get you started:
* **Bookmarking:** Use a rubber band to mark your page in a book.
* **Hair Ties:** Rubber bands can be used as temporary hair ties in a pinch.
* **Non-Slip Grips:** Wrap rubber bands around slippery handles to improve grip.
* **DIY Stamps:** Carve designs into rubber bands and use them as stamps.
* **Phone Stand:** Use a rubber band to create a simple phone stand.
* **Paintbrush Grip:** Wrap a rubber band around the handle of a paintbrush for a more comfortable grip.
* **Emergency Repair:** Use a rubber band to temporarily fix a broken zipper or button.
* **Seed Starting:** Use a rubber band to hold together seed starting pots.
Don’t be afraid to experiment and come up with your own unique uses for rubber bands! The only limit is your imagination.
Where can I find a wide variety of rubber bands for crafting?
You can find a wide variety of rubber bands at most office supply stores, craft stores, and online retailers. Look for rubber bands in different colors, sizes, and thicknesses to suit your specific needs. You can also find specialty rubber bands, such as UV-resistant rubber bands or extra-strong rubber bands, for specific applications. Consider buying a variety pack of rubber bands to have a range of options on hand for different projects. When purchasing rubber bands online, be sure to read reviews and check the product specifications to ensure you’re getting a quality product.
Leave a Comment