

Growing Sweet Potatoes Easy? Absolutely! Imagine harvesting a bounty of vibrant, delicious sweet potatoes right from your own backyard. It’s not just a dream; it’s an achievable reality with a few simple tricks and DIY techniques. For centuries, sweet potatoes have been a staple in diets around the world, from their origins in Central and South America to their widespread cultivation in Asia and Africa. They’re packed with nutrients and offer a unique, subtly sweet flavor that elevates any meal.
But let’s be honest, the thought of growing them can seem a little daunting. That’s where this guide comes in! I’m here to show you that growing sweet potatoes easy is totally possible, even if you’re a beginner gardener. We’ll break down the process into manageable steps, sharing insider tips and DIY hacks that will have you enjoying homegrown sweet potatoes in no time.
Why do you need these tricks? Because store-bought sweet potatoes simply can’t compare to the taste and satisfaction of harvesting your own. Plus, you’ll know exactly where your food is coming from and how it was grown. So, let’s ditch the grocery store produce aisle and embark on this rewarding gardening adventure together!
Growing Sweet Potatoes: A Beginner’s Guide to Bountiful Harvests
Hey there, fellow gardening enthusiasts! I’m super excited to share my tried-and-true method for growing sweet potatoes. It’s easier than you might think, and the reward of digging up your own homegrown sweet potatoes is absolutely amazing. Get ready to enjoy the sweet taste of success!
Choosing the Right Sweet Potato Variety
Before we dive into the nitty-gritty, let’s talk about choosing the right sweet potato variety for your garden. This is a crucial step because different varieties have different growing requirements and flavor profiles.
* Beauregard: This is a classic and widely popular variety. It’s known for its reddish-purple skin, orange flesh, and excellent flavor. It’s also relatively early maturing, which is great for those of us with shorter growing seasons.
* Georgia Jet: If you’re looking for a super-early maturing variety, Georgia Jet is your best bet. It has red skin and deep orange flesh and is known for its high yields.
* Jewel: Jewel sweet potatoes have copper-colored skin and deep orange flesh. They’re known for their sweet, moist flavor and are a great all-around choice.
* Okinawan Purple: For something a little different, try Okinawan Purple sweet potatoes. They have tan skin and vibrant purple flesh. They’re less sweet than orange varieties and have a slightly nutty flavor.
* White Sweet Potatoes (Bonita): These are less common but worth exploring. They have light tan skin and white flesh, with a drier, less sweet flavor.
Consider your climate, growing season length, and personal taste preferences when making your choice. I personally love Beauregard for its reliable yields and classic sweet potato flavor.
Preparing Your Garden Bed
Sweet potatoes need plenty of sunshine and well-drained soil to thrive. Here’s how to prepare your garden bed for success:
* Sunlight: Choose a location that receives at least 6-8 hours of direct sunlight per day.
* Soil: Sweet potatoes prefer loose, sandy loam soil. If your soil is heavy clay, amend it with plenty of compost, aged manure, or other organic matter to improve drainage.
* Soil pH: The ideal soil pH for sweet potatoes is between 5.5 and 6.8. You can test your soil pH with a home testing kit or send a sample to your local agricultural extension office.
* Fertilizing: Sweet potatoes don’t need a lot of nitrogen, so avoid using high-nitrogen fertilizers. Instead, focus on phosphorus and potassium, which promote root development. A balanced fertilizer like 5-10-10 or 10-20-20 can be used sparingly. I like to amend my soil with bone meal and wood ash for a natural boost of phosphorus and potassium.
* Raised Beds: Consider growing sweet potatoes in raised beds, especially if you have heavy clay soil. Raised beds improve drainage and allow the soil to warm up faster in the spring.
Starting Sweet Potato Slips
Sweet potato “slips” are the sprouts that grow from a sweet potato. You can buy slips from a nursery, but it’s also easy (and more affordable!) to start your own. Here’s how:
1. Choose Your Sweet Potatoes: Select healthy, disease-free sweet potatoes from your local grocery store or farmer’s market. Organic sweet potatoes are a good choice to avoid any potential sprouting inhibitors.
2. Prepare the Sweet Potatoes: There are two main methods for sprouting sweet potatoes:
* Water Method: Suspend the sweet potato in a jar or glass of water, with the bottom half submerged. You can use toothpicks to hold it in place.
* Soil Method: Bury the sweet potato horizontally in a container filled with moist potting mix, leaving the top exposed.
3. Provide Warmth and Light: Place the jar or container in a warm, sunny location. The ideal temperature for sprouting is between 75-85°F (24-29°C).
4. Wait for Sprouts: It will take several weeks for sprouts to emerge from the sweet potato. Keep the water fresh (for the water method) and the soil moist (for the soil method).
5. Harvest the Slips: Once the sprouts are 6-8 inches tall, they’re ready to be harvested. Gently twist or cut the slips off the sweet potato.
6. Root the Slips: Place the slips in a glass of water, with the bottom inch or two submerged. Within a few days, roots will begin to form.
7. Harden Off the Slips: Before planting the slips in your garden, harden them off by gradually exposing them to outdoor conditions for a week or so. This will help them adjust to the sun and wind.
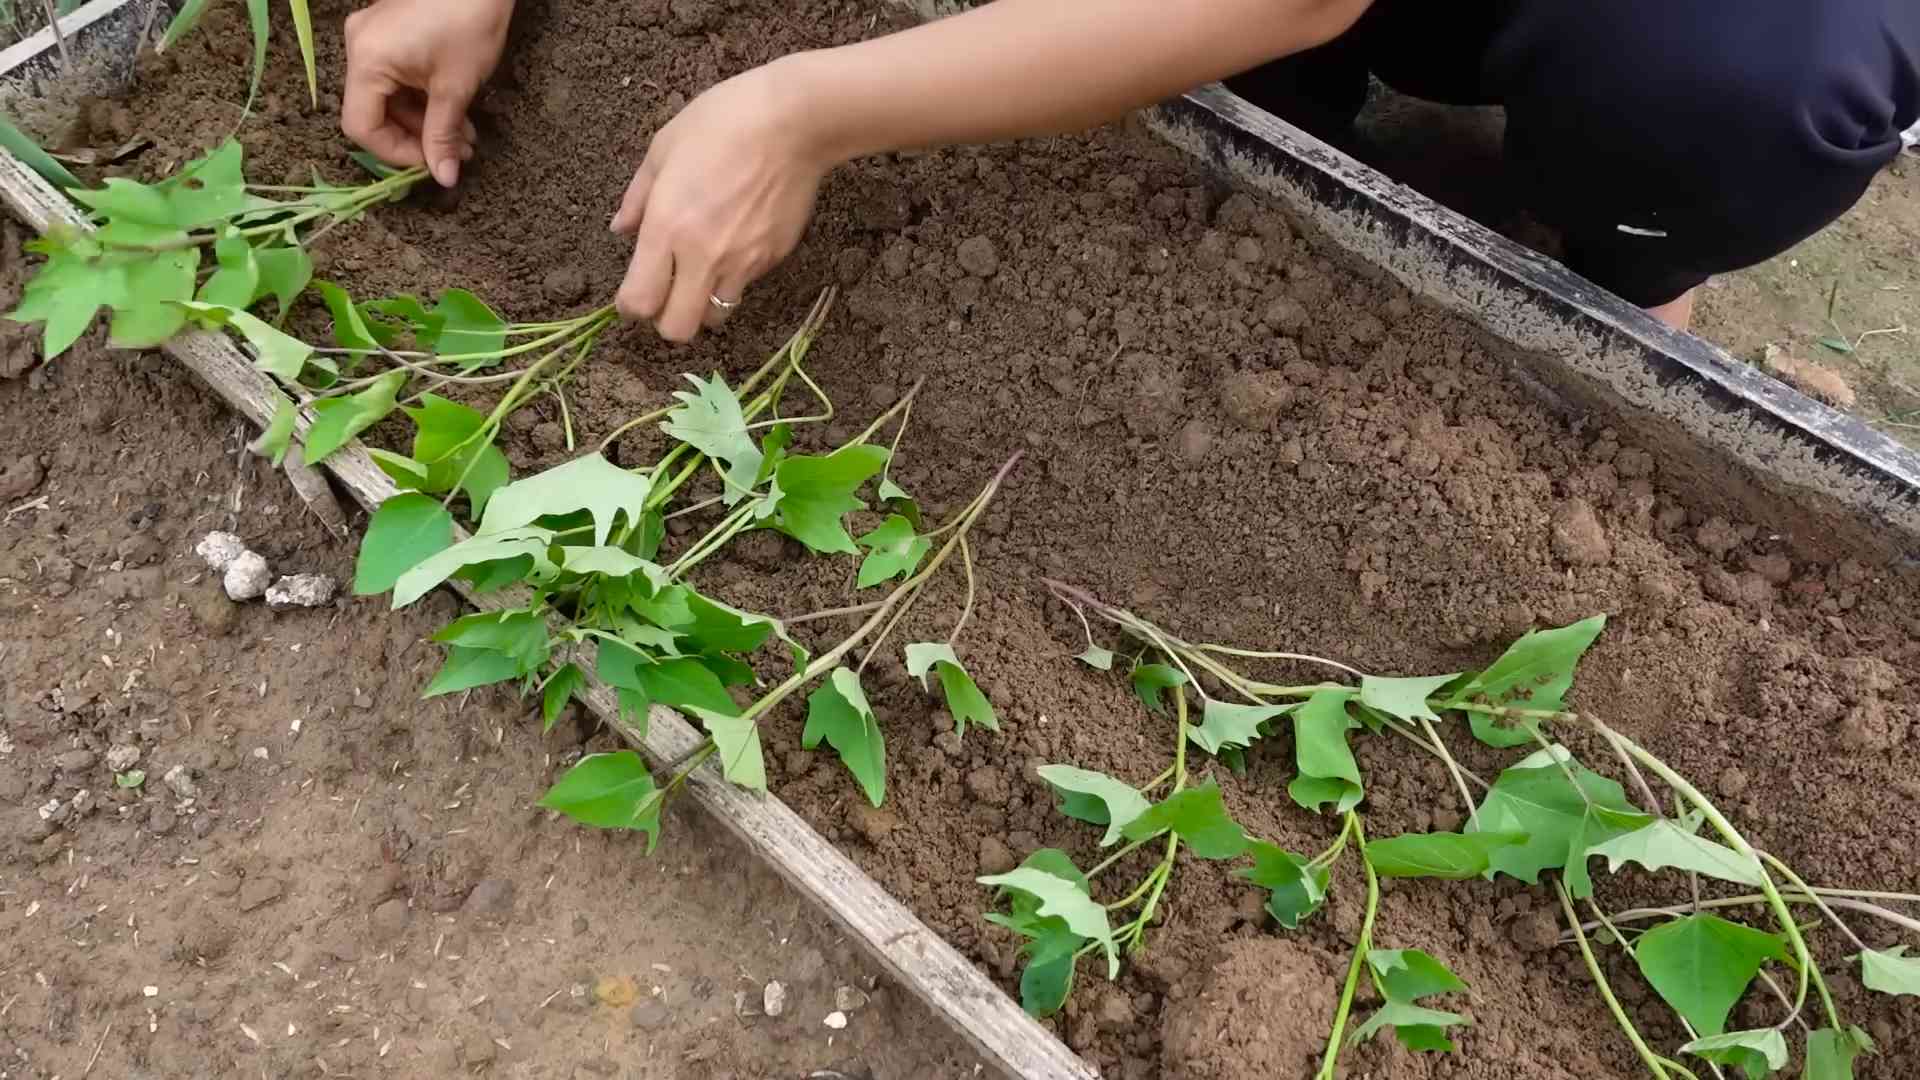
Planting Sweet Potato Slips
Now that you have your sweet potato slips, it’s time to plant them in your prepared garden bed.
1. Timing: Plant sweet potato slips after the last frost, when the soil has warmed up to at least 60°F (15°C).
2. Spacing: Space the slips 12-18 inches apart in rows that are 3-4 feet apart.
3. Planting Depth: Dig a small hole and plant the slip deep enough so that only the top few leaves are above the soil surface.
4. Watering: Water the newly planted slips thoroughly.
5. Mulching: Mulch around the plants with straw, hay, or other organic material to help retain moisture, suppress weeds, and keep the soil cool.
Caring for Your Sweet Potato Plants
Sweet potatoes are relatively low-maintenance plants, but here are a few things you can do to ensure a bountiful harvest:
* Watering: Water regularly, especially during dry spells. Sweet potatoes need consistent moisture to develop large, healthy tubers.
* Weeding: Keep the garden bed free of weeds, which can compete with the sweet potatoes for nutrients and water.
* Fertilizing: Side-dress the plants with a balanced fertilizer a few weeks after planting. Avoid over-fertilizing, as this can lead to excessive vine growth and fewer tubers.
* Vine Training: Sweet potato vines can spread quite a bit, so you may need to train them to stay within their designated area. You can use stakes or trellises to keep the vines off the ground.
* Pest Control: Sweet potatoes are generally pest-resistant, but they can be susceptible to certain pests, such as sweet potato weevils and flea beetles. Inspect your plants regularly and take action if you notice any signs of infestation. Organic pest control methods, such as neem oil or insecticidal soap, can be effective.
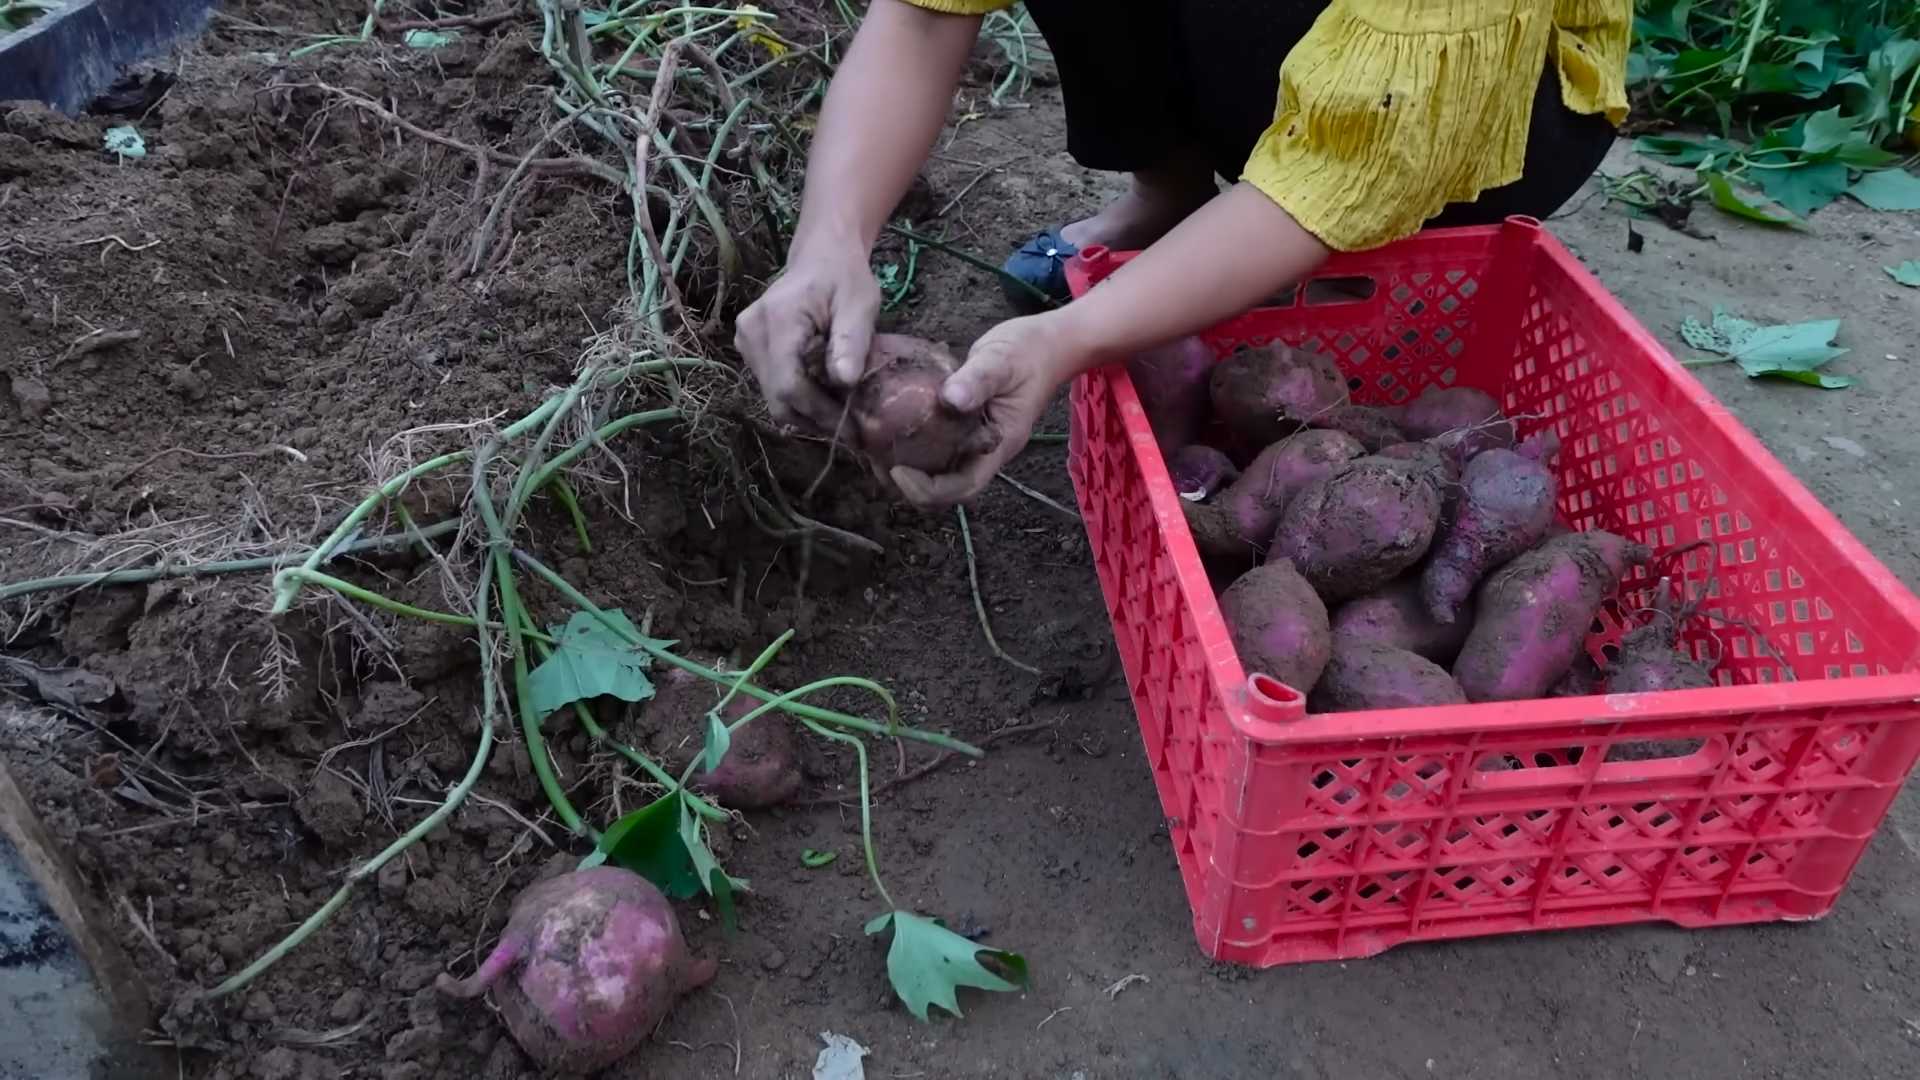
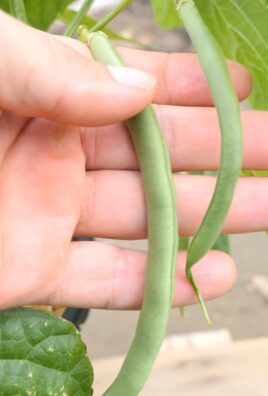
Harvesting Sweet Potatoes
The moment we’ve all been waiting for! Harvesting sweet potatoes is the most rewarding part of the process.
1. Timing: Sweet potatoes are typically ready to harvest 90-120 days after planting. The leaves will start to turn yellow and the vines will begin to die back.
2. Digging: Use a garden fork or shovel to carefully dig up the sweet potatoes. Be careful not to damage the tubers. Start digging a foot or so away from the plant to avoid accidentally spearing the sweet potatoes.
3. Handling: Gently brush off any excess soil from the sweet potatoes. Avoid washing them, as this can shorten their storage life.
4. Curing: Curing is an essential step for improving the flavor and storage life of sweet potatoes. Place the sweet potatoes in a warm, humid location (80-85°F/27-29°C and 85-90% humidity) for 7-10 days. This will allow the skins to harden and any minor cuts or bruises to heal. A greenhouse or a warm, sunny room with a humidifier works well.
5. Storing: After curing, store the sweet potatoes in a cool, dry, and dark location (55-60°F/13-16°C). Avoid storing them in the refrigerator, as this can cause them to develop a hard core. Properly cured and stored sweet potatoes can last for several months.
Troubleshooting Common Problems
Even with the best planning, you might encounter a few challenges along the way. Here are some common problems and how to address them:
* Poor Sprouting: If your sweet potatoes aren’t sprouting, make sure they’re in a warm, sunny location. You can also try gently scoring the skin of the sweet potato to encourage sprouting.
* Yellowing Leaves: Yellowing leaves can be a sign of nutrient deficiency, overwatering, or pest infestation. Check the soil moisture and nutrient levels, and inspect the plants for pests.
* Small Tubers: Small tubers can be caused by poor soil, insufficient sunlight, or over-fertilizing with nitrogen. Amend the soil with compost, ensure the plants are getting enough
Conclusion
So, there you have it! Growing sweet potatoes doesn’t have to be a daunting task reserved for seasoned gardeners. With this simple DIY trick, you can unlock the potential of your garden and enjoy a bountiful harvest of these nutritious and delicious root vegetables. This method simplifies the process, making it accessible even to those with limited space or gardening experience.
Why is this a must-try? Because it’s efficient, cost-effective, and incredibly rewarding. Imagine the satisfaction of nurturing your own sweet potato slips from scraps and watching them transform into thriving plants. Plus, you’ll be reducing food waste by repurposing sweet potatoes that might otherwise end up in the compost bin. It’s a win-win!
But don’t stop there! Get creative with your sweet potato growing journey. Experiment with different varieties of sweet potatoes to discover your favorites. Try growing them in containers on your patio or balcony if you’re short on garden space. You can even explore different soil amendments to optimize growth and yield. Consider companion planting with herbs like rosemary or thyme to deter pests naturally.
Another variation to consider is starting your slips indoors earlier in the season, especially if you live in a cooler climate with a shorter growing season. This will give your plants a head start and ensure a more abundant harvest. You can also experiment with different methods of curing your sweet potatoes after harvesting to enhance their sweetness and improve their storage life. Some people prefer to cure them in a warm, humid environment for a week or two, while others find that simply letting them dry in a well-ventilated area works just as well.
The possibilities are endless! The key is to embrace the process, learn from your experiences, and adapt your approach as needed.
We’re confident that this DIY trick will revolutionize your sweet potato growing experience. It’s a game-changer that will empower you to cultivate your own supply of these versatile vegetables, right in your own backyard.
Now, it’s your turn! We encourage you to give this DIY trick a try and share your results with us. Post photos of your sweet potato slips, your growing plants, and your bountiful harvests on social media using the hashtag #DIYSweetPotatoes. We can’t wait to see your success stories and learn from your experiences. Let’s build a community of sweet potato enthusiasts and share our knowledge to help everyone grow their own delicious and nutritious sweet potatoes.
Don’t be afraid to experiment, adapt, and personalize this method to suit your specific needs and preferences. Gardening is a journey of discovery, and we’re excited to embark on this sweet potato adventure with you. So, grab a sweet potato, follow these simple steps, and get ready to enjoy the fruits (or rather, the roots) of your labor! Happy growing!
Frequently Asked Questions (FAQ)
What kind of sweet potato should I use to start slips?
You can use any sweet potato you find at the grocery store or farmer’s market, but organic sweet potatoes are generally recommended. Non-organic sweet potatoes may be treated with sprout inhibitors, which can prevent them from producing slips. Look for sweet potatoes that are firm, free of blemishes, and have a few “eyes” or small bumps on the surface. These eyes are where the sprouts will emerge.
How long does it take for sweet potato slips to grow?
The time it takes for slips to grow can vary depending on factors such as temperature, humidity, and the variety of sweet potato. Generally, you can expect to see sprouts emerging within 2-4 weeks. Once the sprouts are about 6-8 inches long, they are ready to be removed and planted.
How do I remove the slips from the sweet potato?
Once the slips have reached a suitable size, gently twist or snap them off the sweet potato. You can also use a sharp knife to carefully cut them off. Be sure to leave a small portion of the slip attached to the sweet potato, as this will encourage new slips to grow.
Can I root the slips in water before planting them?
Yes, rooting the slips in water is a great way to encourage strong root development before planting them in soil. Simply place the slips in a jar or glass of water, ensuring that the bottom portion of the stem is submerged. Change the water every few days to prevent bacterial growth. Within a week or two, you should see roots forming. Once the roots are about an inch long, the slips are ready to be planted.
What kind of soil is best for growing sweet potatoes?
Sweet potatoes prefer well-drained, sandy loam soil that is rich in organic matter. Avoid heavy clay soils, as they can become waterlogged and hinder root development. Before planting, amend your soil with compost or other organic matter to improve drainage and fertility.
How much sunlight do sweet potatoes need?
Sweet potatoes need at least 6-8 hours of direct sunlight per day to thrive. Choose a sunny location in your garden where your plants will receive ample sunlight.
How often should I water sweet potatoes?
Water sweet potatoes regularly, especially during dry periods. Keep the soil consistently moist, but avoid overwatering, as this can lead to root rot. A good rule of thumb is to water deeply whenever the top inch of soil feels dry to the touch.
When is the best time to harvest sweet potatoes?
Sweet potatoes are typically ready to harvest in the fall, about 90-120 days after planting. The leaves will start to turn yellow and the vines will begin to die back. To harvest, carefully dig around the plants with a garden fork, being careful not to damage the sweet potatoes. Gently lift the sweet potatoes from the soil and brush off any excess dirt.
How do I cure sweet potatoes after harvesting?
Curing sweet potatoes is essential for enhancing their sweetness and improving their storage life. To cure sweet potatoes, place them in a warm, humid environment (80-85°F and 85-90% humidity) for 7-10 days. This can be achieved by placing them in a well-ventilated room with a humidifier or by wrapping them in damp towels. After curing, store the sweet potatoes in a cool, dry place (55-60°F) for several months.
Can I grow sweet potatoes in containers?
Yes, sweet potatoes can be grown in containers, making them a great option for those with limited garden space. Choose a large container (at least 20 gallons) with good drainage. Fill the container with well-drained potting mix and plant your sweet potato slips. Water regularly and fertilize as needed.
What are some common pests and diseases that affect sweet potatoes?
Some common pests that can affect sweet potatoes include sweet potato weevils, flea beetles, and aphids. Diseases that can affect sweet potatoes include fusarium wilt, black rot, and scurf. To prevent pests and diseases, practice good garden hygiene, such as removing weeds and debris, and rotate your crops regularly. You can also use organic pest control methods, such as insecticidal soap or neem oil.
Can I eat the sweet potato leaves?
Yes, sweet potato leaves are edible and nutritious. They can be eaten raw in salads or cooked like spinach. Choose young, tender leaves for the best flavor.
How do I store sweet potatoes long-term?
After curing, store sweet potatoes in a cool, dry, and well-ventilated place, ideally between 55-60°F (13-16°C). Avoid storing them in the refrigerator, as this can cause them to develop a hard core and lose their flavor. Properly cured and stored sweet potatoes can last for several months.
What if my sweet potato doesn’t sprout?
Sometimes, despite your best efforts, a sweet potato may not sprout. This could be due to several factors, such as the sweet potato being treated with a sprout inhibitor, being too old, or not having enough warmth or moisture. If your sweet potato doesn’t sprout after a few weeks, try starting with a fresh sweet potato. Make sure to provide adequate warmth and moisture, and consider using an organic sweet potato to avoid sprout inhibitors.
Leave a Comment