

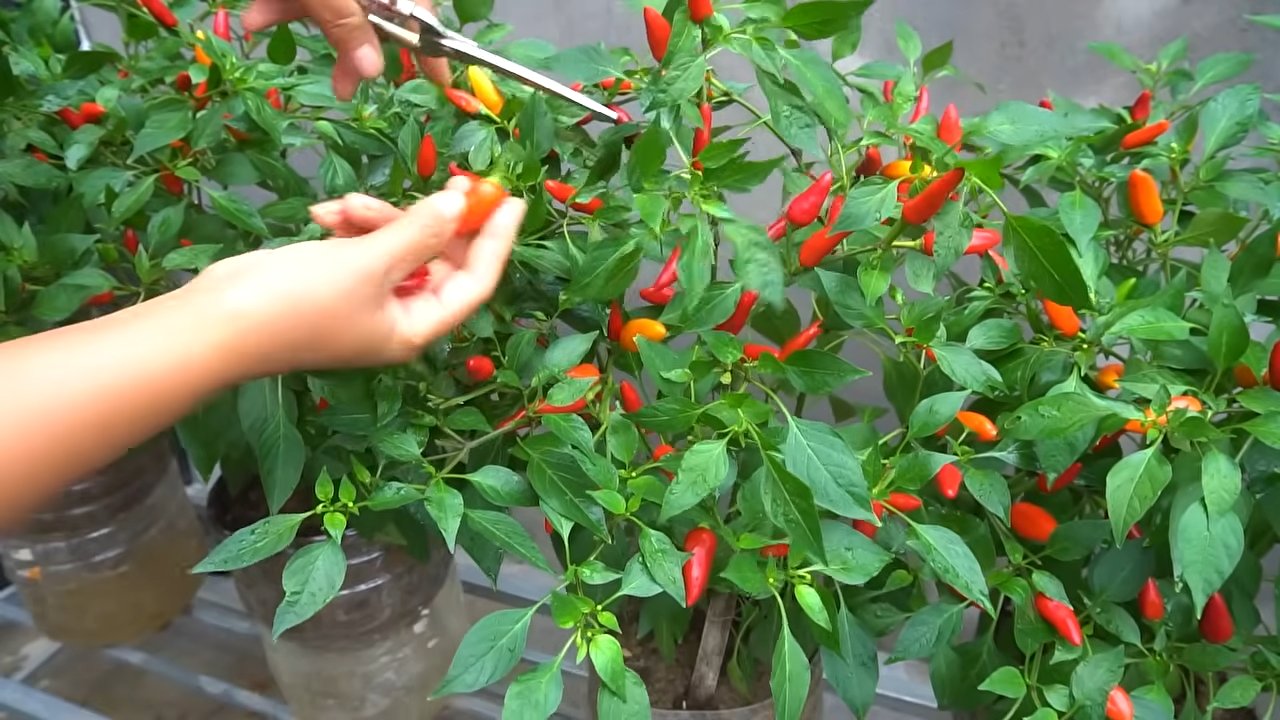
Chili pepper plastic bottle trick: Ever dreamt of a bountiful chili pepper harvest, bursting with fiery flavor, right in your own backyard? I know I have! But sometimes, those delicate seedlings need a little extra TLC to thrive. That’s where this ingenious DIY hack comes in – and trust me, it’s a game-changer.
For centuries, gardeners have sought innovative ways to protect their precious plants from the elements and pesky critters. While the exact origin of using plastic bottles in gardening is hard to pinpoint, the resourcefulness it embodies speaks to a long tradition of making the most of available materials. Think of it as a modern twist on ancient cloche techniques, where glass jars were used to create mini-greenhouses.
Why is this chili pepper plastic bottle trick so essential? Well, chili peppers are notoriously sensitive to temperature fluctuations, especially when they’re young. A sudden cold snap or a strong gust of wind can easily stunt their growth or even kill them outright. Plus, they’re a favorite snack for snails, slugs, and other garden pests. This simple DIY solution provides a protective barrier, creating a warm, humid microclimate that encourages healthy growth and shields your seedlings from unwanted attention. It’s an easy, affordable, and eco-friendly way to give your chili peppers the best possible start, ensuring a spicy and satisfying harvest. So, let’s dive in and learn how to transform those empty plastic bottles into miniature chili pepper havens!
DIY Pest Control: The Chili Pepper Plastic Bottle Trick
Hey everyone! I’m so excited to share this super effective and budget-friendly DIY pest control trick with you. If you’re like me and love gardening but hate those pesky critters munching on your precious plants, then you’re in the right place. This chili pepper plastic bottle trick is a game-changer, and it’s surprisingly easy to make! We’re going to create a potent, natural pesticide using ingredients you probably already have at home. Let’s get started!
What You’ll Need
Before we dive into the step-by-step instructions, let’s gather all the necessary materials. Trust me, having everything ready beforehand will make the whole process much smoother.
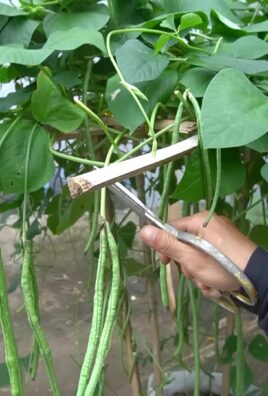
* **Plastic Bottle:** A clean, empty plastic bottle (like a soda or water bottle) will serve as our container. I usually use a 2-liter bottle because it holds a good amount of solution, but any size will work.
* **Chili Peppers:** Fresh or dried chili peppers are the star of the show! The hotter the peppers, the more effective your pesticide will be. I prefer using a mix of different types for maximum potency. About 10-15 peppers should do the trick.
* **Garlic:** Garlic adds another layer of pest-repelling power. About 4-5 cloves will be perfect.
* **Onion:** Similar to garlic, onion has strong-smelling compounds that deter many pests. Half of a medium-sized onion is all you need.
* **Dish Soap:** A few drops of mild dish soap will help the solution stick to the plants. Make sure it’s a gentle formula, as harsh soaps can damage your plants.
* **Water:** We’ll need water to dilute the mixture and create our spray.
* **Spray Bottle:** This is essential for applying the pesticide to your plants.
* **Gloves:** I highly recommend wearing gloves when handling chili peppers, as they can irritate your skin.
* **Cutting Board and Knife:** For chopping the ingredients.
* **Pot (Optional):** If you choose to boil the mixture, you’ll need a pot.
* **Strainer or Cheesecloth:** To filter the mixture before pouring it into the spray bottle.
Preparing the Ingredients
This is where the magic begins! We need to prepare our ingredients to release their pest-repelling properties.
1. **Chop the Chili Peppers:** Put on your gloves! Carefully chop the chili peppers into small pieces. The smaller the pieces, the more effectively they’ll release their capsaicin (the compound that makes them spicy and repels pests). Be careful not to touch your eyes or face while handling the peppers.
2. **Mince the Garlic:** Peel the garlic cloves and mince them finely. Mincing helps release the allicin, another powerful pest repellent.
3. **Chop the Onion:** Chop the onion into small pieces. Just like garlic, the smaller the pieces, the better.
Making the Chili Pepper Solution
Now, let’s combine all the ingredients and create our potent pest control solution. You have two options here: the cold infusion method or the boiling method. I’ll explain both, and you can choose the one that suits you best.
Cold Infusion Method
This method is simple and requires no heat. It takes a bit longer, but it preserves more of the beneficial compounds in the ingredients.
1. **Combine Ingredients:** In the plastic bottle, combine the chopped chili peppers, minced garlic, and chopped onion.
2. **Add Water:** Fill the bottle with water, leaving a little space at the top.
3. **Add Dish Soap:** Add a few drops of mild dish soap (about 1 teaspoon).
4. **Shake Well:** Secure the lid and shake the bottle vigorously to mix everything thoroughly.
5. **Let it Steep:** Place the bottle in a cool, dark place for at least 2-3 days, or even up to a week. The longer it steeps, the stronger the solution will be. Shake the bottle daily.
Boiling Method
This method is faster and extracts the pest-repelling compounds more quickly. However, some of the beneficial compounds might be lost during the boiling process.
1. **Combine Ingredients:** In a pot, combine the chopped chili peppers, minced garlic, and chopped onion.
2. **Add Water:** Add enough water to cover the ingredients (about 4-5 cups).
3. **Boil the Mixture:** Bring the mixture to a boil over medium heat. Once boiling, reduce the heat and let it simmer for about 20-30 minutes.
4. **Cool Down:** Remove the pot from the heat and let the mixture cool completely.
Filtering and Diluting the Solution
Before we can use our chili pepper solution, we need to filter it to remove any solid particles that could clog the spray bottle. We also need to dilute it to prevent it from burning our plants.
1. **Strain the Mixture:** Place a strainer or cheesecloth over a bowl or measuring cup. Pour the chili pepper solution through the strainer to remove the solid particles. Squeeze the solids to extract as much liquid as possible.
2. **Dilute the Solution:** This is crucial! The chili pepper solution is very potent and can damage your plants if used undiluted. I usually dilute it with water in a ratio of 1:10 (1 part chili pepper solution to 10 parts water). For example, if you have 1 cup of chili pepper solution, add 10 cups of water. You can adjust the dilution ratio depending on the sensitivity of your plants. It’s always best to start with a weaker solution and increase the concentration if needed.
3. **Add Dish Soap (if not already added):** If you haven’t already added dish soap, add a few drops (about 1 teaspoon per gallon of diluted solution) to help the solution stick to the plants.
4. **Mix Well:** Stir the diluted solution thoroughly.
Applying the Chili Pepper Pesticide
Now comes the fun part – protecting our plants!
1. **Test on a Small Area:** Before spraying the entire plant, test the solution on a small, inconspicuous area to make sure it doesn’t cause any damage. Wait 24 hours to observe the results.
2. **Spray the Plants:** Pour the diluted chili pepper solution into a spray bottle. Spray the plants thoroughly, paying attention to the undersides of the leaves, where many pests like to hide.
3. **Spray in the Evening:** It’s best to spray in the evening or early morning when the sun isn’t too strong. This will prevent the solution from burning the leaves.
4. **Reapply as Needed:** Reapply the chili pepper pesticide every few days or after it rains.
Tips and Precautions
* Always wear gloves when handling chili peppers and the solution.
* Avoid spraying on windy days to prevent the solution from drifting onto unintended areas.
* Don’t spray during flowering, as it can deter pollinators.
* Store the solution in a cool, dark place. It should last for several weeks.
* Be mindful of pets and children. Keep the solution out of their reach.
* Observe your plants carefully for any signs of damage. If you notice any burning or discoloration, dilute the solution further.
* This pesticide is effective against a wide range of pests, including aphids, spider mites, whiteflies, and caterpillars.
* Consider adding other natural pest repellents to the mixture, such as neem oil or essential oils (like peppermint or rosemary).
* Remember that this is a natural pesticide, so it may not be as effective as synthetic pesticides. However, it’s a much safer and more environmentally friendly option.
* If you have a severe pest infestation, you may need to use a combination of methods to control it.
Troubleshooting
* **Solution not working?** Make sure you’re using hot peppers and enough garlic and onion. You might also need to increase the concentration of the solution (but test it on a small area first!).
* **Plants getting burned?** Dilute the solution further.
* **Spray bottle clogged?** Make sure you’ve filtered the solution properly.
I hope this DIY chili pepper plastic bottle trick helps you keep your garden pest-free! It’s a simple, effective, and affordable way to protect your plants without resorting to harsh chemicals. Happy gardening!
Conclusion
So, there you have it! The chili pepper plastic bottle trick – a simple, ingenious, and surprisingly effective method for preserving your precious chili peppers and unlocking a world of culinary possibilities. This isn’t just about preventing spoilage; it’s about maximizing flavor, minimizing waste, and empowering you to enjoy the vibrant heat of your chili peppers year-round.
Why is this DIY trick a must-try? Because it’s incredibly easy, cost-effective, and yields impressive results. Forget about complicated canning processes or expensive dehydrators. All you need is a clean plastic bottle and a little bit of patience. The airtight environment created within the bottle protects your chili peppers from moisture and oxidation, the two primary culprits behind spoilage. This means your peppers retain their color, aroma, and, most importantly, their fiery kick for months to come.
Imagine having a stash of perfectly preserved chili peppers ready to add a burst of flavor to your winter stews, summer salsas, or any dish that needs a little extra zing. No more last-minute trips to the grocery store or settling for bland, dried-out peppers. With this simple trick, you’ll always have a supply of fresh-tasting chili peppers at your fingertips.
But the benefits don’t stop there. This method is also incredibly versatile. Feel free to experiment with different types of chili peppers, from mild jalapeños to scorching habaneros. You can even add other aromatics, such as garlic cloves or bay leaves, to infuse your peppers with even more flavor. Consider adding a pinch of salt to the bottle to further inhibit mold growth. For those who prefer a smoky flavor, lightly roast your chili peppers before placing them in the bottle. This will add a depth of complexity to your preserved peppers that is simply irresistible.
Don’t be afraid to get creative and tailor this technique to your own preferences. The possibilities are endless!
We wholeheartedly encourage you to try this chili pepper plastic bottle trick. It’s a game-changer for anyone who loves chili peppers and wants to preserve their flavor and freshness. It’s a fantastic way to reduce food waste, save money, and elevate your cooking to the next level.
Once you’ve tried it, we’d love to hear about your experience! Share your tips, variations, and success stories in the comments below. Let’s build a community of chili pepper enthusiasts and learn from each other. Did you try a specific type of pepper? Did you add any unique aromatics? What dishes did you use your preserved peppers in? Your feedback is invaluable and will help others discover the magic of this simple yet effective preservation method.
So, grab a plastic bottle, gather your chili peppers, and get ready to embark on a flavor-filled adventure. You won’t be disappointed! This chili pepper plastic bottle trick is a must-try for any home cook looking to preserve the taste of summer and add a touch of heat to their culinary creations.
Frequently Asked Questions (FAQ)
1. What type of plastic bottle should I use?
The best type of plastic bottle to use is a clean, dry, and food-grade plastic bottle. Look for bottles that are labeled with a recycling symbol and a number, typically 1 or 2, indicating that they are made from PET or HDPE plastic, respectively. These types of plastic are generally considered safe for food storage. Avoid using bottles that have previously contained strong-smelling or flavored liquids, as these odors can transfer to your chili peppers. Thoroughly wash and dry the bottle before use to ensure it is free of any contaminants. A bottle with a wide mouth will make it easier to pack the peppers inside.
2. Do I need to wash the chili peppers before putting them in the bottle?
Yes, it’s essential to wash your chili peppers thoroughly before placing them in the bottle. This will remove any dirt, debris, or pesticide residue that may be present on the surface of the peppers. Gently wash the peppers under cool running water, using a soft brush if necessary to remove any stubborn dirt. After washing, make sure to dry the peppers completely before placing them in the bottle. Any excess moisture can promote mold growth and compromise the preservation process. You can use a clean kitchen towel or paper towels to pat the peppers dry.
3. How long will the chili peppers last in the plastic bottle?
When stored properly, chili peppers preserved using the plastic bottle trick can last for several months, even up to a year. The key to long-term storage is to ensure that the bottle is completely airtight and stored in a cool, dark, and dry place. Avoid exposing the bottle to direct sunlight or extreme temperatures, as this can degrade the quality of the peppers. Regularly check the bottle for any signs of spoilage, such as mold growth or discoloration. If you notice any of these signs, discard the peppers immediately.
4. Can I use this method for other types of peppers besides chili peppers?
Yes, this method can be used for other types of peppers, such as bell peppers, jalapeños, and banana peppers. However, keep in mind that the shelf life may vary depending on the type of pepper and its moisture content. Peppers with higher moisture content may not last as long as chili peppers. It’s always a good idea to experiment and see what works best for you. You can also try combining different types of peppers in the same bottle for a unique flavor blend.
5. What if I don’t have a plastic bottle? Can I use a glass jar instead?
While a plastic bottle is the preferred container for this method due to its flexibility and ability to create an airtight seal, you can use a glass jar as an alternative. However, it’s important to ensure that the jar is completely clean, dry, and airtight. Use a jar with a tight-fitting lid and consider using a vacuum sealer to remove any excess air from the jar. Glass jars are more prone to breakage than plastic bottles, so handle them with care.
6. Can I add any other ingredients to the bottle along with the chili peppers?
Yes, you can add other ingredients to the bottle to enhance the flavor of your preserved chili peppers. Some popular additions include garlic cloves, bay leaves, peppercorns, and dried herbs. These ingredients will infuse the peppers with their aroma and flavor, creating a more complex and interesting taste. Be sure to use fresh, high-quality ingredients and avoid adding anything that could introduce moisture into the bottle.
7. How do I know if the chili peppers have gone bad?
There are several signs that indicate that your chili peppers have gone bad. Look for any signs of mold growth, discoloration, or a foul odor. If the peppers appear slimy or mushy, they are no longer safe to eat. Discard any peppers that show these signs immediately. It’s always better to err on the side of caution when it comes to food safety.
8. What’s the best way to use the preserved chili peppers?
The preserved chili peppers can be used in a variety of dishes to add heat and flavor. You can chop them up and add them to salsas, stews, soups, sauces, and marinades. They can also be used to make chili oil or chili flakes. The possibilities are endless! Remember that the preserved peppers will be quite potent, so start with a small amount and add more to taste.
9. Can I freeze the chili peppers after preserving them in the bottle?
Yes, you can freeze the chili peppers after preserving them in the bottle. This will further extend their shelf life and preserve their flavor. Simply remove the peppers from the bottle and place them in a freezer-safe bag or container. Be sure to remove as much air as possible from the bag or container to prevent freezer burn. The frozen peppers can be used directly from the freezer in your favorite recipes.
10. Is this method safe for long-term storage?
The chili pepper plastic bottle trick is generally considered safe for long-term storage, provided that you follow the instructions carefully and take proper precautions. Ensure that the bottle is completely clean, dry, and airtight, and store it in a cool, dark, and dry place. Regularly check the bottle for any signs of spoilage. If you have any concerns about the safety of this method, consult with a food safety expert.
Leave a Comment