

Grow Swiss Chard Easily, even if you think you don’t have a green thumb! Have you ever dreamt of stepping into your backyard and harvesting vibrant, nutritious greens for a delicious and healthy meal? Well, dream no more! This DIY guide will unlock the secrets to cultivating your own thriving Swiss chard patch, transforming your garden (or even a sunny balcony!) into a source of fresh, homegrown goodness.
Swiss chard, with its colorful stalks and crinkled leaves, isn’t just a pretty face. It boasts a rich history, dating back to ancient Greece and Rome, where it was prized for its medicinal properties and culinary versatility. For centuries, cultures around the world have enjoyed this leafy green, incorporating it into soups, stews, salads, and more.
But why should you bother to grow Swiss chard easily? In today’s world, where access to fresh, organic produce can be limited or expensive, growing your own food offers a fantastic solution. Not only will you save money, but you’ll also have the satisfaction of knowing exactly where your food comes from and how it was grown. Plus, Swiss chard is packed with vitamins and minerals, making it a superfood you can feel good about adding to your diet. So, let’s dive in and discover the simple steps to growing this amazing vegetable at home!
Growing Swiss Chard: A Beginner’s Guide to Bountiful Harvests
Hey there, fellow gardening enthusiasts! I’m so excited to share my experience with growing Swiss chard. It’s one of the easiest and most rewarding vegetables to cultivate, offering a vibrant splash of color and a ton of nutrients to your meals. Plus, it’s incredibly versatile in the kitchen. Let’s dive into how you can grow your own beautiful and delicious Swiss chard!
Choosing Your Swiss Chard Variety
First things first, let’s talk about varieties. Swiss chard comes in a rainbow of colors, and honestly, choosing is half the fun! Here are a few popular options:
- Bright Lights: This is probably the most well-known variety, boasting stems in shades of red, yellow, orange, pink, and white. It’s a real showstopper in the garden!
- Ruby Red: As the name suggests, this variety has striking deep red stems and veins. It’s a classic choice for adding a pop of color.
- Fordhook Giant: If you’re looking for a more traditional green chard, Fordhook Giant is a great option. It has large, dark green leaves and thick, white stems.
- Lucullus: This variety offers tender, slightly savoyed leaves and a mild flavor. It’s a good choice if you prefer a more delicate taste.
I personally love growing Bright Lights because it adds so much visual interest to my garden. But really, any variety will do! Choose one that appeals to you and fits your taste preferences.
Getting Started: Planting Your Swiss Chard
Swiss chard is relatively easy to start from seed, either directly in the garden or indoors for transplanting. I’ve had success with both methods, so I’ll walk you through each one.
Direct Sowing
Direct sowing is the simplest method, especially if you live in a climate with mild springs and summers.
- Prepare the Soil: Swiss chard prefers well-drained soil that’s rich in organic matter. Before planting, amend your soil with compost or well-rotted manure. This will provide essential nutrients and improve drainage. I usually dig in about 2-3 inches of compost.
- Choose Your Planting Location: Swiss chard thrives in full sun (6-8 hours of sunlight per day), but it can also tolerate partial shade, especially in hotter climates. Make sure your chosen spot has good drainage.
- Sow the Seeds: Sow the seeds about 陆 inch deep and 1-2 inches apart in rows that are 18-24 inches apart. You can use your finger to make a small trench, sprinkle in the seeds, and then gently cover them with soil.
- Water Gently: Water the soil gently after planting to keep it moist but not waterlogged. I like to use a watering can with a rose head to avoid disturbing the seeds.
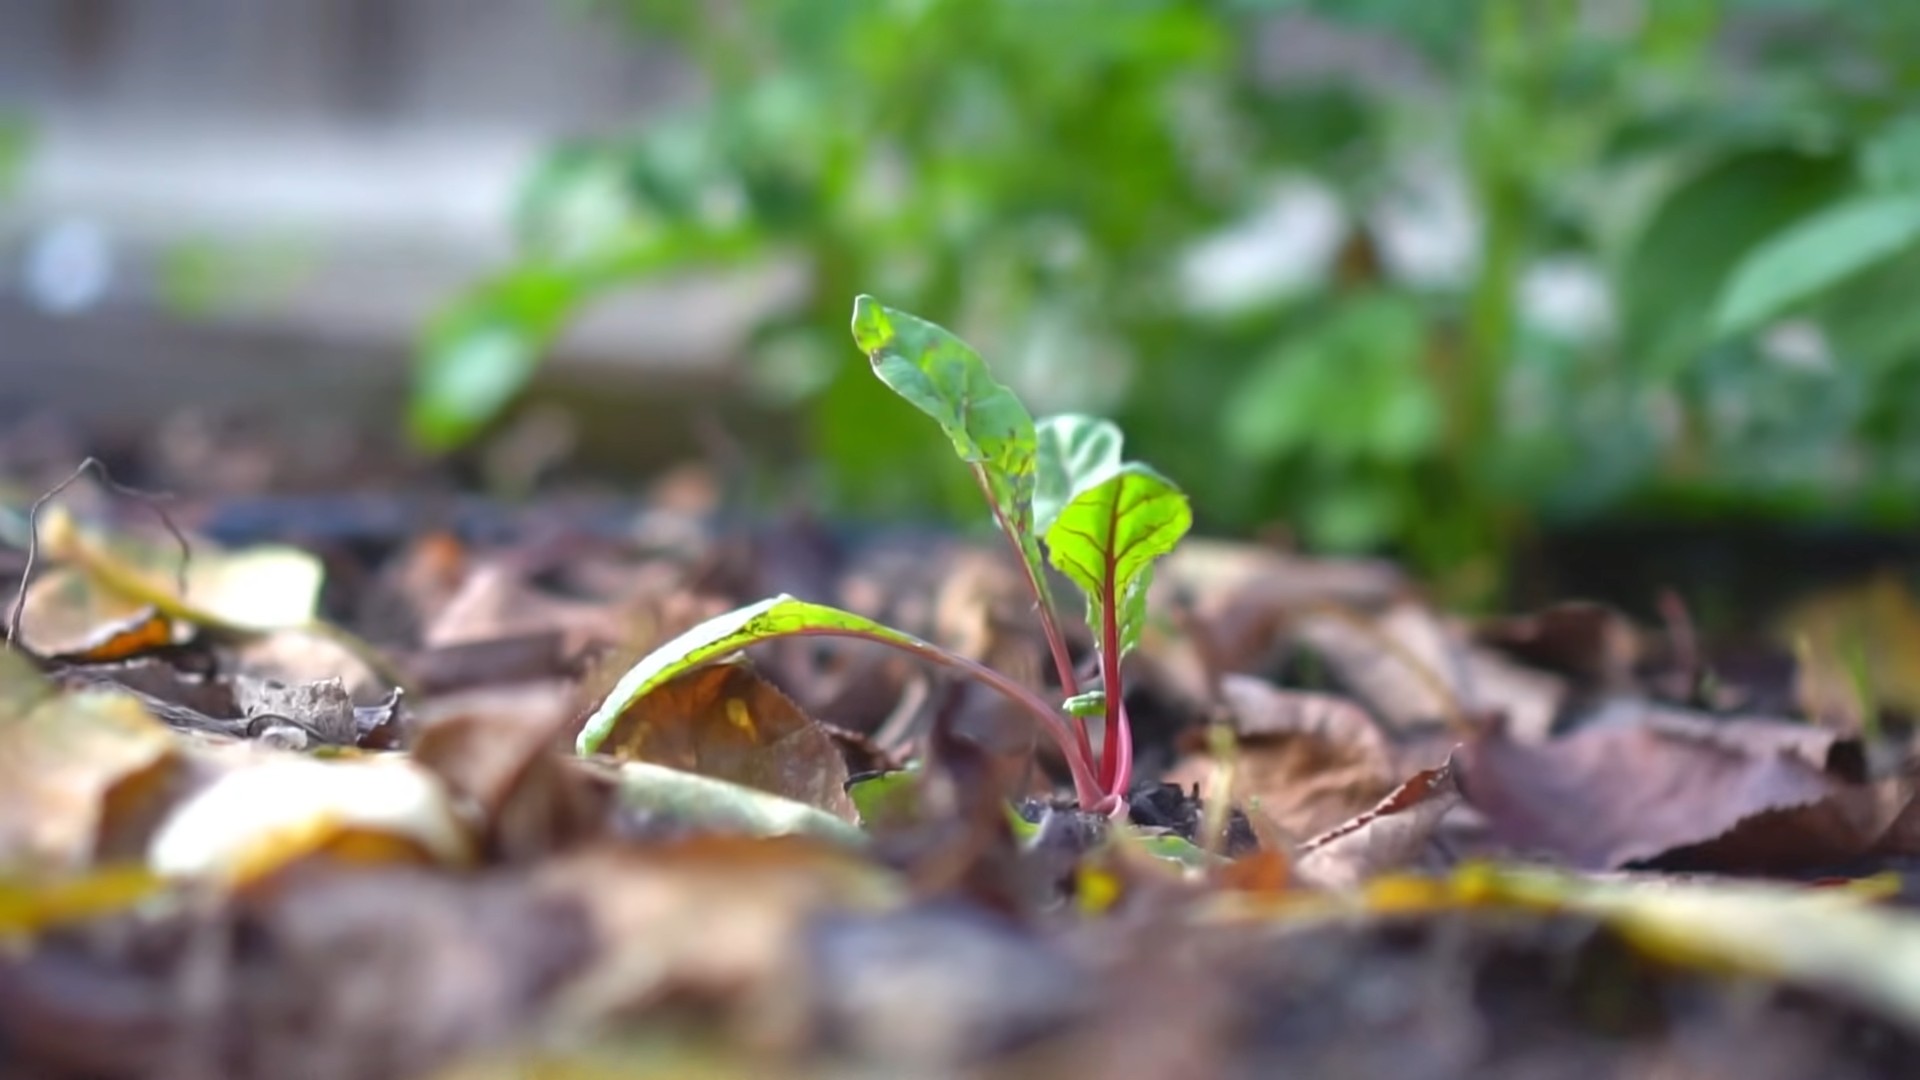
- Thin Seedlings: Once the seedlings emerge (usually in 5-10 days), thin them to about 6-12 inches apart. This will give them enough space to grow and mature. Don’t just pull them out! Gently snip them at the soil line with scissors to avoid disturbing the roots of the remaining plants.
Starting Seeds Indoors
Starting seeds indoors gives you a head start on the growing season, especially if you live in a colder climate.
- Gather Your Supplies: You’ll need seed starting trays or small pots, seed starting mix, Swiss chard seeds, and a spray bottle.
- Fill the Trays/Pots: Fill your seed starting trays or pots with seed starting mix. Gently pat it down to remove any air pockets.
- Sow the Seeds: Sow 2-3 seeds per cell or pot, about 陆 inch deep.
- Water Gently: Water the soil gently with a spray bottle to moisten it.
- Provide Light and Warmth: Place the trays or pots in a warm location with plenty of light. A sunny windowsill or a grow light works well. The ideal temperature for germination is around 70-75掳F (21-24掳C).
- Keep the Soil Moist: Keep the soil consistently moist but not waterlogged. Check the soil daily and water as needed.
- Harden Off Seedlings: Once the seedlings have developed a few sets of true leaves (usually after 4-6 weeks), it’s time to harden them off. This process gradually acclimates the seedlings to outdoor conditions. Start by placing them outside for a few hours each day, gradually increasing the amount of time they spend outdoors over the course of a week.
- Transplant Seedlings: After hardening off, transplant the seedlings into your garden, spacing them 6-12 inches apart. Be careful not to damage the roots during transplanting.
Caring for Your Swiss Chard
Once your Swiss chard is planted, it’s relatively low-maintenance. Here are a few tips to keep your plants healthy and productive:
- Watering: Water regularly, especially during dry periods. Swiss chard needs consistent moisture to thrive. Aim for about 1 inch of water per week.
- Fertilizing: Fertilize your Swiss chard every few weeks with a balanced fertilizer or compost tea. This will provide essential nutrients and promote healthy growth. I like to use a liquid seaweed fertilizer diluted according to the package instructions.
- Weeding: Keep the area around your Swiss chard free of weeds. Weeds compete with your plants for nutrients and water. Mulching can help suppress weeds and retain moisture.
- Pest Control: Swiss chard is generally pest-resistant, but it can occasionally be bothered by aphids, slugs, or snails. Check your plants regularly for signs of pests and take action if necessary. I usually handpick any pests I find or use insecticidal soap for aphids.
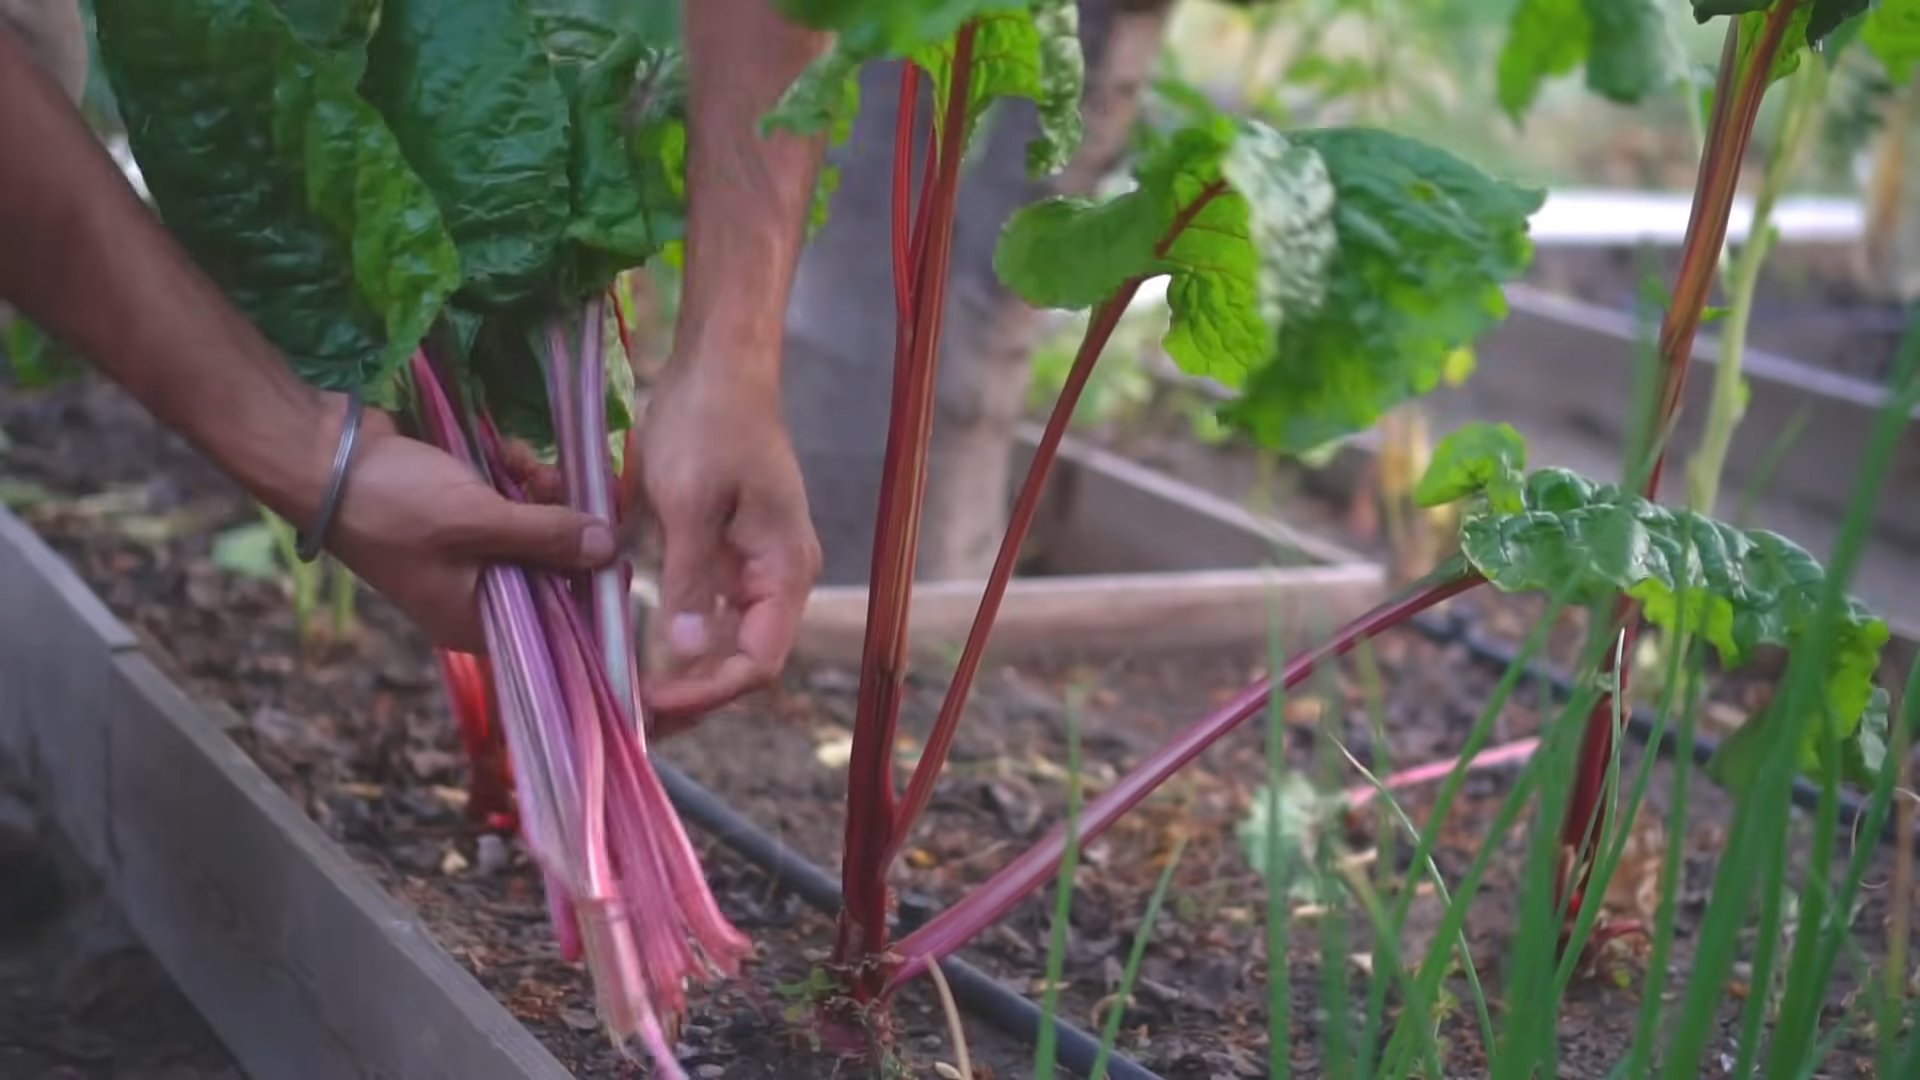
Harvesting Your Swiss Chard
Harvesting is the most rewarding part of growing Swiss chard! You can start harvesting leaves as soon as they are large enough to eat, usually when they are about 6-8 inches long.
- Harvest Outer Leaves: Harvest the outer leaves first, leaving the inner leaves to continue growing. This is known as the “cut-and-come-again” method, and it allows you to harvest Swiss chard continuously throughout the growing season.
- Cut at the Base: Use a sharp knife or scissors to cut the leaves at the base of the stem, about 2 inches above the ground.
- Wash and Store: Wash the harvested leaves thoroughly and store them in the refrigerator in a plastic bag or container. They will keep for several days.
Troubleshooting Common Problems
Even with the best care, you might encounter a few problems while growing Swiss chard. Here are some common issues and how to address them:
- Bolting: Bolting occurs when the plant prematurely produces flower stalks, usually due to hot weather or stress. Once a plant bolts, the leaves become bitter. To prevent bolting, provide shade during hot weather and ensure consistent watering. If your plant does bolt, you can still harvest the leaves, but they may not taste as good.
- Leaf Miners: Leaf miners are small insects that tunnel through the leaves, leaving unsightly trails. To control leaf miners, you can cover your plants with row covers or use insecticidal soap.
- Yellowing Leaves: Yellowing leaves can be a sign of nutrient deficiency, overwatering, or underwatering. Check the soil moisture and adjust your watering accordingly. Fertilize your plants with a balanced fertilizer to address any nutrient deficiencies.
Enjoying Your Harvest
Now for the best part: enjoying your homegrown Swiss chard! This versatile vegetable can be used in a variety of dishes. Here are a few of my favorite ways to use it:
- Saut茅ed: Saut茅 Swiss chard with garlic, olive oil, and a pinch of salt and pepper for a simple and delicious side dish.
- In Soups and Stews: Add chopped Swiss chard to soups and stews for extra nutrients and flavor.
- In Salads: Use young, tender Swiss chard leaves in salads for a pop of color and a slightly earthy flavor.
- In Frittatas and Quiches: Add chopped Swiss chard to frittatas and quiches for a healthy and flavorful breakfast or brunch.
- Steamed: Steam Swiss chard and serve it with a squeeze of lemon juice and a drizzle of olive oil.
I hope this guide has inspired you to grow your own Swiss chard. It’s a rewarding and delicious experience that anyone can enjoy! Happy gardening!
Conclusion
So, there you have it! Growing your own Swiss chard from scraps is not just a fun gardening experiment; it’s a sustainable, cost-effective, and incredibly rewarding way to enjoy fresh, nutritious greens right from your kitchen or garden. We’ve walked you through the simple steps, from selecting your chard stalks to nurturing them into vibrant, leafy plants.
Why is this DIY trick a must-try? Because it’s a fantastic way to reduce food waste, save money on groceries, and connect with the natural world. Imagine the satisfaction of harvesting your own Swiss chard, knowing that you’ve given new life to something that would have otherwise ended up in the compost bin. Plus, it’s a great conversation starter and a fantastic project to do with kids, teaching them about plant life cycles and the importance of sustainability.
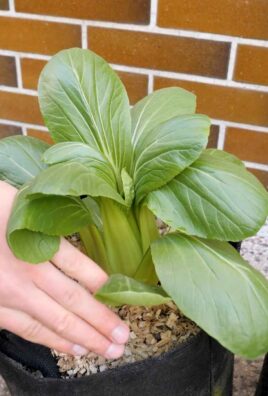
But the fun doesn’t stop there! Feel free to experiment with different varieties of Swiss chard. Try regrowing rainbow chard for a splash of color in your garden and on your plate. You can also adjust the size of your container depending on the space you have available. A small pot is perfect for a windowsill herb garden, while a larger container or raised bed will allow your chard to grow to its full potential.
Consider companion planting your Swiss chard with other vegetables and herbs. Marigolds can help deter pests, while basil can improve the flavor of your chard. Get creative and see what combinations work best for you!
And don’t forget about the different ways you can enjoy your homegrown Swiss chard. Saut茅 it with garlic and olive oil for a simple side dish, add it to soups and stews for extra nutrients, or use it in salads for a fresh, earthy flavor. The possibilities are endless!
We are confident that you’ll find this DIY Swiss chard regrowing project to be both enjoyable and successful. It’s a testament to the resilience of nature and a reminder that even the smallest scraps can have the potential for new growth.
Now, it’s your turn! We encourage you to give this DIY trick a try and share your experience with us. Post photos of your regrown Swiss chard on social media using #GrowSwissChardEasily and let us know how it went. We can’t wait to see your leafy creations! Happy gardening!
Frequently Asked Questions (FAQ)
What kind of Swiss chard is best for regrowing?
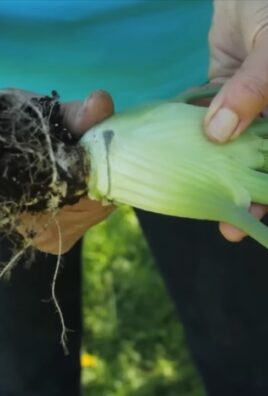
Any variety of Swiss chard can be regrown from scraps, including rainbow chard, red chard, and white-stemmed chard. The key is to select healthy stalks with a firm base and no signs of rot or disease. The fresher the stalk, the better your chances of success. Look for stalks that still have some leaves attached, as these will provide the plant with energy during the initial stages of regrowth.
How long does it take for Swiss chard to regrow?
The time it takes for Swiss chard to regrow from scraps can vary depending on several factors, including the variety of chard, the quality of the stalk, and the environmental conditions. Generally, you can expect to see new leaves emerging within 1-2 weeks of planting the stalk in water. Once you transplant the stalk to soil, it may take another 2-4 weeks for the plant to establish itself and start producing a significant amount of foliage. Be patient and provide your chard with the proper care, and you’ll be rewarded with a bountiful harvest.
Can I grow Swiss chard indoors?
Yes, Swiss chard can be successfully grown indoors, especially if you provide it with adequate light. Place your potted chard near a sunny window that receives at least 6 hours of direct sunlight per day. If you don’t have access to a sunny window, you can supplement with artificial grow lights. Make sure to use a well-draining potting mix and water regularly, allowing the soil to dry out slightly between waterings. Indoor-grown Swiss chard may not grow as large as outdoor-grown chard, but it can still provide you with a steady supply of fresh greens.
What kind of soil is best for growing Swiss chard?
Swiss chard prefers well-draining soil that is rich in organic matter. A good potting mix for Swiss chard should contain a blend of compost, peat moss, and perlite or vermiculite. You can also amend your garden soil with compost or aged manure to improve its fertility and drainage. Swiss chard thrives in soil with a pH between 6.0 and 7.0.
How often should I water my Swiss chard?
Water your Swiss chard regularly, especially during hot, dry weather. The soil should be kept consistently moist, but not waterlogged. Water deeply whenever the top inch of soil feels dry to the touch. Avoid overhead watering, as this can increase the risk of fungal diseases. Instead, water at the base of the plant, using a watering can or a soaker hose.
What are some common pests and diseases that affect Swiss chard?
Swiss chard is generally a hardy plant, but it can be susceptible to certain pests and diseases. Common pests include aphids, slugs, and leaf miners. Aphids can be controlled with insecticidal soap or neem oil. Slugs can be deterred with beer traps or copper tape. Leaf miners can be removed by hand or treated with spinosad. Common diseases include fungal leaf spots and downy mildew. These diseases can be prevented by providing good air circulation, avoiding overhead watering, and applying a fungicide if necessary.
How do I harvest Swiss chard?
You can begin harvesting Swiss chard leaves once they reach a size of about 6-8 inches. To harvest, simply cut the outer leaves near the base of the plant, leaving the inner leaves to continue growing. This cut-and-come-again method allows you to harvest Swiss chard continuously throughout the growing season. Avoid harvesting more than one-third of the plant at a time, as this can weaken it.
Can I eat the stems of Swiss chard?
Yes, the stems of Swiss chard are edible and can be cooked in the same way as the leaves. They have a slightly different texture and flavor than the leaves, but they are equally nutritious. The stems can be saut茅ed, steamed, or added to soups and stews. If the stems are particularly thick, you may want to peel them before cooking.
How do I store Swiss chard?
Freshly harvested Swiss chard can be stored in the refrigerator for up to a week. To store, wrap the leaves in a damp paper towel and place them in a plastic bag or container. You can also blanch and freeze Swiss chard for longer storage. To blanch, submerge the leaves in boiling water for 2-3 minutes, then transfer them to an ice bath to stop the cooking process. Drain the leaves thoroughly and pack them into freezer bags or containers.
Is Swiss chard nutritious?
Yes, Swiss chard is a highly nutritious vegetable. It is an excellent source of vitamins A, C, and K, as well as minerals like potassium, magnesium, and iron. Swiss chard is also a good source of dietary fiber and antioxidants. Incorporating Swiss chard into your diet can help improve your overall health and well-being.

Leave a Comment