

Harvesting Mustard Greens from your own garden is easier than you might think, and it’s a fantastic way to enjoy fresh, flavorful greens right at your table! Have you ever wondered how to bring that vibrant, peppery kick of mustard greens from your backyard to your plate? I’m here to guide you through the simple steps and share some insider tips to make your harvest a success.
Mustard greens have a rich history, cultivated for centuries across Asia and brought to the Americas during the colonial era. They’ve long been valued not only for their distinctive taste but also for their nutritional benefits, packed with vitamins and antioxidants. Think of all the delicious meals you can create with your own homegrown mustard greens!
Why should you learn this DIY trick? Well, store-bought greens often lack the freshness and flavor of homegrown produce. Plus, knowing exactly when and how to harvest ensures you get the most tender and delicious leaves.
Imagine the satisfaction of serving a salad made entirely from your garden!
This guide will empower you to confidently harvest mustard greens at their peak, maximizing their flavor and nutritional value. Let’s get started and unlock the secrets to a bountiful harvest!
Harvesting Mustard Greens Like a Pro: A DIY Guide
Okay, so you’ve nurtured your mustard greens, watched them sprout, and now they’re looking lush and ready to eat. Awesome! But how do you actually harvest them without killing the plant and ensuring you get more delicious greens later? Don’t worry, I’ve got you covered. Harvesting mustard greens is surprisingly easy, and with a few simple steps, you’ll be enjoying fresh, homegrown greens in no time.
Understanding When to Harvest
First things first, let’s talk about timing. Knowing when to harvest is crucial for getting the best flavor and ensuring your plants keep producing.
* Leaf Size: Generally, you want to harvest mustard greens when the leaves are about 6-8 inches long. This is when they’re tender and have the best flavor. Smaller leaves are fine too, especially if you prefer a milder taste.
* Plant Maturity: Mustard greens typically mature in about 40-60 days. Keep an eye on your seed packet or plant tag for specific timing.
* Bolting: Watch out for bolting! This is when the plant starts to flower, and the leaves can become bitter. Hot weather often triggers bolting. If you see flower stalks forming, harvest the remaining leaves quickly.
* Succession Planting: To have a continuous supply of mustard greens, consider succession planting. Sow new seeds every 2-3 weeks. This way, you’ll always have fresh greens ready to harvest.
Tools You’ll Need
You don’t need a ton of fancy equipment for harvesting mustard greens. Here’s a basic list:
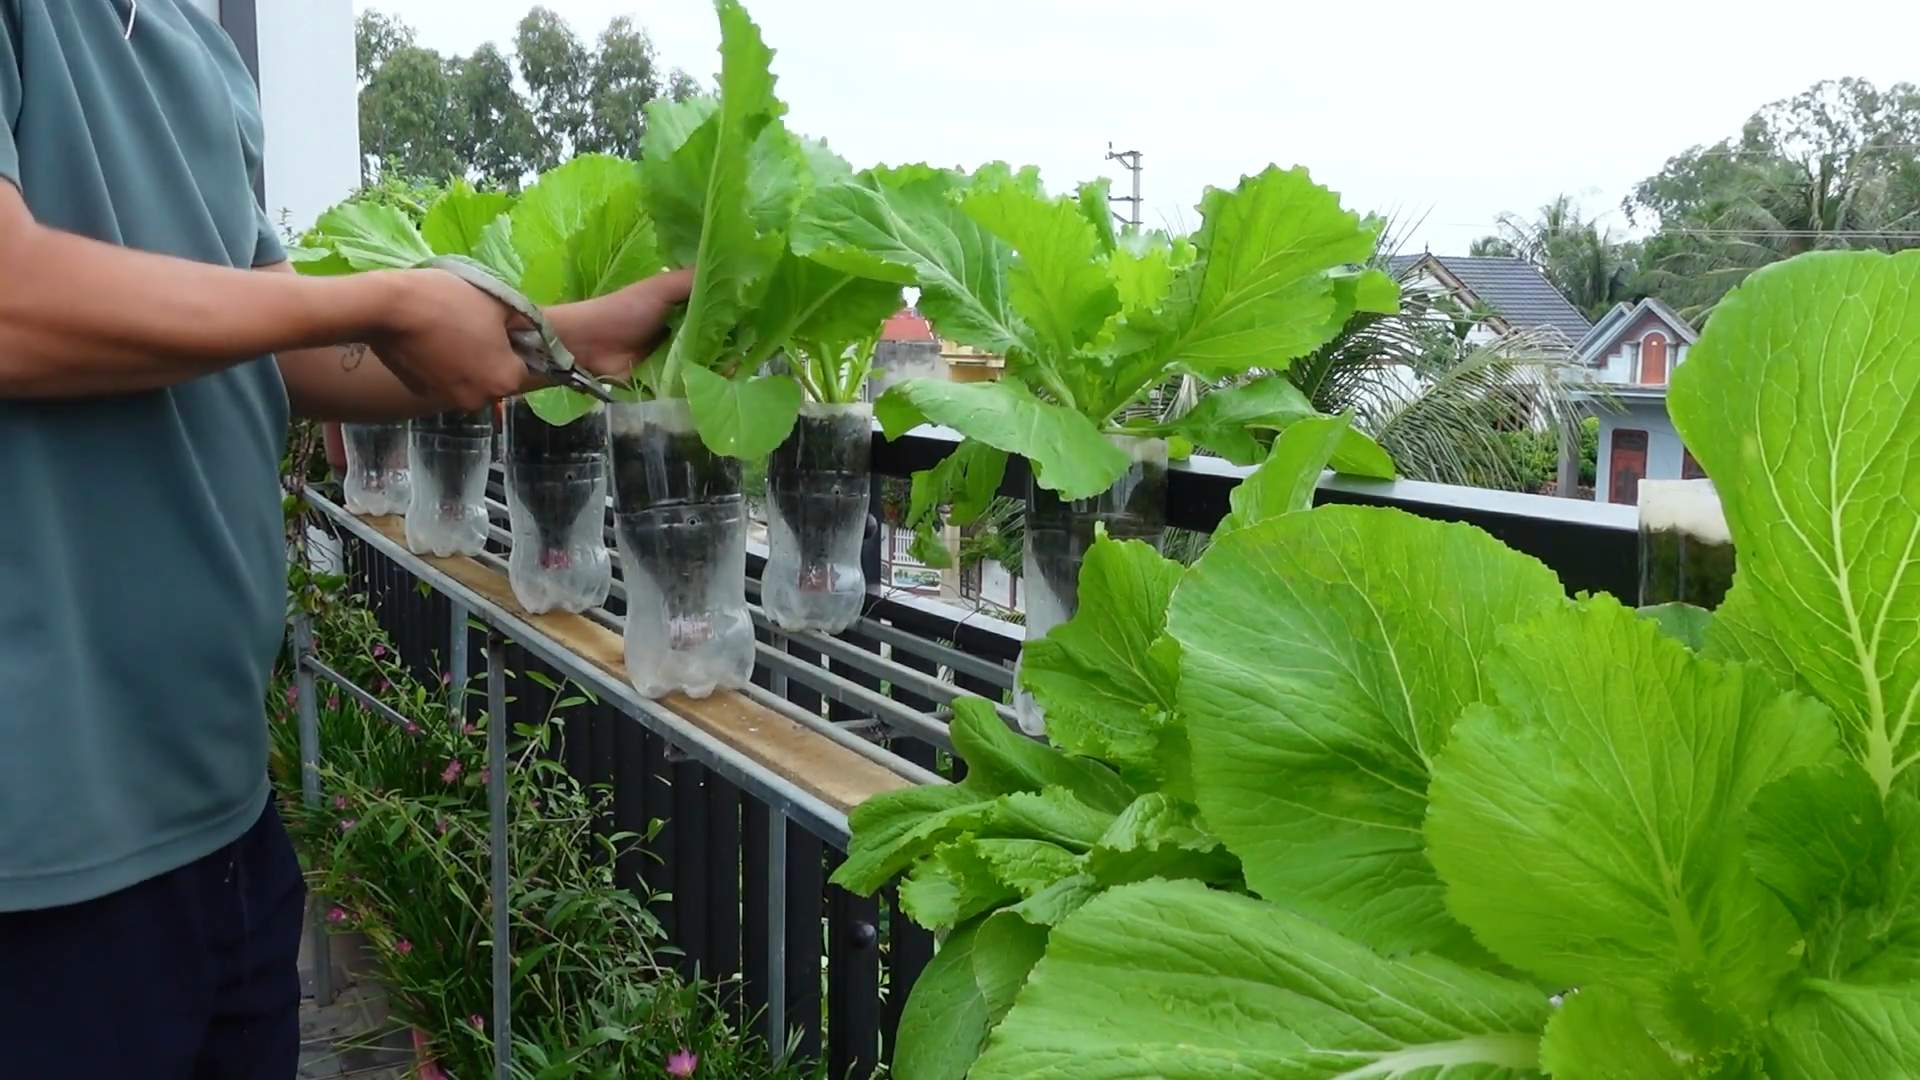
* Sharp Knife or Scissors: A sharp tool is essential for clean cuts, which helps the plant recover quickly.
* Basket or Bag: To collect your harvested greens.
* Gloves (Optional): If you have sensitive skin, gloves can protect you from any potential irritation.
The Harvesting Process: Step-by-Step
Alright, let’s get down to the nitty-gritty. Here’s how to harvest your mustard greens:
1. Choose Your Leaves: Select the outer, larger leaves first. These are the oldest and will be the most flavorful. Leave the inner, smaller leaves to continue growing. This allows the plant to keep producing.
2. Make the Cut: Using your sharp knife or scissors, cut the leaf stem about 1-2 inches above the soil line. Be careful not to damage the central stem of the plant. A clean cut is key to preventing disease.
3. Repeat: Continue harvesting the outer leaves until you have enough for your meal. Remember to leave the inner leaves to grow.
4. Wash and Store: After harvesting, wash your mustard greens thoroughly to remove any dirt or debris. You can store them in a plastic bag in the refrigerator for up to a week. For best results, wrap them in a slightly damp paper towel.
Harvesting Methods: Cut-and-Come-Again vs. Whole Plant
There are two main ways to harvest mustard greens: the cut-and-come-again method and harvesting the whole plant. Let’s break down each one:
Cut-and-Come-Again Method
This is the method I described above, where you harvest individual leaves as needed. It’s my preferred method because it allows you to get multiple harvests from the same plant.
* Benefits:
* Prolonged harvest period.
* Continuous supply of fresh greens.
* More economical use of space.
* How to Do It:
* Focus on harvesting the outer, larger leaves.
* Leave the inner leaves to continue growing.
* Avoid damaging the central stem.
* Harvest regularly to encourage new growth.
Whole Plant Harvest
This method involves cutting the entire plant at the base. It’s a good option if you need a large quantity of greens at once or if the plant is starting to bolt.
* Benefits:
* Quick and easy harvest.
* Suitable for bolting plants.
* Good for a one-time harvest.
* How to Do It:
* Cut the entire plant at the base, about 1-2 inches above the soil line.
* Wash the greens thoroughly.
* This method will end the plant’s production, so you’ll need to sow new seeds for future harvests.
Tips for Maximizing Your Harvest
Want to get the most out of your mustard greens? Here are a few extra tips:
* Water Regularly: Mustard greens need consistent moisture to thrive. Water deeply whenever the soil feels dry to the touch.
* Fertilize: Feed your plants with a balanced fertilizer every few weeks to promote healthy growth.
* Pest Control: Keep an eye out for pests like aphids and cabbage worms. Handpick them off or use an organic insecticide if necessary.
* Weed Control: Remove weeds regularly to prevent them from competing with your mustard greens for nutrients and water.
* Harvest in the Morning: The best time to harvest is in the morning, after the dew has dried but before the sun gets too hot. This is when the leaves are at their freshest.
* Don’t Over-Harvest: Avoid taking too many leaves from a single plant at once. This can stress the plant and reduce its ability to produce new growth.
* Rotate Crops: To prevent soilborne diseases, rotate your crops each year. Don’t plant mustard greens in the same spot year after year.
Dealing with Common Problems
Even with the best care, you might encounter a few problems when growing mustard greens. Here’s how to deal with some common issues:
* Bolting: As mentioned earlier, bolting is when the plant starts to flower and the leaves become bitter. To prevent bolting, provide shade during hot weather and water regularly. If bolting occurs, harvest the remaining leaves quickly.
* Pests: Aphids, cabbage worms, and flea beetles are common pests of mustard greens. Handpick them off, use insecticidal soap, or cover your plants with row covers.
* Diseases: Fungal diseases like downy mildew can affect mustard greens. Ensure good air circulation, avoid overhead watering, and use a fungicide if necessary.
* Yellowing Leaves: Yellowing leaves can indicate a nutrient deficiency. Fertilize your plants with a balanced fertilizer.
* Slow Growth: Slow growth can be caused by poor soil, lack of sunlight, or insufficient watering. Amend your soil with compost, ensure your plants get at least 6 hours of sunlight per day, and water regularly.
Mustard Greens Varieties to Explore
There are so many different varieties of mustard greens to try! Each one has its own unique flavor and texture. Here are a few of my favorites:
* Southern Giant Curled: This is a classic variety with large, frilly leaves and a mild, mustardy flavor.
* Florida Broadleaf: This variety has smooth, broad leaves and a slightly peppery taste.
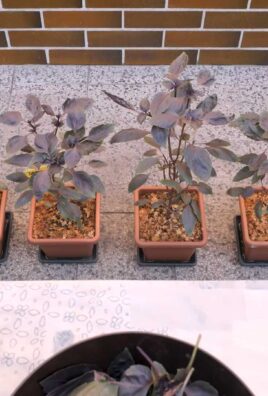
* Red Giant: This variety has beautiful reddish-purple leaves and a strong, spicy flavor.
* Osaka Purple: Another purple variety, Osaka Purple is known for its mild flavor and tender leaves.
* Mizuna: While technically a mustard green, Mizuna has a milder, slightly peppery flavor and feathery leaves. It’s great in salads.
Enjoying Your Harvest: Recipe Ideas
Now that you’ve harvested your mustard greens, it’s time to enjoy them! Here are a few recipe ideas to get you started:
* Saut茅ed Mustard Greens: Saut茅 mustard greens with garlic, olive oil, and a pinch of red pepper flakes for a simple and delicious side dish.
* Mustard Greens Salad: Add mustard greens to your favorite salad for a peppery kick.
* Mustard Greens Soup: Use mustard greens in soups and stews for added flavor and nutrients.
* Mustard Greens Smoothie: Blend mustard greens into your smoothies for a healthy boost.
* Pickled Mustard Greens: Preserve your harvest by pickling mustard greens.
Final Thoughts
Harvesting mustard greens is a rewarding experience that allows you to enjoy fresh, homegrown produce. By following these simple steps and tips, you can ensure a bountiful harvest and a continuous supply of delicious greens. So get out there, harvest your mustard greens, and enjoy the fruits (or rather, leaves) of your labor! Happy gardening!
Conclusion
So, there you have it! Harvesting your own mustard greens is not just a way to put fresh, flavorful greens on your table; it’s an empowering experience that connects you directly to your food source. It’s about understanding the life cycle of a plant, appreciating the nuances of flavor that come with freshness, and reducing your reliance on store-bought produce. This simple DIY trick transforms your garden, or even a container on your balcony, into a vibrant source of peppery goodness.
Why is this a must-try? Because the difference between store-bought mustard greens and freshly harvested ones is like night and day. The bitterness is milder, the texture is crisper, and the nutritional value is at its peak. Plus, the satisfaction of knowing you nurtured these greens from seed to plate is immeasurable.
But don’t stop there! Experiment with different varieties of mustard greens. Some are spicier than others, some have frillier leaves, and some boast beautiful purple hues. Try ‘Red Giant’ for a visually stunning and intensely flavored option, or ‘Florida Broadleaf’ for a milder, more versatile green.
Consider the timing of your harvest too. Younger leaves are more tender and delicate, perfect for salads. More mature leaves are heartier and hold up well in stir-fries, braises, and soups. You can even pickle the stems for a tangy treat!
And speaking of using your harvested greens, the possibilities are endless. Saut茅 them with garlic and olive oil for a simple side dish. Add them to your favorite soup or stew for a peppery kick. Blend them into a pesto for a unique twist on a classic sauce. Or, get creative and use them in a mustard green kimchi!
We’ve covered the basics of harvesting, but remember that gardening is a journey of continuous learning. Pay attention to your plants, observe how they respond to different conditions, and don’t be afraid to experiment. The more you engage with the process, the more rewarding it will become.
Ultimately, mastering the art of harvesting mustard greens is about more than just getting food on the table. It’s about cultivating a deeper connection with nature, embracing a more sustainable lifestyle, and enjoying the simple pleasures of growing your own food. So, grab your scissors, head out to your garden (or balcony!), and start harvesting!
We are confident that once you experience the joy of harvesting your own mustard greens, you’ll never look at store-bought greens the same way again. It’s a simple, rewarding, and delicious way to connect with nature and nourish your body.
Now, we want to hear from you! Have you tried harvesting your own mustard greens? What are your favorite ways to use them? Share your experiences, tips, and recipes in the comments below. Let’s build a community of mustard green enthusiasts and inspire others to embrace the joys of homegrown goodness. Don’t forget to share pictures of your harvest! We can’t wait to see what you create. Happy harvesting!
Frequently Asked Questions (FAQ)
What is the best time of day to harvest mustard greens?
The best time to harvest mustard greens is in the morning, after the dew has dried but before the sun gets too hot. This is when the leaves are at their most turgid and flavorful. Harvesting in the heat of the day can cause the leaves to wilt and lose some of their moisture.
How do I know when my mustard greens are ready to harvest?
Mustard greens are typically ready to harvest about 4-6 weeks after planting, depending on the variety and growing conditions. Look for leaves that are at least 4-6 inches long. You can harvest individual leaves as needed, or you can harvest the entire plant at once. The younger leaves will be more tender and mild, while the older leaves will be more pungent.
Can I harvest mustard greens more than once from the same plant?
Yes, you can! This is one of the great things about growing mustard greens. You can either harvest individual leaves as needed (a “cut-and-come-again” method), or you can cut the entire plant back to a few inches above the ground. If you choose the latter method, the plant will regrow and you’ll be able to harvest again in a few weeks. Make sure to fertilize the plant after harvesting to encourage new growth.
How do I store harvested mustard greens?
To store harvested mustard greens, rinse them thoroughly under cold water and pat them dry with a clean towel or spin them in a salad spinner. Wrap the greens in a damp paper towel and place them in a plastic bag or container in the refrigerator. They should last for about 3-5 days. It’s best to use them as soon as possible for the best flavor and texture.
What if my mustard greens are too bitter?
Mustard greens can sometimes be bitter, especially if they are grown in hot weather or if they are allowed to mature for too long. There are a few things you can do to reduce the bitterness. First, harvest the leaves when they are young and tender. Second, cook the greens with an acid, such as lemon juice or vinegar. Third, blanch the greens in boiling water for a minute or two before cooking them. Finally, you can try growing a less bitter variety of mustard greens.
Can I eat the stems of mustard greens?
Yes, you can eat the stems of mustard greens, but they can be a bit tough. It’s best to remove the stems from the larger, more mature leaves. You can chop the stems and add them to stir-fries, soups, or stews. You can also pickle them for a tangy treat.
What are some common pests and diseases that affect mustard greens?
Some common pests that affect mustard greens include aphids, flea beetles, and cabbage worms. Common diseases include downy mildew and white rust. You can prevent these problems by practicing good garden hygiene, such as removing weeds and debris, and by using organic pest control methods, such as insecticidal soap or neem oil.
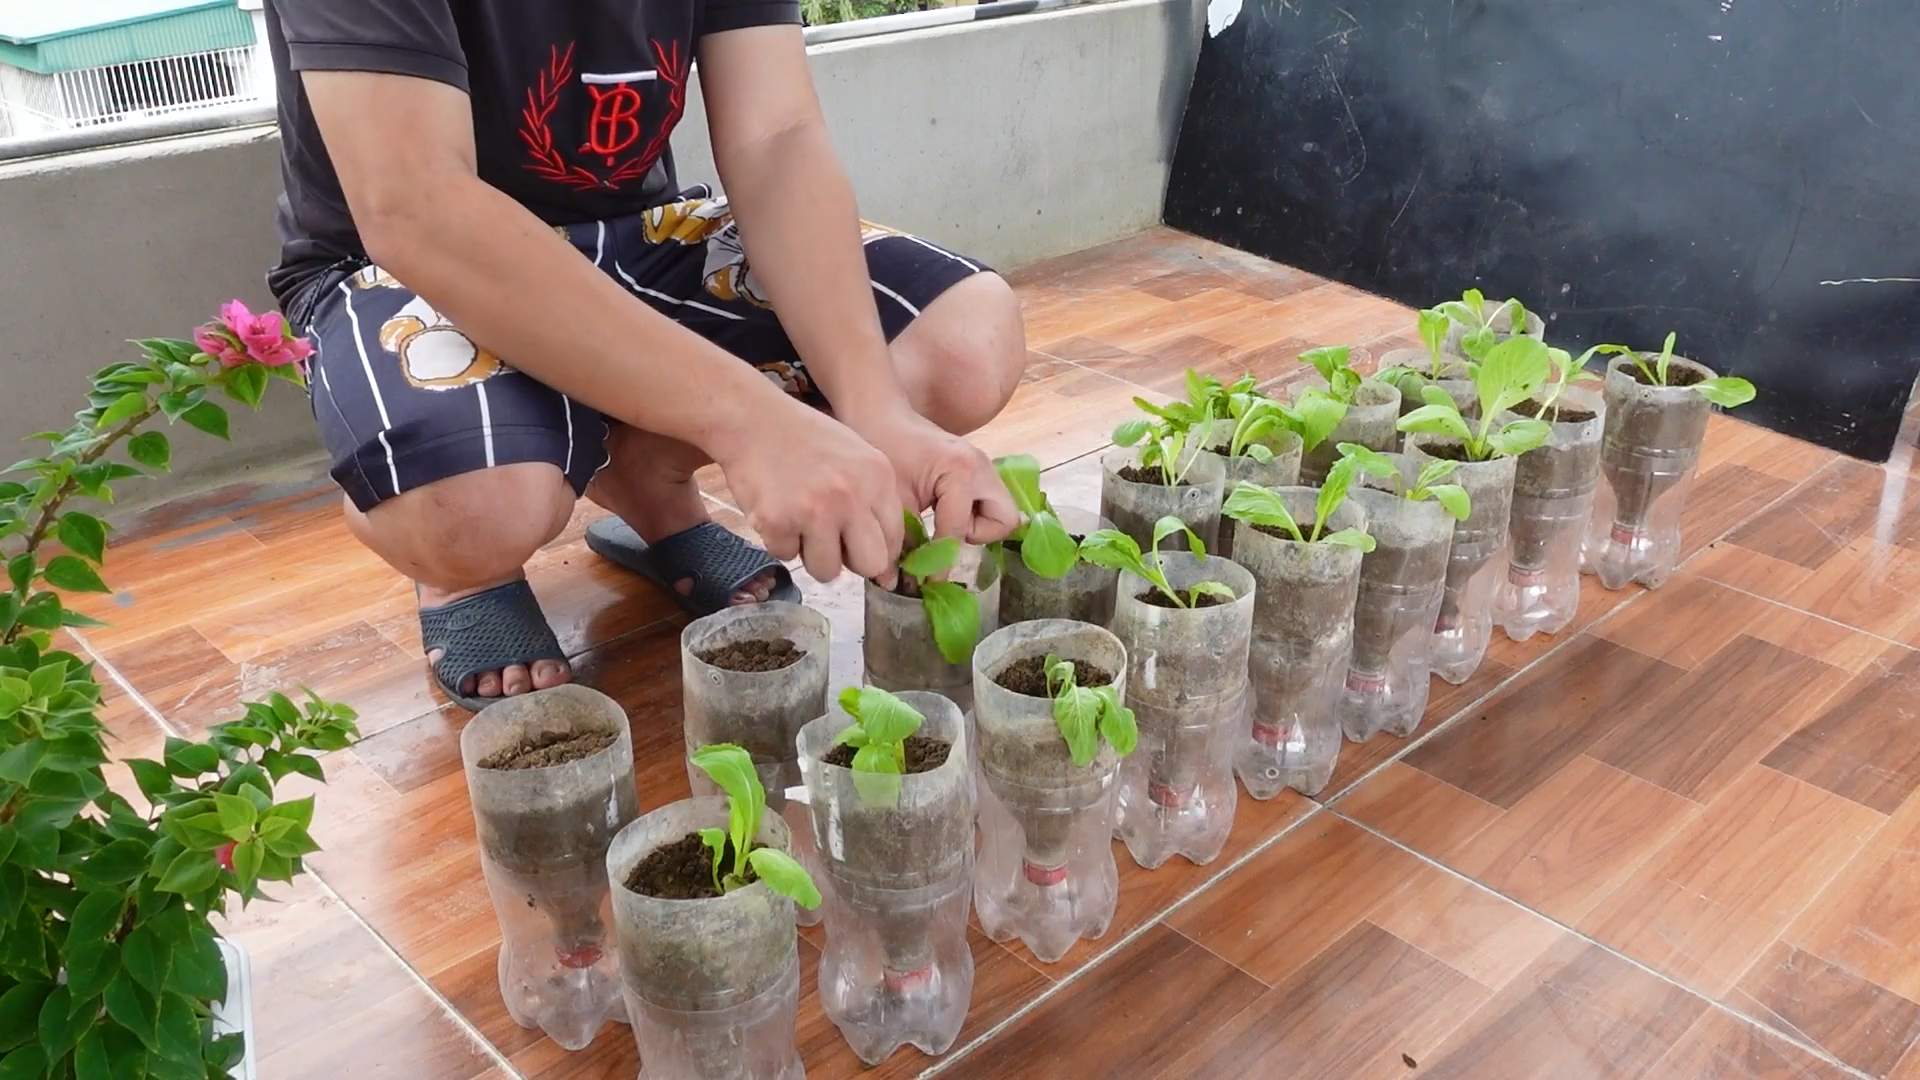
Can I grow mustard greens in containers?
Yes, you can definitely grow mustard greens in containers! Choose a container that is at least 6 inches deep and has good drainage. Use a good quality potting mix and water regularly. Place the container in a sunny location. Container-grown mustard greens may need to be fertilized more frequently than those grown in the ground.
What are some good companion plants for mustard greens?
Good companion plants for mustard greens include dill, rosemary, and thyme, which can help to repel pests. Marigolds are also a good choice, as they attract beneficial insects. Avoid planting mustard greens near other members of the brassica family, such as cabbage, broccoli, and cauliflower, as they can attract the same pests and diseases.
How do I save seeds from my mustard greens?
Saving seeds from mustard greens is relatively easy. Allow a few plants to bolt (go to seed). Once the seed pods are dry and brown, harvest them and allow them to dry completely. Then, crush the pods to release the seeds. Store the seeds in an airtight container in a cool, dry place. Remember that if you grew a hybrid variety, the seeds may not produce plants that are true to type.
Leave a Comment