

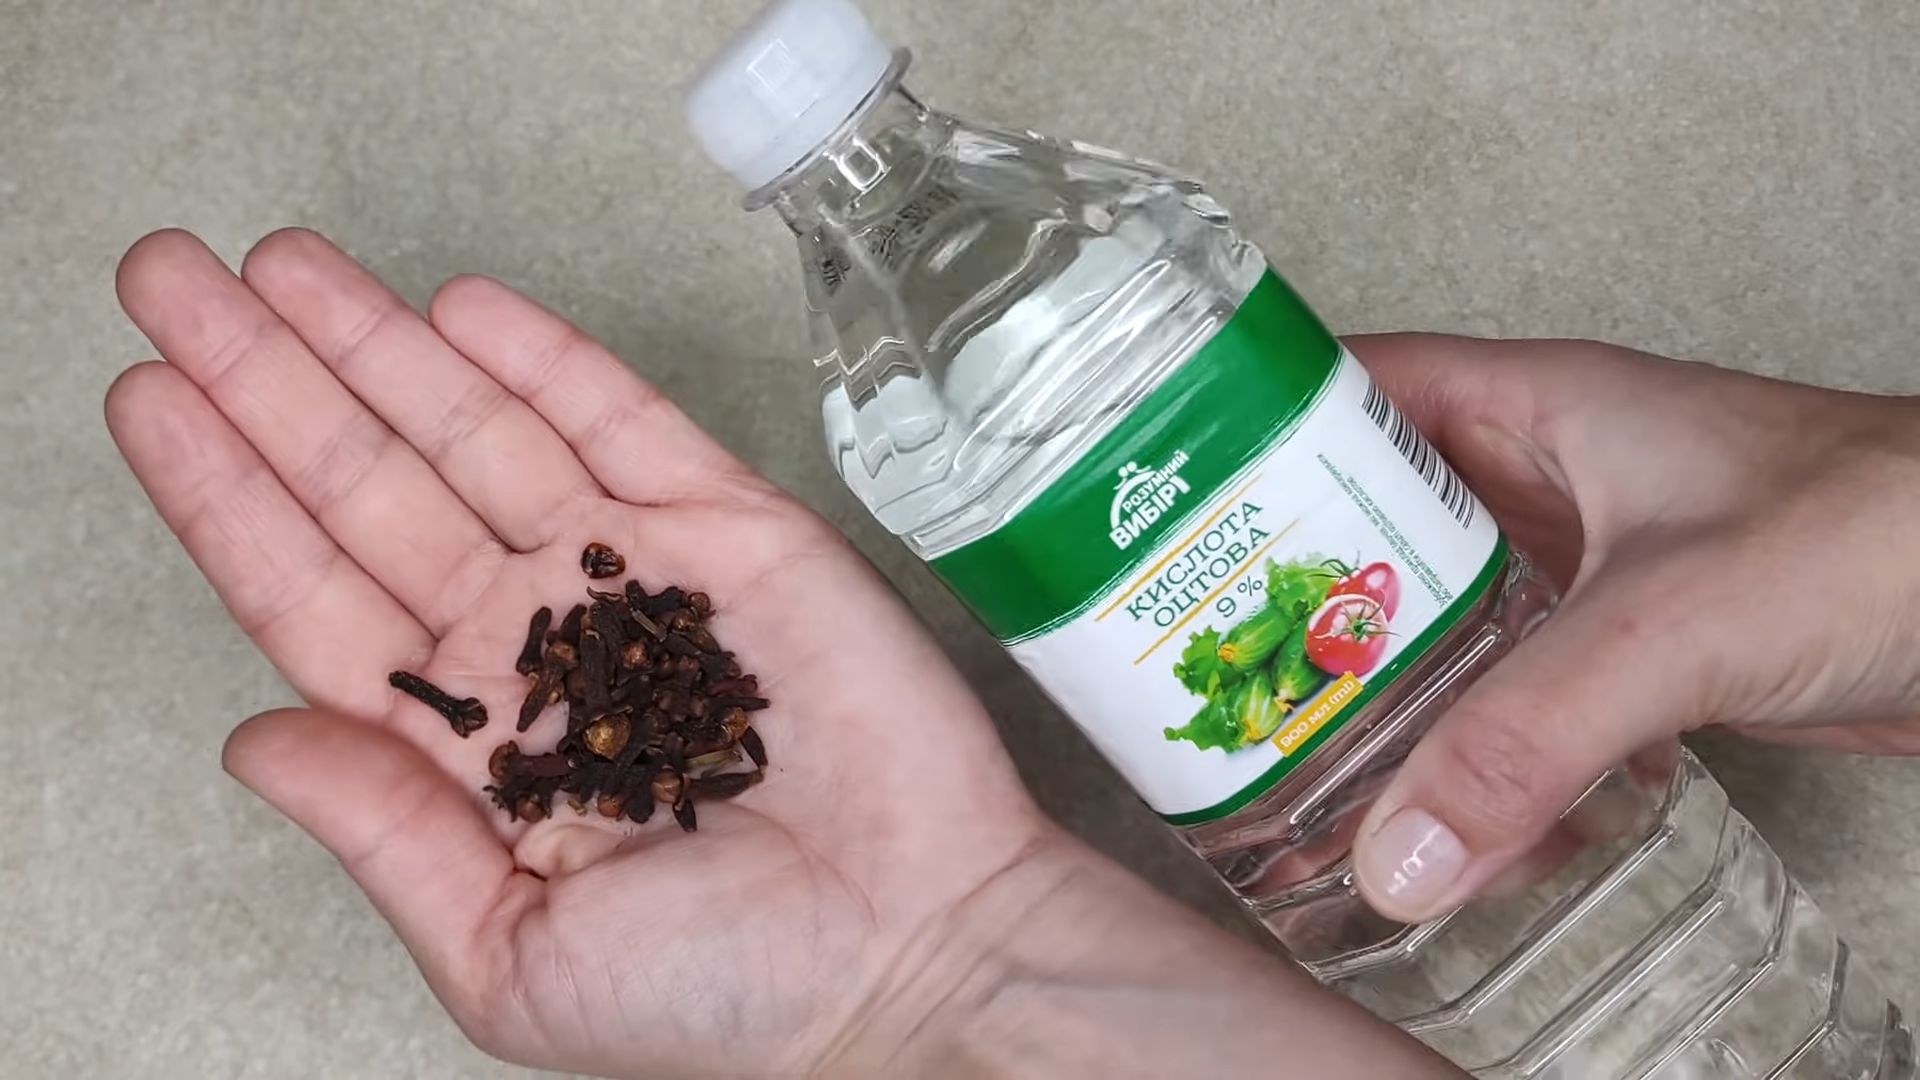
Vinegar and cloves home remedy – sounds like something your grandma might have concocted, right? Well, you’re not entirely wrong! For generations, resourceful folks have turned to their pantries for natural solutions to everyday problems, and this particular blend is a powerhouse when it comes to keeping your home and garden thriving.
I’m so excited to share this simple yet incredibly effective DIY trick with you. We all know how frustrating it is to battle pests and weeds in our gardens, especially when we’re trying to avoid harsh chemicals. That’s where the magic of vinegar and cloves comes in. This isn’t just some trendy new fad; the use of vinegar as a natural cleaner and pest repellent dates back centuries, with cloves adding an extra layer of potent protection.
But why should *you* care about a vinegar and cloves home remedy? Because it’s a game-changer! Imagine a garden flourishing without the need for expensive and potentially harmful pesticides. Think of the peace of mind knowing you’re using a safe, natural solution around your family and pets. This DIY trick is not only cost-effective but also incredibly easy to make and use. So, let’s dive in and discover how to harness the power of vinegar and cloves to create a healthier, happier home and garden!
Growing Chili Peppers: A Beginner’s Guide to Fiery Success
Alright, chili pepper enthusiasts! So you want to grow your own fiery little devils? Awesome! I’m here to guide you through the process, from seed to sizzling harvest. Don’t worry if you’re a complete newbie; this guide is designed for beginners. We’ll cover everything you need to know to get those peppers popping.
Choosing Your Chili Pepper Variety
Before we get our hands dirty, let’s talk about choosing the right chili pepper for you. There are literally hundreds of varieties, ranging from mild and sweet to face-meltingly hot. Consider your taste preferences and growing conditions.
* Mild Peppers: If you’re just starting out or prefer a gentle kick, consider varieties like Anaheim, Poblano, or Jalapeño. These are relatively easy to grow and offer a good balance of flavor and heat.
* Medium Peppers: For a bit more heat, try Serrano, Cayenne, or Thai chili peppers. These are versatile and add a nice zing to your dishes.
* Hot Peppers: If you’re a true chili head, you might be tempted to jump straight to the super hots like Habanero, Scotch Bonnet, or Ghost Pepper. However, these can be more challenging to grow and require extra care. I’d recommend starting with something a little less intense and working your way up.
* Consider Your Climate: Some chili peppers thrive in warmer climates, while others are more tolerant of cooler temperatures. Research which varieties are best suited for your region.
* Space Considerations: Some chili pepper plants can grow quite large, while others are more compact. If you have limited space, choose a smaller variety.
Starting Your Chili Pepper Seeds
Starting your chili pepper seeds indoors is generally recommended, especially if you live in a region with a shorter growing season. This gives your plants a head start and ensures a better harvest.
1. Gather Your Supplies: You’ll need:
* Chili pepper seeds (obviously!)
* Seed starting trays or small pots
* Seed starting mix (a light, well-draining mix is crucial)
* A spray bottle filled with water
* A heat mat (optional, but highly recommended)
* A grow light (also optional, but beneficial)
* A clear plastic dome or plastic wrap (to create a humid environment)
2. Sow the Seeds:
* Moisten the seed starting mix. It should be damp but not soggy.
* Fill the seed starting trays or pots with the moistened mix.
* Make a small indentation (about 1/4 inch deep) in the center of each cell or pot.
* Place 1-2 seeds in each indentation.
* Gently cover the seeds with the seed starting mix.
* Lightly mist the surface with water.
3. Create a Warm and Humid Environment:
* Place the seed starting trays or pots on a heat mat. This will help to speed up germination.
* Cover the trays or pots with a clear plastic dome or plastic wrap. This will create a humid environment that the seeds need to germinate.
4. Provide Light:
* If you’re using a grow light, position it a few inches above the seed starting trays or pots.
* If you’re not using a grow light, place the trays or pots in a warm, sunny location.
5. Maintain Moisture:
* Check the seed starting mix regularly and mist with water as needed to keep it moist.
* Be careful not to overwater, as this can lead to fungal diseases.
6. Be Patient:
* Chili pepper seeds can take anywhere from 7 to 21 days to germinate, depending on the variety and growing conditions.
* Once the seedlings emerge, remove the plastic dome or plastic wrap and continue to provide light and moisture.
Transplanting Your Chili Pepper Seedlings
Once your chili pepper seedlings have developed a few sets of true leaves (the leaves that look like miniature versions of the adult leaves), it’s time to transplant them into larger pots.
1. Harden Off the Seedlings:
* Before transplanting your seedlings outdoors, you need to “harden them off.” This means gradually exposing them to outdoor conditions over a period of 7-10 days.
* Start by placing the seedlings outdoors in a sheltered location for a few hours each day.
* Gradually increase the amount of time they spend outdoors each day, and also expose them to more sunlight and wind.
* This process will help the seedlings to acclimate to the outdoor environment and prevent them from being shocked when you transplant them.
2. Prepare the Planting Location:
* Choose a sunny location with well-draining soil. Chili peppers need at least 6-8 hours of sunlight per day.
* Amend the soil with compost or other organic matter to improve drainage and fertility.
* If you’re growing your chili peppers in containers, choose pots that are at least 5 gallons in size.
3. Transplant the Seedlings:
* Gently remove the seedlings from their seed starting trays or pots.
* Dig a hole in the ground or in the container that is large enough to accommodate the root ball.
* Place the seedling in the hole and gently backfill with soil.
* Water thoroughly.
Caring for Your Chili Pepper Plants
Now that your chili pepper plants are in their permanent homes, it’s time to provide them with the care they need to thrive.
1. Watering:
* Water your chili pepper plants regularly, especially during hot, dry weather.
* Allow the soil to dry out slightly between waterings.
* Avoid overwatering, as this can lead to root rot.
* Water deeply, so that the water reaches the roots.
2. Fertilizing:
* Fertilize your chili pepper plants every 2-3 weeks with a balanced fertilizer.
* Look for a fertilizer that is specifically formulated for vegetables.
* Follow the instructions on the fertilizer label.
* Avoid over-fertilizing, as this can lead to excessive foliage growth and fewer peppers.
3. Pruning:
* Pruning your chili pepper plants can help to improve air circulation and encourage bushier growth.
* Remove any dead or yellowing leaves.
* Pinch off the tips of the branches to encourage branching.
4. Pest and Disease Control:
* Keep an eye out for pests and diseases.
* Common pests of chili pepper plants include aphids, spider mites, and whiteflies.
* Common diseases of chili pepper plants include fungal diseases and viruses.
* If you notice any pests or diseases, take action immediately.
* There are many organic and non-organic pest and disease control options available.
* Neem oil is a great organic option for controlling many common pests.
5. Support:
* As your chili pepper plants grow, they may need support.
* Use stakes or cages to support the plants and prevent them from falling over.
* This is especially important for taller varieties or those that produce heavy peppers.
Harvesting Your Chili Peppers
The moment you’ve been waiting for! Harvesting your chili peppers is the most rewarding part of the process.
1. When to Harvest:
* The best time to harvest your chili peppers depends on the variety and your personal preference.
* Most chili peppers will change color as they ripen, from green to red, yellow, or orange.
* You can harvest them at any stage of ripeness, but they will generally be hotter and more flavorful when they are fully ripe.
* The pepper should feel firm and slightly waxy.
2. How to Harvest:
* Use a sharp knife or scissors to cut the peppers from the plant.
* Leave a small piece of the stem attached to the pepper.
* Be careful not to damage the plant when harvesting the peppers.
* Wear gloves when harvesting hot peppers, as the capsaicin (the compound that makes them hot) can irritate your skin. I learned this the hard way!
3. Storing Your Chili Peppers:
* Fresh chili peppers can be stored in the refrigerator for up to a week.
* You can also dry, freeze, or pickle your chili peppers for longer storage.
* Drying chili peppers is a great way to preserve them and concentrate their flavor.
* Freezing chili peppers is a quick and easy way to preserve them.
* Pickling chili peppers is a delicious way to add a spicy kick to your meals.
Troubleshooting Common Problems
Even with the best care, you may encounter some problems

Conclusion
So, there you have it! This simple yet incredibly effective vinegar and cloves home remedy is a game-changer for anyone looking for a natural and cost-effective solution to freshen their home and deter unwanted pests. Forget harsh chemicals and expensive store-bought air fresheners; this DIY trick harnesses the power of readily available ingredients to create a pleasant and inviting atmosphere.
Why is this a must-try? Because it’s more than just a pleasant scent. The vinegar acts as a natural disinfectant, helping to eliminate odors at their source, while the cloves release a warm, spicy aroma that’s both comforting and invigorating. Plus, the cloves contain compounds that naturally repel insects, making this remedy a double-duty powerhouse for your home. It’s a win-win!
But the beauty of this DIY trick lies in its versatility. Feel free to experiment with different types of vinegar. White vinegar is the most economical and effective for odor elimination, but apple cider vinegar can add a subtle fruity note to the fragrance. You can also customize the scent profile by adding other spices like cinnamon sticks, star anise, or even a few drops of your favorite essential oils. Imagine a blend of vinegar, cloves, and orange essential oil for a festive holiday aroma, or vinegar, cloves, and lavender oil for a calming and relaxing atmosphere in your bedroom.
For a stronger scent, try gently simmering the mixture on the stovetop for a short period, allowing the fragrance to permeate your home. Just be sure to keep a close eye on it and don’t let it boil dry! Alternatively, you can create a concentrated spray by steeping the cloves in vinegar for a longer period (a week or two) and then diluting the mixture with water before spraying. This is perfect for targeting specific areas like closets or bathrooms.
This vinegar and cloves home remedy is a simple, effective, and customizable way to freshen your home naturally. It’s time to ditch the chemicals and embrace the power of nature!
We’re confident that you’ll love the results. So, go ahead and give this DIY trick a try. We encourage you to experiment with different variations and find the perfect scent combination for your home. And most importantly, we want to hear about your experience! Share your tips, tricks, and favorite scent combinations in the comments below. Let’s create a community of natural home freshening enthusiasts! We can’t wait to see what you come up with.
Frequently Asked Questions (FAQ)
What type of vinegar is best for this remedy?
White vinegar is generally considered the best option for this remedy due to its strong odor-neutralizing properties and affordability. It effectively eliminates unwanted smells without adding its own distinct fragrance. However, apple cider vinegar can also be used, although it may impart a slightly fruity scent. Avoid using balsamic vinegar or other flavored vinegars, as their strong aromas can clash with the cloves.
How long does the scent last?
The duration of the scent depends on several factors, including the concentration of cloves, the size of the room, and the ventilation. In general, the scent can last for several days to a week. To prolong the fragrance, you can add more cloves or refresh the mixture periodically. Simmering the mixture on the stovetop can also help to release the scent more intensely and for a longer duration.
Can I use essential oils in addition to cloves?
Absolutely! Essential oils can be a wonderful addition to this remedy, allowing you to customize the scent to your liking. Popular choices include lavender, lemon, orange, cinnamon, and eucalyptus. Add a few drops of your favorite essential oil to the vinegar and clove mixture after it has cooled down. Avoid adding essential oils while simmering the mixture, as the heat can degrade their fragrance.
Is this remedy safe for pets and children?
While vinegar and cloves are generally considered safe, it’s important to exercise caution when using this remedy around pets and children. Keep the mixture out of their reach to prevent accidental ingestion. Some pets may be sensitive to the strong scent of cloves, so monitor their reaction and ensure they have access to fresh air. If you have any concerns, consult with your veterinarian or pediatrician.
Can I use this remedy to repel insects?
Yes, cloves contain compounds that naturally repel insects, making this remedy a useful tool for deterring unwanted pests. The scent of cloves can help to keep away mosquitoes, flies, and other insects. Place the mixture in areas where insects are prevalent, such as near windows and doors. For added effectiveness, you can also add a few drops of citronella essential oil, which is a well-known insect repellent.
How do I dispose of the vinegar and cloves mixture?
Once the scent has faded, you can dispose of the vinegar and cloves mixture down the drain. The vinegar is biodegradable and will not harm your plumbing. Alternatively, you can compost the cloves, as they are a natural organic material.
Can I reuse the cloves?
While you can technically reuse the cloves, they will gradually lose their potency over time. For the best results, it’s recommended to use fresh cloves each time you make the remedy. However, if you want to reuse them, you can try simmering them in fresh vinegar to extract any remaining fragrance.
What if the vinegar smell is too strong?
If the vinegar smell is too strong, you can dilute the mixture with water. Start by adding a small amount of water and gradually increase the amount until you achieve the desired scent strength. You can also try using apple cider vinegar instead of white vinegar, as it has a milder aroma. Additionally, adding essential oils can help to mask the vinegar smell and create a more pleasant fragrance.
Can I spray this mixture directly onto surfaces?
It’s generally not recommended to spray this mixture directly onto surfaces, as the vinegar can potentially damage or discolor certain materials. Instead, use the mixture as an air freshener by placing it in an open container or simmering it on the stovetop. If you want to use it as a cleaning solution, dilute the mixture with water and test it on an inconspicuous area first.
How often should I replace the mixture?
You should replace the mixture when the scent starts to fade or when the vinegar becomes cloudy. This typically occurs after a week or two, depending on the factors mentioned earlier. Regularly replacing the mixture will ensure that your home remains fresh and fragrant.

Leave a Comment