

Grow Pink Radishes in Pots? Absolutely! And I’m here to show you how surprisingly easy and rewarding it can be. Forget those bland, store-bought radishes – imagine plucking vibrant, peppery pink radishes straight from your own patio or balcony!
Radishes, believe it or not, have been cultivated for centuries, dating back to ancient Egypt and Greece. They were prized not only for their unique flavor but also for their medicinal properties. While we might not be relying on them for healing these days, the joy of growing your own food, especially something as quick and satisfying as radishes, is a timeless pleasure.
In today’s busy world, finding time for a large garden can be a challenge. That’s where container gardening comes in! This DIY guide will provide you with simple, step-by-step instructions to grow pink radishes in pots, even if you have limited space. You’ll learn everything from choosing the right pot and soil to watering and harvesting techniques. Why settle for ordinary when you can cultivate a burst of color and flavor right at your fingertips? Let’s get started and transform your space into a mini radish paradise!
Growing Pink Radishes in Pots: A Beginner’s Guide
Hey there, fellow gardening enthusiasts! I’m so excited to share my experience growing vibrant pink radishes in pots. It’s a surprisingly simple and rewarding project, perfect for small spaces like balconies or patios. Plus, the pop of pink adds a delightful touch to your garden and your salads! Let’s dive in!
What You’ll Need
Before we get our hands dirty, let’s gather all the necessary supplies. Here’s a checklist:
* **Radish Seeds (Pink Variety):** Look for varieties like ‘Pink Beauty’ or ‘French Breakfast’ for that lovely pink hue. I personally love ‘Pink Beauty’ because they mature quickly and have a mild flavor.
* **Pots:** Choose pots that are at least 6 inches deep. Radishes don’t need a ton of space, but they do need enough room for their roots to develop. I prefer using terracotta pots because they allow for better drainage, but plastic pots work just fine too.
* **Potting Mix:** Use a high-quality potting mix that’s well-draining. Avoid using garden soil, as it can become compacted in pots and hinder root growth. I usually mix in some compost for extra nutrients.
* **Watering Can or Hose:** Essential for keeping your radishes hydrated. A gentle watering can is ideal to avoid disturbing the delicate seedlings.
* **Fertilizer (Optional):** A balanced liquid fertilizer can give your radishes a boost, but it’s not strictly necessary. I only use it if I notice the leaves looking pale.
* **Trowel or Small Shovel:** For filling the pots with soil and making small holes for the seeds.
* **Sunlight:** Radishes need at least 6 hours of sunlight per day. Choose a sunny spot for your pots.
* **Labels (Optional):** To mark which pots contain radishes, especially if you’re growing other vegetables.
Preparing Your Pots
This is a crucial step to ensure your radishes have a healthy start.
1. **Clean Your Pots:** If you’re using pots that have been used before, make sure to clean them thoroughly with soap and water to remove any dirt or debris. This helps prevent the spread of diseases.
2. **Add Drainage Material (Optional):** While good potting mix should provide adequate drainage, you can add a layer of gravel or broken pottery shards to the bottom of the pot for extra insurance. This prevents the roots from sitting in soggy soil.
3. **Fill with Potting Mix:** Fill the pots with your chosen potting mix, leaving about an inch of space at the top. Gently pat down the soil to remove any air pockets.
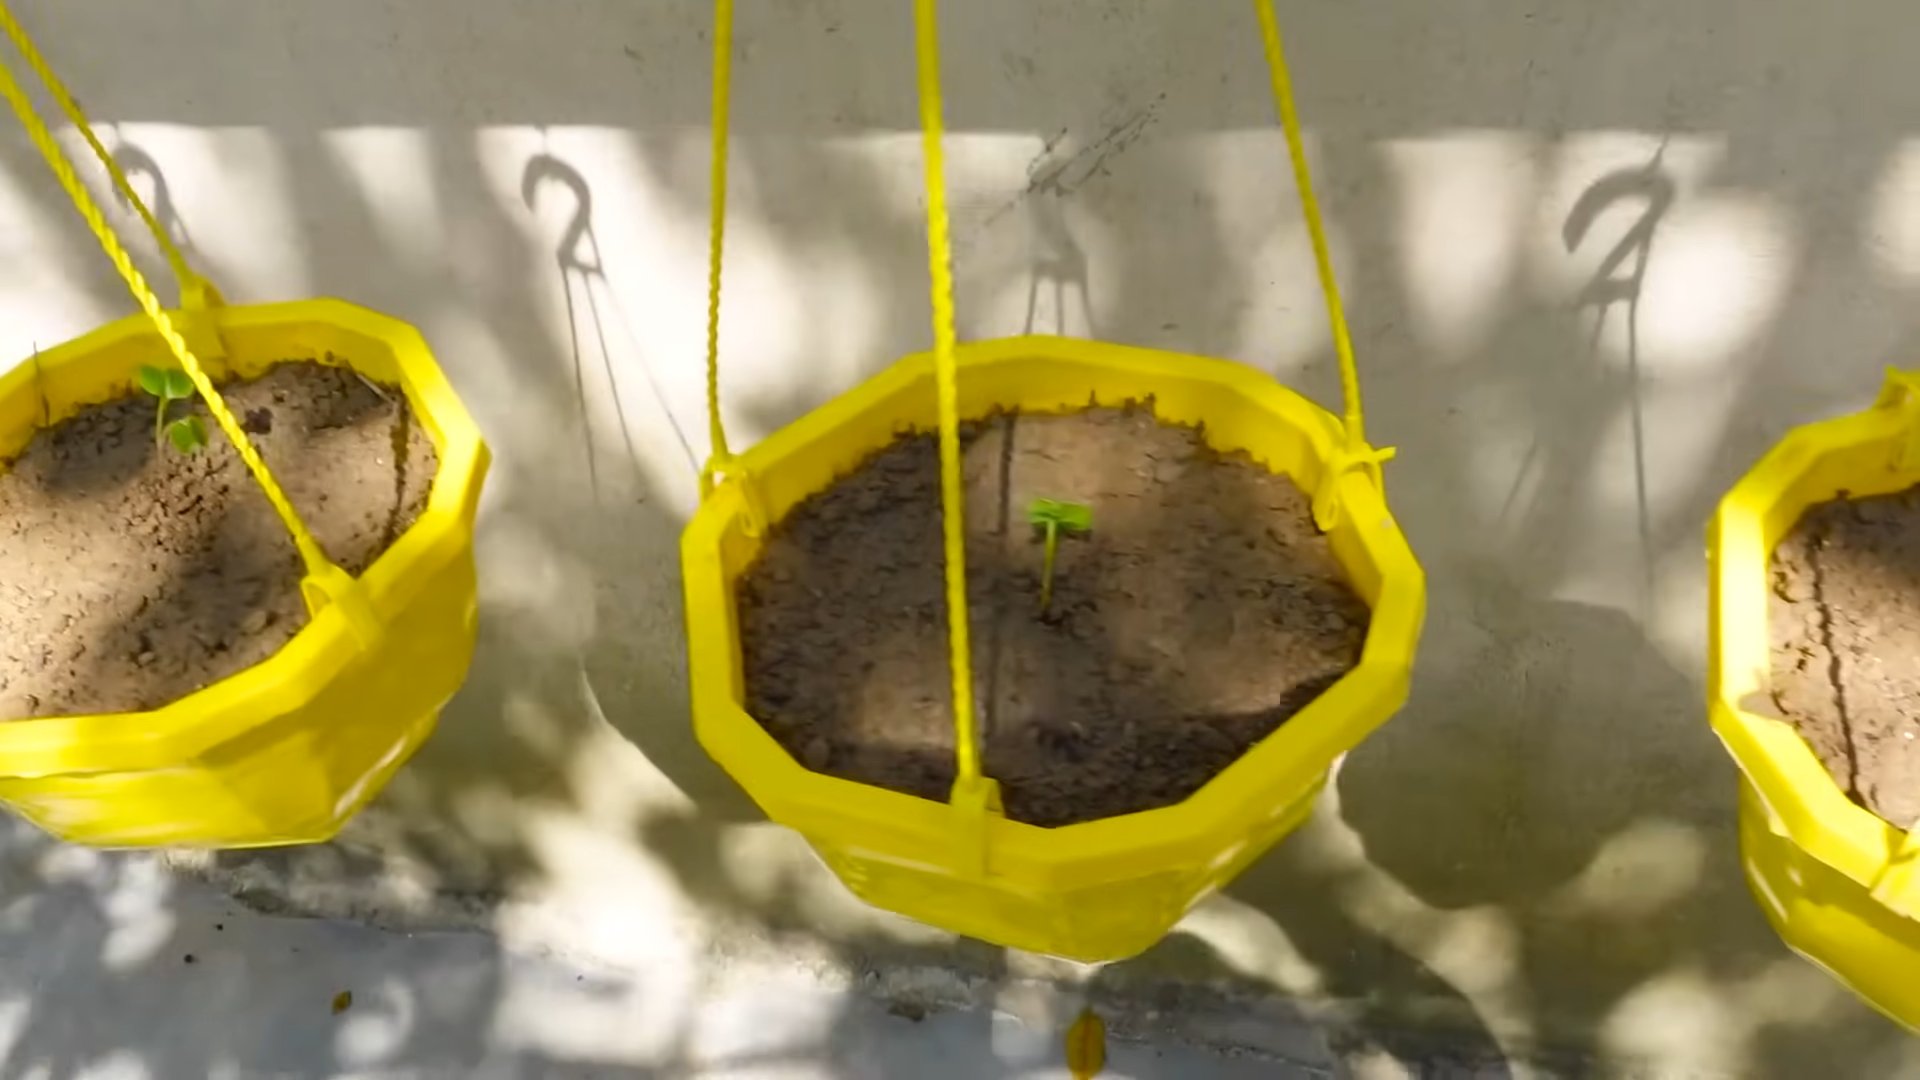
Sowing the Seeds
Now for the fun part – planting those tiny seeds!
1. **Make Small Holes:** Use your finger or a trowel to create small holes about ½ inch deep and 1 inch apart. I usually plant 3-4 seeds per hole to increase the chances of germination.
2. **Sow the Seeds:** Place the radish seeds into the holes.
3. **Cover the Seeds:** Gently cover the seeds with potting mix.
4. **Water Thoroughly:** Water the pots thoroughly until the water drains out of the bottom. This helps settle the soil and ensures the seeds have enough moisture to germinate.
Caring for Your Radishes
Consistent care is key to growing plump, juicy radishes.
1. **Watering:** Keep the soil consistently moist, but not waterlogged. Radishes need regular watering, especially during hot weather. Check the soil moisture daily by sticking your finger into the soil. If the top inch feels dry, it’s time to water. I usually water in the morning to allow the leaves to dry before nightfall, which helps prevent fungal diseases.
2. **Thinning:** Once the seedlings emerge (usually within 4-7 days), thin them out to one plant per hole. This gives the remaining plants enough space to grow. Choose the strongest-looking seedling in each hole and gently snip off the others at the soil line. Don’t pull them out, as this can disturb the roots of the remaining plant.
3. **Fertilizing (Optional):** If you choose to fertilize, use a balanced liquid fertilizer diluted to half strength. Apply it every 2-3 weeks. Avoid over-fertilizing, as this can lead to excessive leaf growth at the expense of root development.
4. **Sunlight:** Ensure your radishes receive at least 6 hours of sunlight per day. If you’re growing them indoors, you may need to supplement with grow lights.
5. **Weed Control:** Keep the pots free of weeds, as they can compete with the radishes for nutrients and water. Gently pull out any weeds that appear.
6. **Pest Control:** Radishes are generally pest-resistant, but they can sometimes be affected by flea beetles or aphids. If you notice any pests, you can try spraying them with insecticidal soap or neem oil. I prefer to use organic pest control methods whenever possible.
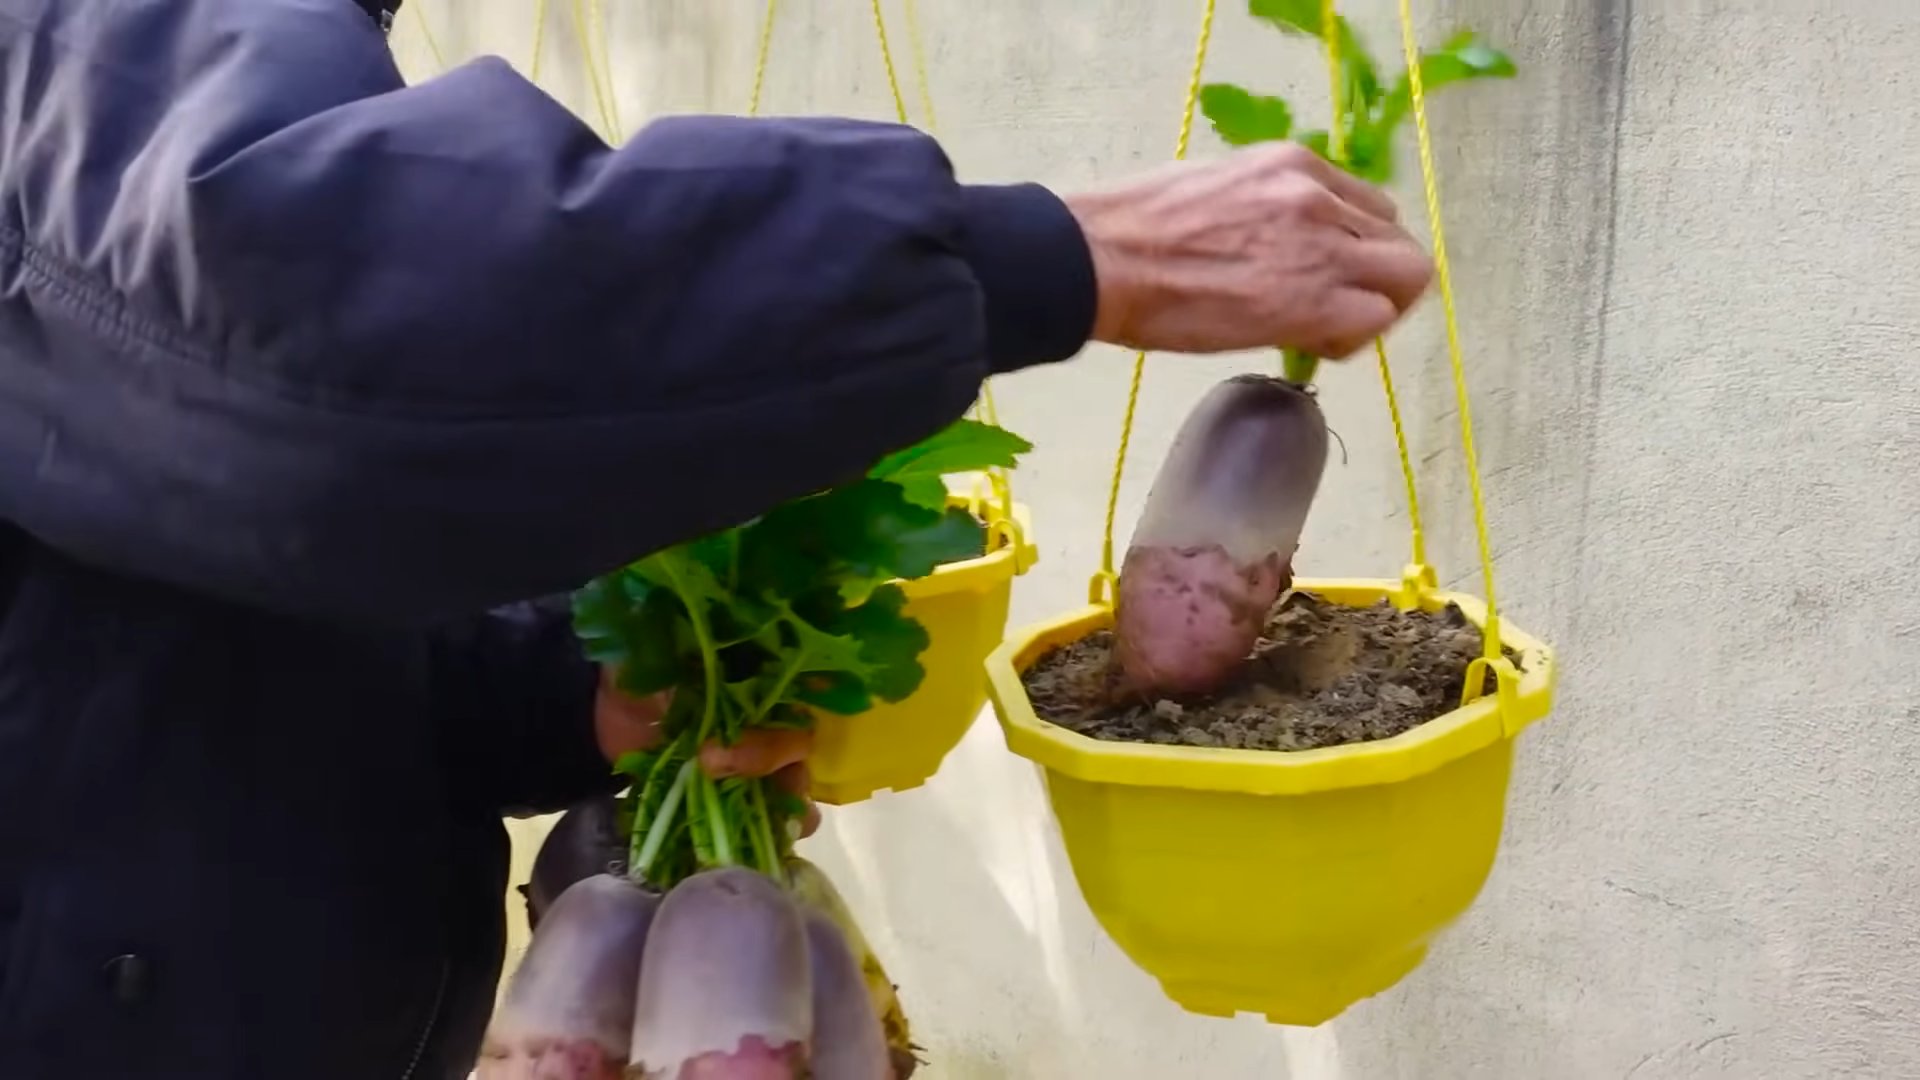
Harvesting Your Radishes
The best part – reaping the rewards of your hard work!
1. **Check for Maturity:** Radishes are typically ready to harvest in 3-4 weeks, depending on the variety. Check the seed packet for specific maturity times. You can tell they’re ready when the radish roots are about 1 inch in diameter.
2. **Harvesting:** Gently pull the radishes out of the soil. If the soil is dry, water it beforehand to make them easier to pull.
3. **Cleaning:** Wash the radishes thoroughly to remove any dirt.
4. **Storage:** Store the radishes in the refrigerator in a plastic bag or container. They will keep for several days.
Troubleshooting
Even with the best care, you might encounter some challenges. Here are a few common problems and how to address them:
* **Radishes Not Bulbing:** This is often caused by overcrowding, lack of sunlight, or poor soil. Make sure you thin the seedlings properly, provide adequate sunlight, and use a good-quality potting mix.
* **Radishes Cracking:** This is usually due to inconsistent watering. Keep the soil consistently moist, especially during hot weather.
* **Radishes Too Spicy:** This can be caused by hot weather or letting the radishes grow too large. Harvest them when they’re still relatively small.
* **Pests:** As mentioned earlier, flea beetles and aphids can sometimes be a problem. Use insecticidal soap or neem oil to control them.
Extra Tips for Success
Here are a few extra tips to help you grow the best pink radishes ever:
* **Succession Planting:** Plant a new batch of seeds every 2-3 weeks to ensure a continuous harvest.
* **Companion Planting:** Plant radishes alongside carrots to deter carrot root flies.
* **Use Radish Greens:** Don’t throw away the radish greens! They’re edible and can be used in salads, soups, or stir-fries. They have a slightly peppery flavor.
* **Experiment with Varieties:** Try different varieties of pink radishes to find your favorite.
* Don’t give up! Gardening is a learning process. Even if you don’t succeed the first time, keep trying and you’ll eventually get the hang of it.
Enjoying Your Harvest
Now that you’ve harvested your beautiful pink radishes, it’s time to enjoy them! Here are a few ideas:
* **Salads:** Slice them thinly and add them to salads for a pop of color and flavor.
* **Snacks:** Eat them raw with a sprinkle of salt.
* **Sandwiches:** Add them to sandwiches for a crunchy and peppery bite.
* **Pickled Radishes:** Pickle them for a tangy and delicious treat.
* **Radish Butter:** Blend them with butter and herbs for a flavorful spread.
Growing pink radishes in pots is a fun and rewarding experience. With a little care and attention, you can enjoy a bountiful harvest of these colorful and delicious vegetables. Happy gardening!
Conclusion
So, there you have it! Growing pink radishes in pots is not only achievable, but it’s also incredibly rewarding. Forget those bland, store-bought radishes that lack that peppery zing and vibrant color. With this simple DIY trick, you can cultivate a bounty of crisp, flavorful, and beautifully pink radishes right on your patio, balcony, or even a sunny windowsill.
Why is this a must-try? Because it puts you in control. You know exactly what goes into your food, from the soil to the sunshine. You avoid the pesticides and herbicides that can sometimes be used in commercial farming. And, let’s be honest, there’s a certain satisfaction that comes from nurturing something from seed to table. It’s a connection to nature that’s often missing in our modern lives.
Beyond the basic method, there’s plenty of room for experimentation. Try different varieties of radish seeds – some are spicier, some are milder, and some boast even more vibrant pink hues. You could also experiment with companion planting. Marigolds, for example, are known to deter pests and can add a splash of color to your radish pots. Another variation is to use different types of containers. While standard pots work perfectly well, you could also repurpose old buckets, tubs, or even grow bags. Just make sure whatever you choose has adequate drainage.
Consider adding a slow-release fertilizer to your potting mix for an extra boost of nutrients. Or, if you’re feeling adventurous, try succession planting. Sow a new batch of seeds every couple of weeks to ensure a continuous harvest throughout the growing season. This is especially useful if you enjoy radishes regularly in salads or as a crunchy snack.
But the real beauty of this DIY trick lies in its simplicity. It doesn’t require a green thumb or extensive gardening knowledge. All you need is a pot, some soil, radish seeds, water, and a little bit of sunshine. The results, however, are anything but simple. You’ll be rewarded with a harvest of delicious, homegrown radishes that will add a pop of color and flavor to your meals.
We wholeheartedly encourage you to give this DIY trick a try. It’s a fun, easy, and rewarding way to connect with nature and enjoy fresh, homegrown produce. And most importantly, it’s a fantastic way to grow pink radishes in pots, even if you don’t have a traditional garden.
Once you’ve harvested your first batch of homegrown radishes, we’d love to hear about your experience! Share your photos, tips, and variations in the comments below. Let’s create a community of radish enthusiasts and inspire others to embrace the joy of growing their own food. Happy gardening!
Frequently Asked Questions (FAQ)
What kind of pot is best for growing radishes?
The ideal pot for growing radishes should be at least 6 inches deep and wide. This allows enough room for the roots to develop properly. A wider pot is preferable, especially if you plan to grow multiple radishes in the same container. Drainage is crucial, so ensure your pot has drainage holes to prevent waterlogging, which can lead to root rot. Terracotta pots are a good option as they allow for good air circulation, but plastic pots are also suitable and tend to retain moisture better.
What type of soil should I use?
Radishes thrive in loose, well-draining soil that is rich in organic matter. A good potting mix specifically designed for vegetables is ideal. You can also create your own mix by combining equal parts of compost, peat moss (or coconut coir), and perlite or vermiculite. Avoid using heavy clay soil, as it can compact and hinder root development. The soil pH should be slightly acidic to neutral, around 6.0 to 7.0.
How often should I water my radishes?
Radishes need consistent moisture to grow quickly and develop crisp roots. Water deeply whenever the top inch of soil feels dry to the touch. Avoid overwatering, as this can lead to root rot. During hot weather, you may need to water more frequently. A good rule of thumb is to check the soil moisture daily and water as needed. Mulching around the base of the plants can help retain moisture and suppress weeds.
How much sunlight do radishes need?
Radishes need at least 6 hours of direct sunlight per day to thrive. If you’re growing them indoors, place them near a sunny window or use grow lights. Insufficient sunlight can result in leggy plants and small, underdeveloped roots. If you live in a particularly hot climate, some afternoon shade can be beneficial to prevent the plants from bolting (going to seed prematurely).
How long does it take for radishes to grow?
One of the great things about radishes is that they are quick to mature. Most varieties are ready to harvest in just 3 to 4 weeks from planting. The exact time will depend on the variety, growing conditions, and weather. Check the seed packet for specific information on the maturity time of your chosen radish variety.
How do I know when my radishes are ready to harvest?
The best way to determine if your radishes are ready to harvest is to check their size. Most varieties are ready when the roots are about 1 inch in diameter. You can also gently brush away some of the soil around the base of the plant to get a better look at the root. If the roots are the desired size, gently pull them from the soil. Don’t wait too long to harvest, as radishes can become woody and bitter if left in the ground for too long.
Can I grow radishes in the winter?
Yes, you can grow radishes in the winter, especially in milder climates. In colder regions, you can grow them indoors under grow lights or in a greenhouse. Choose varieties that are specifically bred for winter growing. Provide adequate light and consistent moisture, and you can enjoy fresh radishes even during the colder months.
What are some common problems when growing radishes?
Some common problems when growing radishes include pests such as flea beetles and root maggots, as well as diseases like root rot. Flea beetles can be controlled with insecticidal soap or by covering the plants with row covers. Root maggots can be prevented by practicing crop rotation and using well-draining soil. Root rot can be avoided by ensuring proper drainage and avoiding overwatering.
Can I eat the radish greens?
Yes, radish greens are edible and nutritious! They have a peppery flavor similar to the roots. You can use them in salads, soups, or stir-fries. Make sure to wash them thoroughly before eating. Harvest the greens when they are young and tender for the best flavor.
How do I store harvested radishes?
To store harvested radishes, remove the greens and wash the roots thoroughly. Place them in a plastic bag or container lined with a damp paper towel. Store them in the refrigerator for up to two weeks. The greens can be stored separately in a plastic bag in the refrigerator for a few days.

Leave a Comment