

Potato Growing Styrofoam Water: Sounds a little unconventional, right? Well, get ready to unlock a surprisingly effective secret weapon in your home gardening arsenal! For centuries, humans have cultivated potatoes, from their humble beginnings in the Andes Mountains to becoming a global staple. But let’s face it, growing potatoes can sometimes feel like a gamble. Poor soil, limited space, and inconsistent watering can all lead to disappointing harvests.
That’s where this DIY trick comes in. I’m going to show you how to leverage the power of styrofoam and water to create a mini potato paradise, even if you’re short on space or dealing with less-than-ideal soil conditions. Imagine harvesting a bounty of fresh, homegrown potatoes right from your balcony or backyard! This method is not only incredibly simple and cost-effective, but it also promotes healthier root development and maximizes your yield.
Why do you need this? Because everyone deserves the joy of digging up their own potatoes! This potato growing styrofoam water hack is perfect for beginners and seasoned gardeners alike. It’s a game-changer that will transform the way you think about growing potatoes at home. So, grab your styrofoam, fill up your watering can, and let’s get started on this exciting gardening adventure together!
Grow Potatoes in a Styrofoam Cooler: A DIY Guide
Hey there, fellow gardening enthusiasts! I’m super excited to share one of my favorite DIY gardening hacks with you: growing potatoes in a styrofoam cooler. It’s a fantastic way to maximize space, control the growing environment, and harvest a bountiful crop of spuds right in your backyard (or even on your balcony!). Plus, it’s a great way to repurpose those old coolers that might otherwise end up in a landfill. Let’s dive in!
Why Grow Potatoes in a Styrofoam Cooler?
Before we get started, you might be wondering why I’m so enthusiastic about this method. Here’s the scoop:
* Space Saving: Perfect for small gardens, patios, or balconies. You don’t need a huge plot of land to grow a decent amount of potatoes.
* Easy Harvesting: Forget digging! When it’s time to harvest, you can simply tip the cooler over and collect your potatoes.
* Controlled Environment: Styrofoam provides insulation, helping to regulate soil temperature and moisture levels. This is especially beneficial in areas with extreme weather.
* Mobility: You can easily move the cooler around to follow the sun or protect your plants from frost.
* Recycling: Give those old styrofoam coolers a new lease on life!
Materials You’ll Need
Alright, let’s gather our supplies. Here’s what you’ll need to get started:
* Styrofoam Cooler: Choose a large cooler, preferably one that’s at least 24 inches long, 18 inches wide, and 12 inches deep. The bigger, the better, as it will allow for more potato growth. Make sure it has a lid, even if it’s damaged.
* Seed Potatoes: These are potatoes specifically grown for planting. You can find them at your local garden center or online. Choose a variety that suits your climate and taste preferences. I personally love Yukon Gold for their creamy texture and delicious flavor.
* Potting Mix: A well-draining potting mix is essential. Avoid using garden soil, as it can become compacted in the cooler. I recommend a mix of compost, peat moss (or coco coir), and perlite or vermiculite.
* Drill: For creating drainage holes in the cooler.
* Knife or Saw: To cut the seed potatoes (if necessary).
* Watering Can or Hose: For watering your potato plants.
* Fertilizer (Optional): A balanced, slow-release fertilizer can help boost potato growth.
* Gloves: To protect your hands while working with soil.
Step-by-Step Instructions: Planting Your Potatoes
Okay, let’s get our hands dirty! Here’s how to plant your seed potatoes in the styrofoam cooler:
1. Drill Drainage Holes: This is crucial! Potatoes need well-draining soil to thrive. Use your drill to create several drainage holes in the bottom of the cooler. I usually make about 6-8 holes, spaced evenly apart.
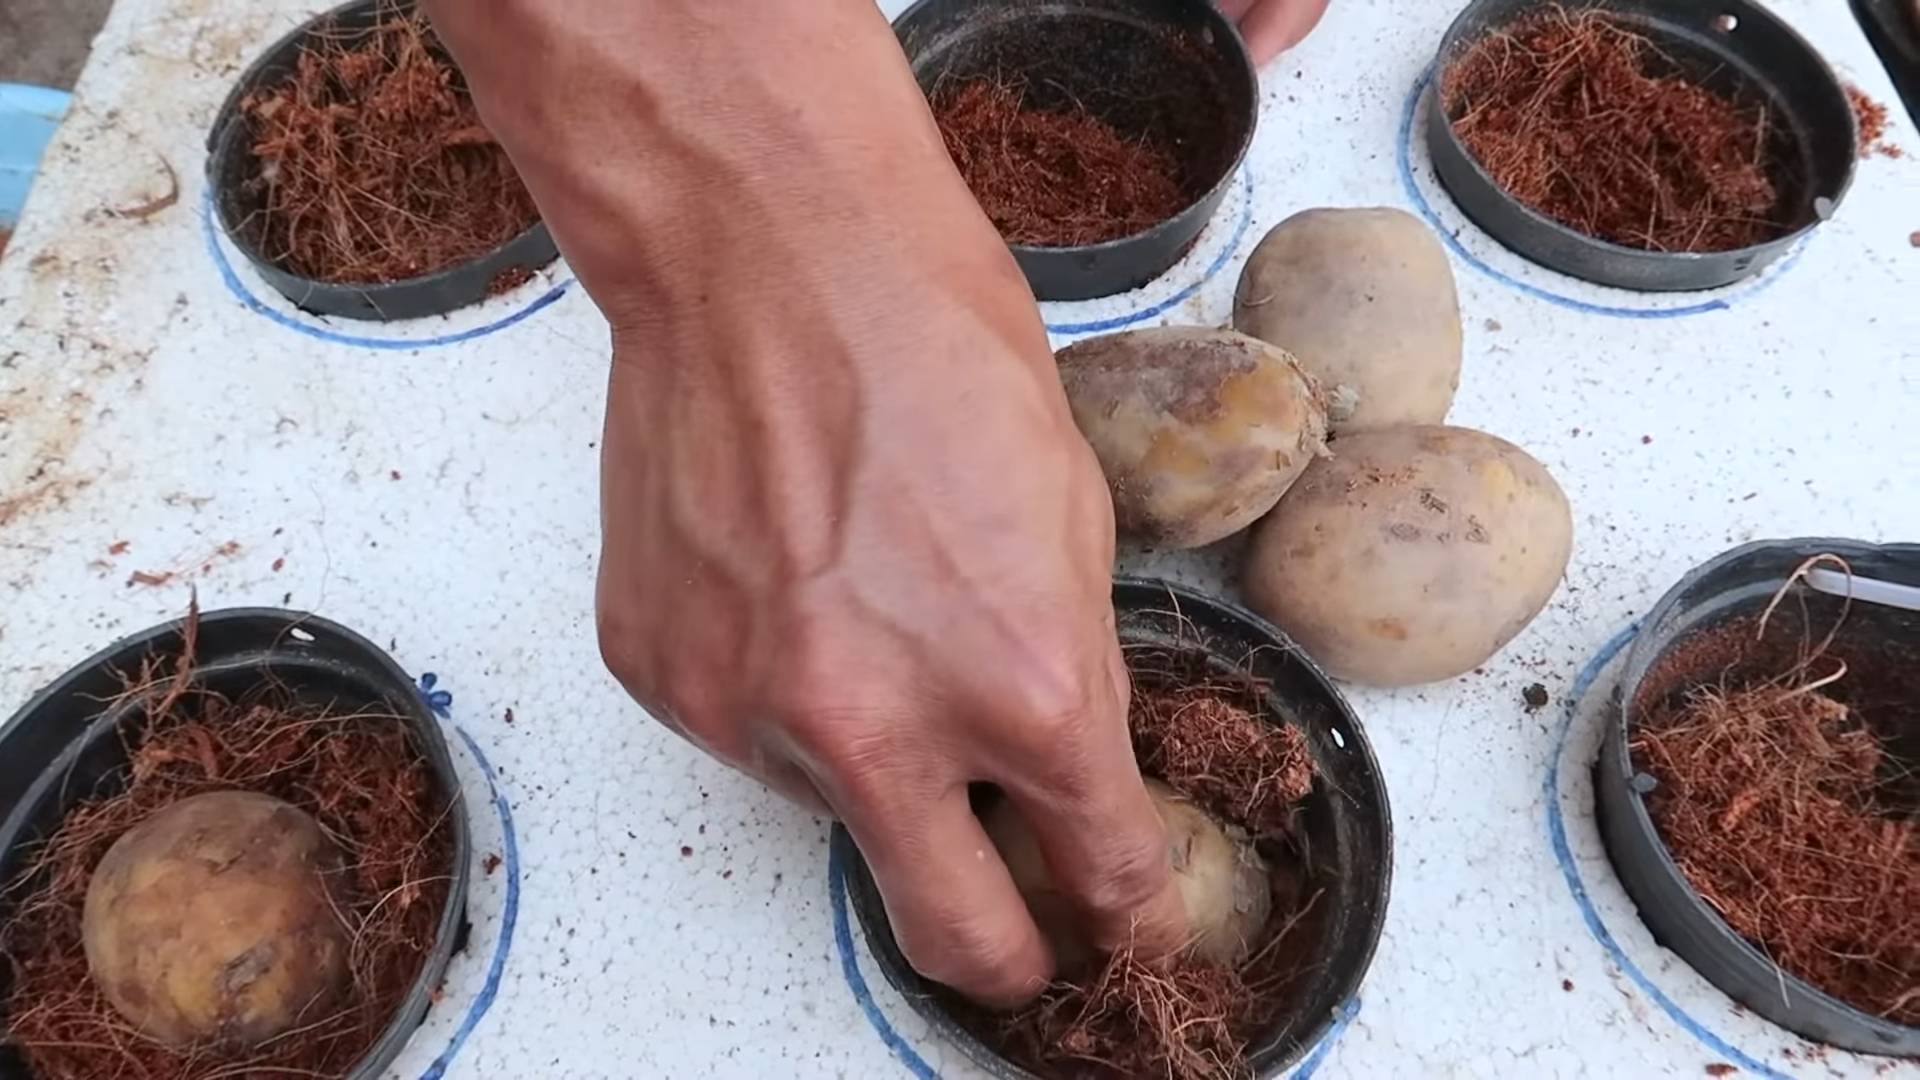
2. Prepare the Seed Potatoes: A week or two before planting, place your seed potatoes in a cool, bright location to encourage “chitting.” This means they’ll start to sprout small “eyes.” If your seed potatoes are large (bigger than an egg), you can cut them into smaller pieces, ensuring that each piece has at least one or two eyes. Let the cut pieces dry for a day or two to prevent rotting.
3. Add the Initial Layer of Soil: Pour about 4-6 inches of potting mix into the bottom of the cooler. This will provide a base for your seed potatoes to grow.
4. Plant the Seed Potatoes: Place the seed potato pieces (or whole seed potatoes if they’re small) on top of the soil, with the eyes facing upwards. Space them about 8-10 inches apart. If you’re using a very large cooler, you can plant more potatoes.
5. Cover with Soil: Cover the seed potatoes with another 4-6 inches of potting mix. Gently pat down the soil.
6. Water Thoroughly: Water the soil until it’s evenly moist but not soggy. You should see water draining out of the drainage holes.
Step-by-Step Instructions: “Hilling” Your Potatoes
Now, here’s where the magic happens! “Hilling” is the process of adding more soil to the potato plants as they grow. This encourages the plants to produce more potatoes along the stems.
1. Wait for Sprouts: After a week or two, you should start to see green sprouts emerging from the soil.
2. Add More Soil: When the sprouts are about 6-8 inches tall, it’s time to add more soil. Carefully add another 4-6 inches of potting mix around the base of the plants, burying the lower part of the stems. Leave the top few inches of the plant exposed.
3. Repeat the Process: Continue to add soil every few weeks as the plants grow taller. The goal is to keep burying the stems, encouraging more potato production. You can add soil until you reach the top of the cooler.
4. Water Regularly: Keep the soil consistently moist, especially during hot weather. Water deeply whenever the top inch of soil feels dry.
5. Fertilize (Optional): If you’re using fertilizer, follow the instructions on the package. I usually fertilize every few weeks with a balanced, slow-release fertilizer.
Step-by-Step Instructions: Caring for Your Potato Plants
Taking care of your potato plants is relatively easy, but here are a few tips to ensure a successful harvest:
1. Sunlight: Potatoes need at least 6-8 hours of sunlight per day. Place your cooler in a sunny location. If you live in a very hot climate, you might want to provide some afternoon shade to prevent the plants from overheating.
2. Watering: As mentioned earlier, water regularly, especially during hot weather. Avoid overwatering, as this can lead to root rot.
3. Pest Control: Keep an eye out for pests like aphids, potato beetles, and flea beetles. You can control these pests with organic insecticides or by hand-picking them off the plants.
4. Disease Prevention: Potatoes are susceptible to diseases like blight. To prevent disease, ensure good air circulation around the plants and avoid overhead watering.
Step-by-Step Instructions: Harvesting Your Potatoes
The most exciting part! Here’s how to harvest your potatoes:
1. Wait for the Right Time: Potatoes are typically ready to harvest about 80-100 days after planting. The foliage will start to turn yellow and die back.
2. Stop Watering: A week or two before harvesting, stop watering the plants. This will help the potatoes to cure and develop a thicker skin.
3. Harvesting: The easiest way to harvest is to simply tip the cooler over and carefully remove the potatoes from the soil. You can also use a garden fork to gently loosen the soil and lift the potatoes out.
4. Curing: After harvesting, cure the potatoes by placing them in a cool, dark, and well-ventilated location for about a week. This will help them to develop a thicker skin and prevent rotting.
5. Storage: Store your cured potatoes in a cool, dark, and dry place. They should last for several months.
Troubleshooting Tips
Even with the best planning, things can sometimes go wrong. Here are a few common problems and how to fix them:
* Yellowing Leaves: This could be a sign of overwatering, underwatering, nutrient deficiency, or disease. Check the soil moisture, fertilize if necessary, and look for signs of pests or disease.
* Small Potatoes: This could be due to insufficient sunlight, overcrowding, or lack of nutrients. Make sure your plants are getting enough sunlight, thin out the plants if necessary, and fertilize regularly.
* Rotting Potatoes: This is usually caused by overwatering or poor drainage. Ensure that your cooler has adequate drainage holes and avoid overwatering.
Additional Tips and Tricks
Here are a few extra tips to help you grow the best potatoes possible:
* Choose the Right Variety: Different potato varieties have different growing requirements and taste profiles. Do some research to find a variety that suits your climate and preferences.
* Use Organic Soil Amendments: Adding organic matter like compost, worm castings, or aged manure to your potting mix can improve soil fertility and drainage.
* Rotate Your Crops: Avoid planting potatoes in the same location year after year. Crop rotation can help prevent soilborne diseases and pests.
* Experiment with Different Techniques: Don’t be afraid to try different techniques to see what works best for you. Gardening is all about learning and experimenting!
I hope this guide has inspired you to try growing potatoes in a styrofoam cooler. It’s a fun, rewarding, and sustainable way to enjoy
Conclusion
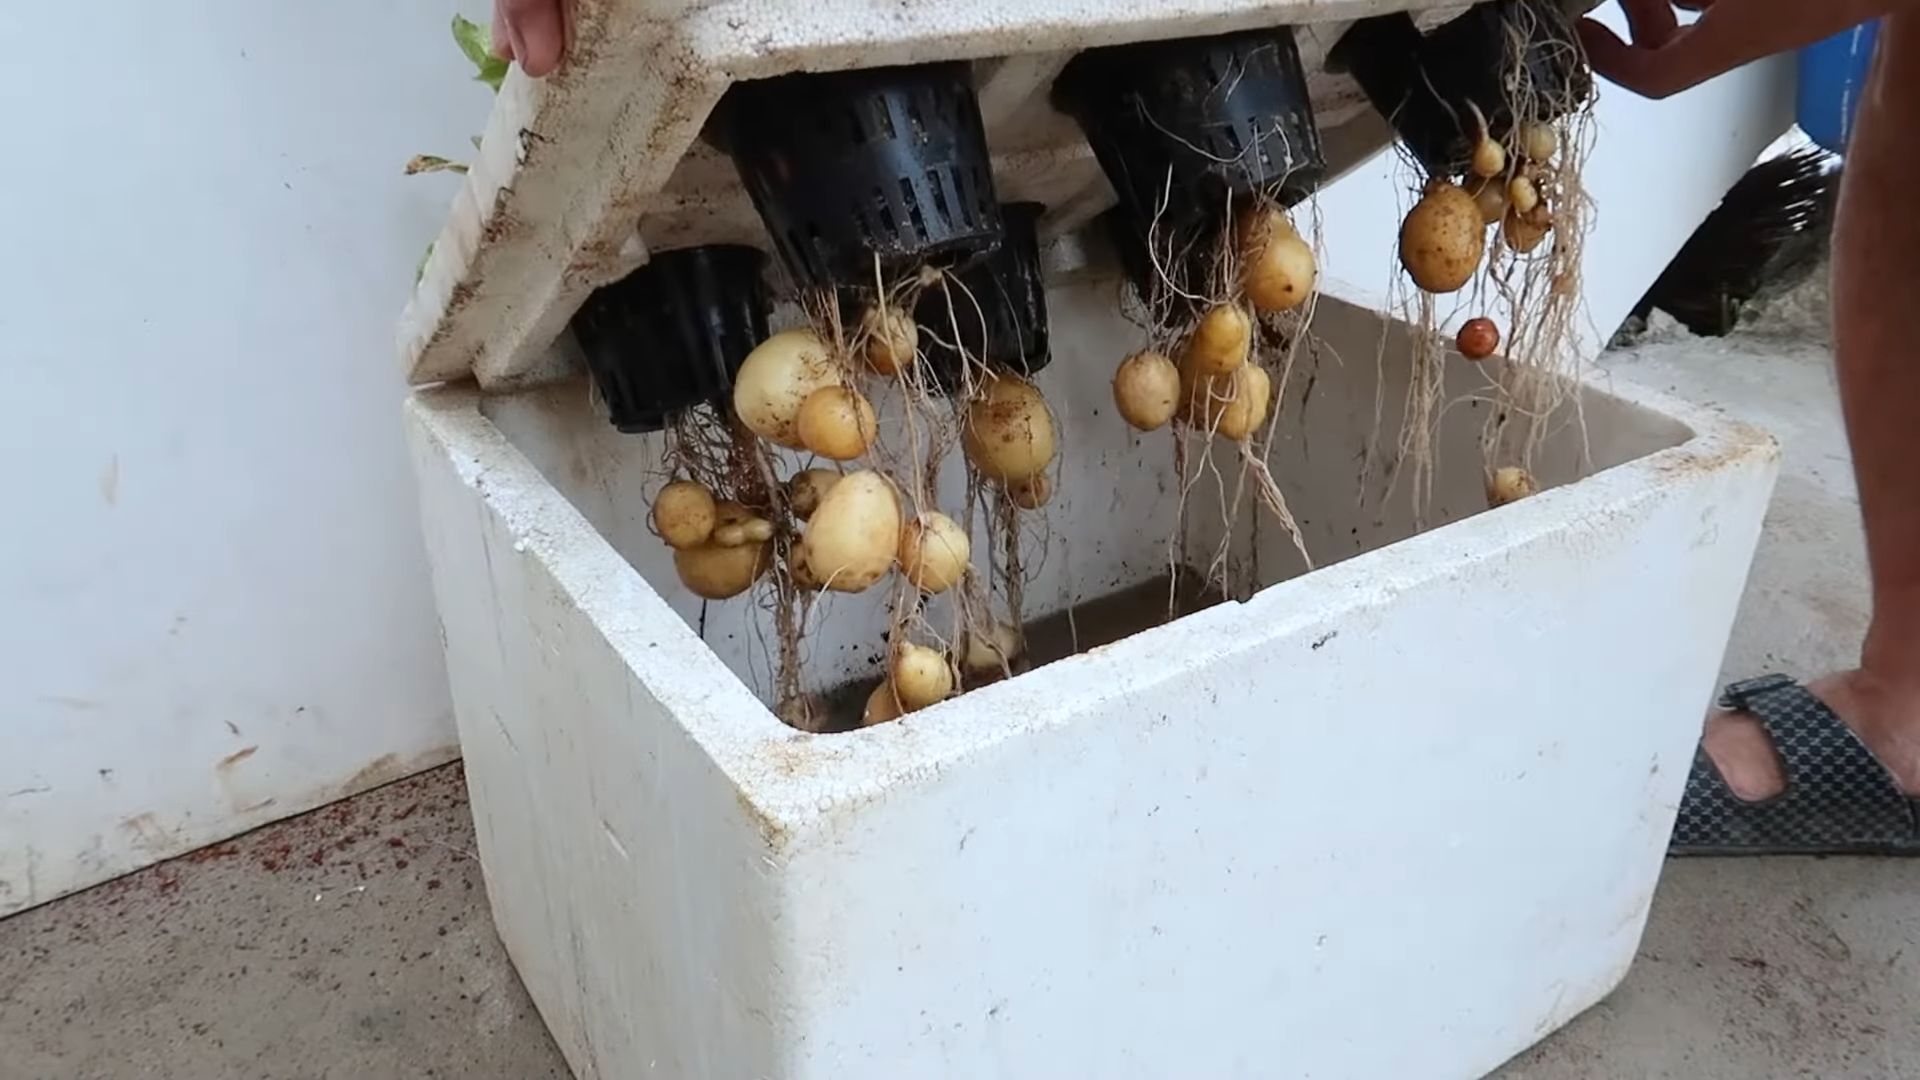
So, there you have it! Transforming discarded styrofoam into a thriving potato garden using the water culture method is not just a fun project; it’s a sustainable solution that yields impressive results. We’ve walked you through the process, highlighting the simplicity and efficiency of this innovative approach. But why is this DIY potato growing trick a must-try?
First and foremost, it’s incredibly space-saving. Whether you have a sprawling backyard or a tiny balcony, this method allows you to cultivate potatoes virtually anywhere. Forget about tilling soil and battling weeds; the styrofoam water culture system minimizes the mess and maximizes your yield. Imagine harvesting a bountiful crop of homegrown potatoes from a container that once held packaging waste – the satisfaction is unparalleled!
Secondly, this method offers superior control over the growing environment. By carefully monitoring the water and nutrient levels, you can optimize conditions for potato growth, leading to healthier plants and larger, more flavorful tubers. Say goodbye to unpredictable weather patterns and soil-borne diseases that can decimate traditional potato crops.
Thirdly, it’s an environmentally conscious choice. By repurposing styrofoam, you’re diverting waste from landfills and giving it a new lease on life. Plus, the water culture system reduces water consumption compared to traditional soil-based gardening, making it a more sustainable option.
But the possibilities don’t end there! Feel free to experiment with different potato varieties to discover your favorites. Consider adding companion plants like basil or marigolds to deter pests and enhance the flavor of your potatoes. You can also customize the size and shape of your styrofoam containers to suit your specific needs and preferences. For instance, you could create a vertical potato garden by stacking multiple styrofoam containers on top of each other. Or, you could build a larger, more elaborate system with multiple containers connected by a network of pipes.
Don’t be afraid to get creative and adapt the method to your unique circumstances. The key is to have fun and learn along the way. Remember to document your progress and share your findings with other gardening enthusiasts.
We are confident that you’ll be amazed by the results of this DIY potato growing trick. It’s a simple, effective, and sustainable way to grow your own delicious potatoes, regardless of your gardening experience or available space.
So, what are you waiting for? Gather your styrofoam, grab some seed potatoes, and get ready to embark on a rewarding gardening adventure. We encourage you to try this method and share your experiences with us. Let us know what worked well, what challenges you encountered, and any tips or tricks you discovered along the way. Together, we can revolutionize the way we grow potatoes and create a more sustainable future for all. Share your pictures and stories on social media using #StyrofoamPotatoGarden and let’s inspire others to join the movement! We can’t wait to see your amazing potato harvests!
Frequently Asked Questions
What type of styrofoam is best for this project?
Ideally, you want to use clean, food-grade styrofoam containers. These are typically used for transporting produce or other food items. Avoid using styrofoam that has been exposed to harsh chemicals or pesticides. If you’re unsure about the safety of the styrofoam, it’s best to err on the side of caution and choose a different container. Also, make sure the styrofoam is thick enough to support the weight of the water and potatoes. A thinner styrofoam might crack or break under pressure.
How often should I change the water in the container?
The frequency of water changes depends on several factors, including the size of the container, the number of potato plants, and the ambient temperature. As a general rule, you should change the water every 1-2 weeks. However, it’s important to monitor the water quality and change it more frequently if it becomes cloudy or develops an unpleasant odor. When changing the water, be sure to add fresh nutrients to ensure that the potato plants receive the necessary nourishment.
What type of nutrients should I use for growing potatoes in water?
You’ll need a balanced hydroponic nutrient solution specifically formulated for vegetables. Look for a nutrient solution that contains all the essential macronutrients and micronutrients that potatoes need to thrive. Follow the instructions on the nutrient solution label carefully to ensure that you’re using the correct concentration. Over-fertilizing can damage the plants, while under-fertilizing can lead to nutrient deficiencies.
How much sunlight do potatoes grown in styrofoam water culture need?
Potatoes need at least 6-8 hours of direct sunlight per day to grow properly. If you don’t have enough natural sunlight, you can supplement with grow lights. Place the grow lights close to the plants and adjust the height as the plants grow. Be sure to use grow lights that emit a full spectrum of light, including both blue and red wavelengths.
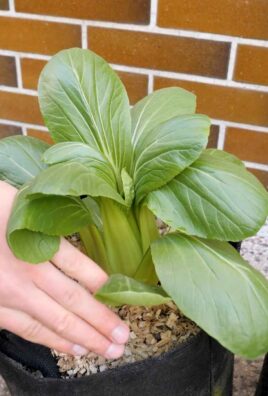
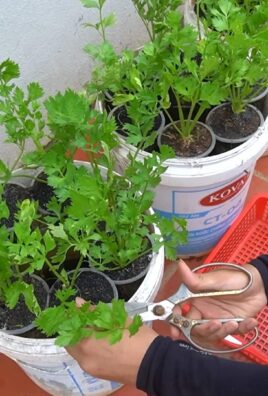
Can I grow other vegetables using this styrofoam water culture method?
Yes, you can grow a variety of other vegetables using this method, including tomatoes, peppers, lettuce, and herbs. However, each vegetable has different nutrient requirements, so you’ll need to adjust the nutrient solution accordingly. Research the specific needs of each vegetable before planting to ensure that they receive the proper nourishment.
What do I do if I see pests on my potato plants?
If you notice pests on your potato plants, take action immediately to prevent them from spreading. You can try spraying the plants with a natural insecticide, such as neem oil or insecticidal soap. You can also manually remove the pests by hand. If the infestation is severe, you may need to use a stronger insecticide. Be sure to follow the instructions on the insecticide label carefully and avoid spraying during the hottest part of the day.
How do I know when the potatoes are ready to harvest?
Potatoes are typically ready to harvest when the plants begin to flower. You can also check the size of the tubers by gently digging around the base of the plant. If the tubers are large enough, you can harvest them. To harvest the potatoes, carefully lift the plants out of the styrofoam container and remove the tubers from the roots.
What are some common problems I might encounter when growing potatoes in styrofoam water culture?
Some common problems include nutrient deficiencies, pest infestations, and root rot. Nutrient deficiencies can be identified by yellowing leaves or stunted growth. Pest infestations can be identified by the presence of insects or damage to the leaves. Root rot can be identified by brown, mushy roots. To prevent these problems, be sure to use a balanced nutrient solution, monitor the plants regularly for pests, and change the water frequently.
Can I reuse the styrofoam containers for multiple growing seasons?
Yes, you can reuse the styrofoam containers for multiple growing seasons, provided that they are still in good condition. Before reusing the containers, be sure to clean them thoroughly with soap and water to remove any dirt or debris. You may also want to disinfect the containers with a bleach solution to kill any bacteria or fungi.
Is this method suitable for growing potatoes indoors?
Yes, this method is suitable for growing potatoes indoors, provided that you have adequate lighting. You’ll need to supplement with grow lights to provide the plants with the necessary amount of light. You’ll also need to ensure that the room is well-ventilated to prevent the buildup of humidity.
Leave a Comment