

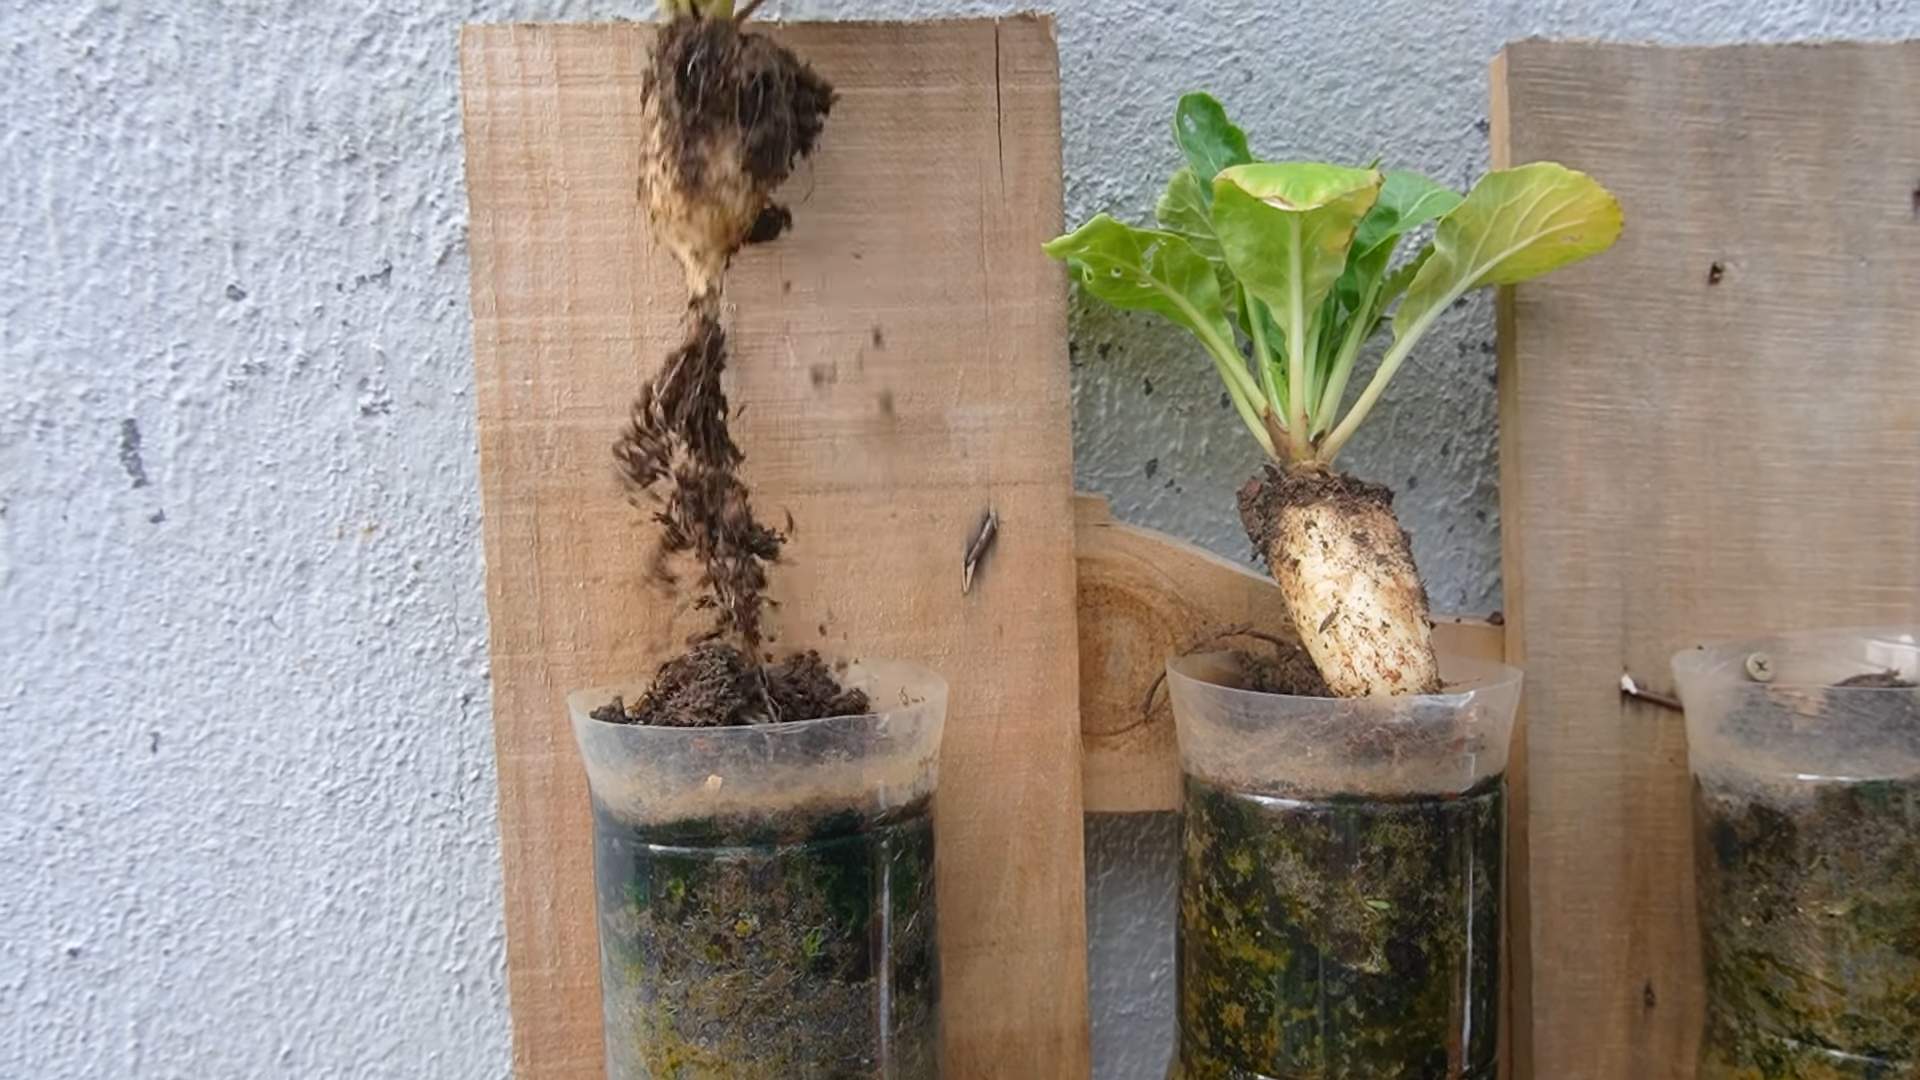
Plant White Radish Year Round? Absolutely! Imagine fresh, crisp radishes gracing your salads and side dishes, no matter the season. It’s not just a dream; it’s an achievable reality with a few clever tricks and a little DIY spirit. For centuries, radishes have been a staple in gardens worldwide, prized for their quick growth and peppery bite. From ancient Egypt, where they were a common offering to the gods, to modern-day kitchen gardens, radishes have proven their resilience and adaptability.
But let’s face it, traditional gardening can be tricky. We’ve all been there – planting with high hopes, only to be met with disappointment when the weather turns or pests invade. That’s where these DIY hacks come in! I’m going to share some simple, effective strategies to help you plant white radish year round, regardless of your climate or experience level. Think of it as unlocking a secret level in your gardening game, allowing you to enjoy the satisfaction of harvesting fresh, homegrown radishes whenever you crave them. So, grab your gardening gloves, and let’s get started on this exciting journey to radish abundance!
Growing Sweet Potatoes from Slips: A Gardener’s Guide
Alright, fellow gardening enthusiasts! Today, I’m going to walk you through a fantastic DIY project: growing sweet potatoes from slips. Now, you might be thinking, “Slips? What are those?” Don’t worry, I’ll explain everything. Slips are basically sprouts that grow from a sweet potato, and they’re the key to starting your own sweet potato patch. It’s easier than you think, and the reward of harvesting your own homegrown sweet potatoes is absolutely worth it.
What You’ll Need
Before we dive in, let’s gather our supplies. This is a pretty low-cost project, which is always a bonus!
* A healthy sweet potato (organic is best, to avoid any sprout inhibitors).
* A glass jar or container.
* Toothpicks.
* Water.
* Potting mix.
* Seedling trays or small pots.
* A sunny windowsill or grow lights.
* Garden soil (well-draining).
* Compost or other organic matter.
* Gardening gloves.
* A trowel.
Creating Your Sweet Potato Slips
This is where the magic happens! We’re going to coax those sweet potatoes into sprouting.
1. Prepare the Sweet Potato: First, give your sweet potato a good wash to remove any dirt. This helps prevent mold from growing later on.
2. Insert Toothpicks: Now, grab those toothpicks. You’ll need to insert them around the middle of the sweet potato, spacing them evenly. These toothpicks will act as supports, allowing you to suspend the potato in water.
3. Suspend in Water: Fill your glass jar or container with water, leaving about an inch of space at the top. Carefully place the sweet potato in the jar, resting it on the toothpicks. The bottom half of the potato should be submerged in water.
4. Find a Sunny Spot: Place the jar on a sunny windowsill or under grow lights. Sweet potatoes need plenty of light to sprout.
5. Maintain Water Level: Keep an eye on the water level and replenish it as needed. You want to make sure the bottom half of the sweet potato remains submerged.
6. Wait Patiently: This is the hardest part! It can take anywhere from a few weeks to a month for slips to start growing. Be patient and keep the water fresh. You’ll start to see little sprouts emerging from the sweet potato – these are your slips!
Separating and Rooting the Slips
Once your slips are a few inches tall, it’s time to separate them from the mother potato and encourage them to develop their own roots.
1. Gently Remove the Slips: Once the slips are about 6-8 inches long, gently twist and pull them away from the sweet potato. Try to get as much of the base of the slip as possible, as this is where the roots will develop. Don’t worry if some of the slips break off – they can still root!
2. Rooting in Water: Place the slips in a glass of water, making sure the bottom inch or two of the stem is submerged. Change the water every day or two to keep it fresh.
3. Wait for Roots: Within a week or two, you should start to see roots developing from the stems. Once the roots are about an inch long, your slips are ready to be planted.
4. Rooting Directly in Soil (Alternative Method): You can also root the slips directly in soil. Fill small pots or seedling trays with potting mix. Make a small hole in the soil and gently insert the base of the slip. Water well and keep the soil moist. This method can be a bit trickier, as the slips are more prone to drying out, but it can also result in stronger plants.
Preparing Your Garden Bed
Sweet potatoes love warm weather and well-drained soil. Let’s get your garden bed ready for them.
1. Choose a Sunny Location: Select a spot in your garden that receives at least 6-8 hours of sunlight per day.
2. Prepare the Soil: Sweet potatoes prefer loose, well-drained soil. Amend your soil with compost or other organic matter to improve drainage and fertility. If your soil is heavy clay, consider creating raised beds to improve drainage.
3. Create Ridges or Hills: Sweet potatoes grow best when planted on ridges or hills. This helps with drainage and allows the tubers to develop more easily. Create ridges that are about 8-10 inches high and 12 inches wide.
4. Warm the Soil: Sweet potatoes thrive in warm soil. You can warm the soil by covering it with black plastic mulch for a few weeks before planting. This will also help suppress weeds.
Planting Your Sweet Potato Slips
Now for the exciting part – planting your slips in the garden!
1. Choose a Planting Time: Wait until the danger of frost has passed and the soil has warmed up to at least 65°F (18°C). This is usually a few weeks after the last frost.
2. Plant the Slips: Dig a small hole in the top of each ridge or hill. Gently remove the slips from the water or pots and plant them about 4-6 inches deep, spacing them about 12-18 inches apart. Make sure to cover the roots with soil.
3. Water Thoroughly: Water the newly planted slips thoroughly. This will help them settle in and establish their roots.
4. Protect from Pests: Young sweet potato plants can be susceptible to pests like flea beetles and sweet potato weevils. Consider using row covers to protect your plants from these pests.
Caring for Your Sweet Potato Plants
Once your sweet potato plants are established, they’re relatively low-maintenance.
1. Water Regularly: Water your sweet potato plants regularly, especially during dry periods. Aim to keep the soil consistently moist, but not waterlogged.
2. Weed Regularly: Keep your garden bed free of weeds. Weeds can compete with your sweet potato plants for nutrients and water.
3. Fertilize Sparingly: Sweet potatoes don’t need a lot of fertilizer. In fact, too much nitrogen can result in excessive vine growth and fewer tubers. If your soil is poor, you can apply a balanced fertilizer (e.g., 10-10-10) at planting time.
4. Control Vine Growth (Optional): Sweet potato vines can grow quite long and sprawling. If you want to control their growth, you can prune them back. However, be careful not to prune too much, as this can reduce your yield.
Harvesting Your Sweet Potatoes
The moment we’ve all been waiting for! Harvesting your homegrown sweet potatoes.
1. Know When to Harvest: Sweet potatoes are typically ready to harvest about 90-120 days after planting. A good indicator is when the leaves start to turn yellow and the vines begin to die back.
2. Choose a Dry Day: Harvest your sweet potatoes on a dry day to prevent rot.
3. Dig Carefully: Use a garden fork or shovel to carefully dig around the plants, being careful not to damage the tubers. Start digging a foot or so away from the base of the plant.
4. Lift the Tubers: Gently lift the tubers from the soil.
5. Cure the Sweet Potatoes: Curing is essential for developing the sweetness and flavor of sweet potatoes. To cure them, place them in a warm, humid place (80-85°F or 27-29°C and 85-90% humidity) for about a week. A greenhouse or a warm, humid room in your house will work.
6. Store Properly: After curing, store your sweet potatoes in a cool, dry place (55-60°F or 13-16°C). Avoid storing them in the refrigerator, as this can cause them to develop a hard core.
Troubleshooting
Even with the best planning, things can sometimes go wrong. Here are a few common problems and how to address them:
* Slips Not Sprouting: Make sure the sweet potato is getting enough light and that the water is fresh. Try using a different sweet potato, as some varieties are more prone to sprouting than others.
* Slips Rotting: This is usually caused by too much moisture or poor air circulation. Make sure the water is clean and change it regularly. You can also try adding a small amount of hydrogen peroxide to the water to help prevent rot.
* Pests: Monitor your plants regularly for pests. If you find any, treat them with an appropriate insecticide or organic pest control method.
* Poor Yield: This can be caused by a variety of factors, including poor soil, insufficient sunlight, or too much nitrogen. Make sure your soil is well-drained and fertile, and that your plants are getting enough sunlight.
Growing sweet
Conclusion
So, there you have it! Mastering the art of planting white radish year-round is not just a gardening feat; it’s a gateway to fresh, crisp, and flavorful radishes gracing your table no matter the season. We’ve explored the secrets to overcoming seasonal challenges, from selecting the right varieties to implementing protective measures against harsh weather. The ability to harvest these peppery delights throughout the year offers a significant advantage, providing a consistent source of vitamins, minerals, and that satisfying crunch that only a freshly grown radish can deliver.
Why is this DIY trick a must-try? Because it empowers you to take control of your food source, reduce your reliance on store-bought produce (which can be expensive and lack the vibrant flavor of homegrown vegetables), and connect with nature in a deeply rewarding way. Imagine the satisfaction of serving a salad featuring radishes you nurtured from seed to harvest, knowing exactly where they came from and how they were grown. It’s a truly fulfilling experience.
But the journey doesn’t end here! Feel free to experiment with different white radish varieties to discover your personal favorites. Consider trying French Breakfast radishes for their mild flavor and elongated shape, or perhaps the Watermelon radish for its stunning pink interior and slightly sweet taste. You can also explore companion planting techniques, pairing your radishes with carrots, lettuce, or spinach to maximize space and deter pests.
For those in particularly hot climates, consider using shade cloth during the peak summer months to protect your radishes from scorching sun. In colder regions, a cold frame or greenhouse can extend your growing season well into the winter. Don’t be afraid to get creative and adapt these techniques to suit your specific environment and gardening style.
We are confident that with a little planning and effort, you can successfully plant white radish year-round and enjoy a continuous harvest of these delicious root vegetables. The key is to understand the needs of your plants, adapt to the changing seasons, and never be afraid to experiment.
Now, it’s your turn! We encourage you to embrace this DIY trick and embark on your own year-round radish-growing adventure. Share your experiences, successes, and challenges in the comments below. We’d love to hear about your favorite varieties, your innovative growing techniques, and any tips you’ve discovered along the way. Let’s build a community of radish enthusiasts and learn from each other! Happy gardening!
Frequently Asked Questions (FAQ)
What are the best white radish varieties to plant year-round?
The best varieties for year-round planting depend on your climate. For warmer climates, consider ‘White Icicle’ or ‘French Breakfast’ radishes, as they are relatively heat-tolerant. In cooler climates, ‘Cherry Belle’ or ‘Sparkler’ radishes are good choices. For winter growing, look for varieties specifically bred for cold tolerance, such as ‘Black Spanish’ radish. Experimenting with different varieties is key to finding what thrives best in your specific microclimate.
How do I protect my radishes from pests and diseases?
Radishes are generally pest-resistant, but flea beetles and root maggots can sometimes be a problem. To deter flea beetles, use row covers or sprinkle diatomaceous earth around your plants. For root maggots, practice crop rotation and avoid planting radishes in the same spot year after year. Ensure good soil drainage to prevent fungal diseases. Companion planting with aromatic herbs like mint or rosemary can also help repel pests. Regularly inspect your plants for any signs of infestation or disease and take action promptly.
What kind of soil is best for growing white radishes?
Radishes prefer well-drained, loose soil that is rich in organic matter. Amend your soil with compost or well-rotted manure before planting to improve its fertility and drainage. Avoid heavy clay soils, as they can restrict root growth and lead to misshapen radishes. A slightly acidic to neutral soil pH (around 6.0 to 7.0) is ideal.
How often should I water my radishes?
Radishes need consistent moisture to grow quickly and develop crisp, flavorful roots. Water deeply whenever the top inch of soil feels dry to the touch. Avoid overwatering, as this can lead to root rot. During hot, dry weather, you may need to water more frequently. Mulching around your plants can help retain moisture and suppress weeds.
How much sunlight do radishes need?
Radishes need at least 6 hours of sunlight per day to thrive. However, in hot climates, they can benefit from some afternoon shade to prevent bolting (going to seed prematurely). If you’re growing radishes indoors, use grow lights to provide adequate illumination.
How long does it take for radishes to mature?
Radishes are one of the fastest-growing vegetables, typically maturing in just 3-4 weeks. The exact time will depend on the variety and growing conditions. Check the seed packet for specific information. Harvest your radishes when they reach the desired size, as they can become woody and bitter if left in the ground too long.
Can I grow radishes in containers?
Yes, radishes are well-suited for container gardening. Choose a container that is at least 6 inches deep and has drainage holes. Use a good-quality potting mix and follow the same planting and care instructions as for growing radishes in the ground. Container-grown radishes may need more frequent watering than those grown in the ground.
What are some signs that my radishes are not growing properly?
Several factors can affect radish growth. If your radishes are small and stunted, it could be due to poor soil, lack of water, or overcrowding. If they are woody and bitter, it could be due to being left in the ground too long or exposure to excessive heat. If the leaves are yellowing or wilting, it could be a sign of disease or pest infestation. Addressing these issues promptly will help ensure a successful harvest.
How do I prevent radishes from becoming too spicy?
The spiciness of radishes is influenced by several factors, including variety, growing conditions, and harvest time. Some varieties are naturally spicier than others. Hot, dry weather can also increase the spiciness. Harvesting radishes when they are young and tender will help reduce their pungency. Watering regularly and providing some shade during hot weather can also help.
Can I eat the radish greens?
Yes, radish greens are edible and nutritious. They have a peppery flavor similar to the roots. Use them in salads, soups, or stir-fries. Choose young, tender greens for the best flavor and texture. Be sure to wash them thoroughly before eating.
What is bolting and how do I prevent it in radishes?
Bolting is when a plant prematurely produces a flowering stem and seeds, often making the edible parts of the plant bitter and less desirable. Radishes bolt primarily due to heat stress. To prevent bolting, choose heat-tolerant varieties, provide afternoon shade during hot weather, and water regularly. Harvesting radishes promptly when they are mature will also help prevent bolting.
How do I succession plant radishes for a continuous harvest?
Succession planting involves planting small batches of radishes every 1-2 weeks to ensure a continuous harvest throughout the growing season. This is especially important for year-round planting. Simply sow a new row or container of radishes every week or two, and you’ll have a steady supply of fresh radishes.
What are some creative ways to use white radishes in cooking?
Beyond salads, white radishes can be used in a variety of dishes. Try pickling them for a tangy condiment, roasting them for a sweeter flavor, or grating them into slaws and dips. They can also be added to stir-fries, soups, and stews. The possibilities are endless!
Is it really possible to plant white radish year round in all climates?
While the principles remain the same, the ease and success of planting white radish year-round varies significantly depending on your specific climate. In mild climates with consistent temperatures, it’s relatively straightforward. However, in regions with harsh winters or extremely hot summers, you’ll need to be more proactive with protective measures like cold frames, greenhouses, or shade cloth. It’s crucial to understand your local climate and adapt your gardening practices accordingly. Even in challenging climates, with the right techniques, you can extend your radish-growing season significantly.
Leave a Comment