

Growing Lettuce Coconut Shells: Who knew that your leftover coconut shells could become adorable and eco-friendly homes for your leafy greens? I’m so excited to share this incredibly fun and resourceful DIY project that will not only add a touch of tropical charm to your garden but also help you reduce waste. For centuries, cultures around the world have utilized natural materials like gourds and shells for planting, demonstrating a deep connection to the earth and a knack for sustainable living.
In today’s world, where space is often a premium and environmental consciousness is growing, this DIY trick is more relevant than ever. Imagine harvesting fresh, crisp lettuce right from your own upcycled coconut shells! It’s a fantastic way to introduce children to gardening, create unique gifts, or simply enjoy the satisfaction of transforming something ordinary into something extraordinary. Plus, growing lettuce coconut shells is surprisingly easy, even for beginners. I’ll guide you through each step, from preparing the shells to nurturing your lettuce seedlings, ensuring you have a thriving mini-garden in no time. Get ready to unleash your creativity and cultivate a little bit of paradise, one coconut shell at a time!
DIY: Growing Lettuce in Coconut Shells – A Fun and Sustainable Project!
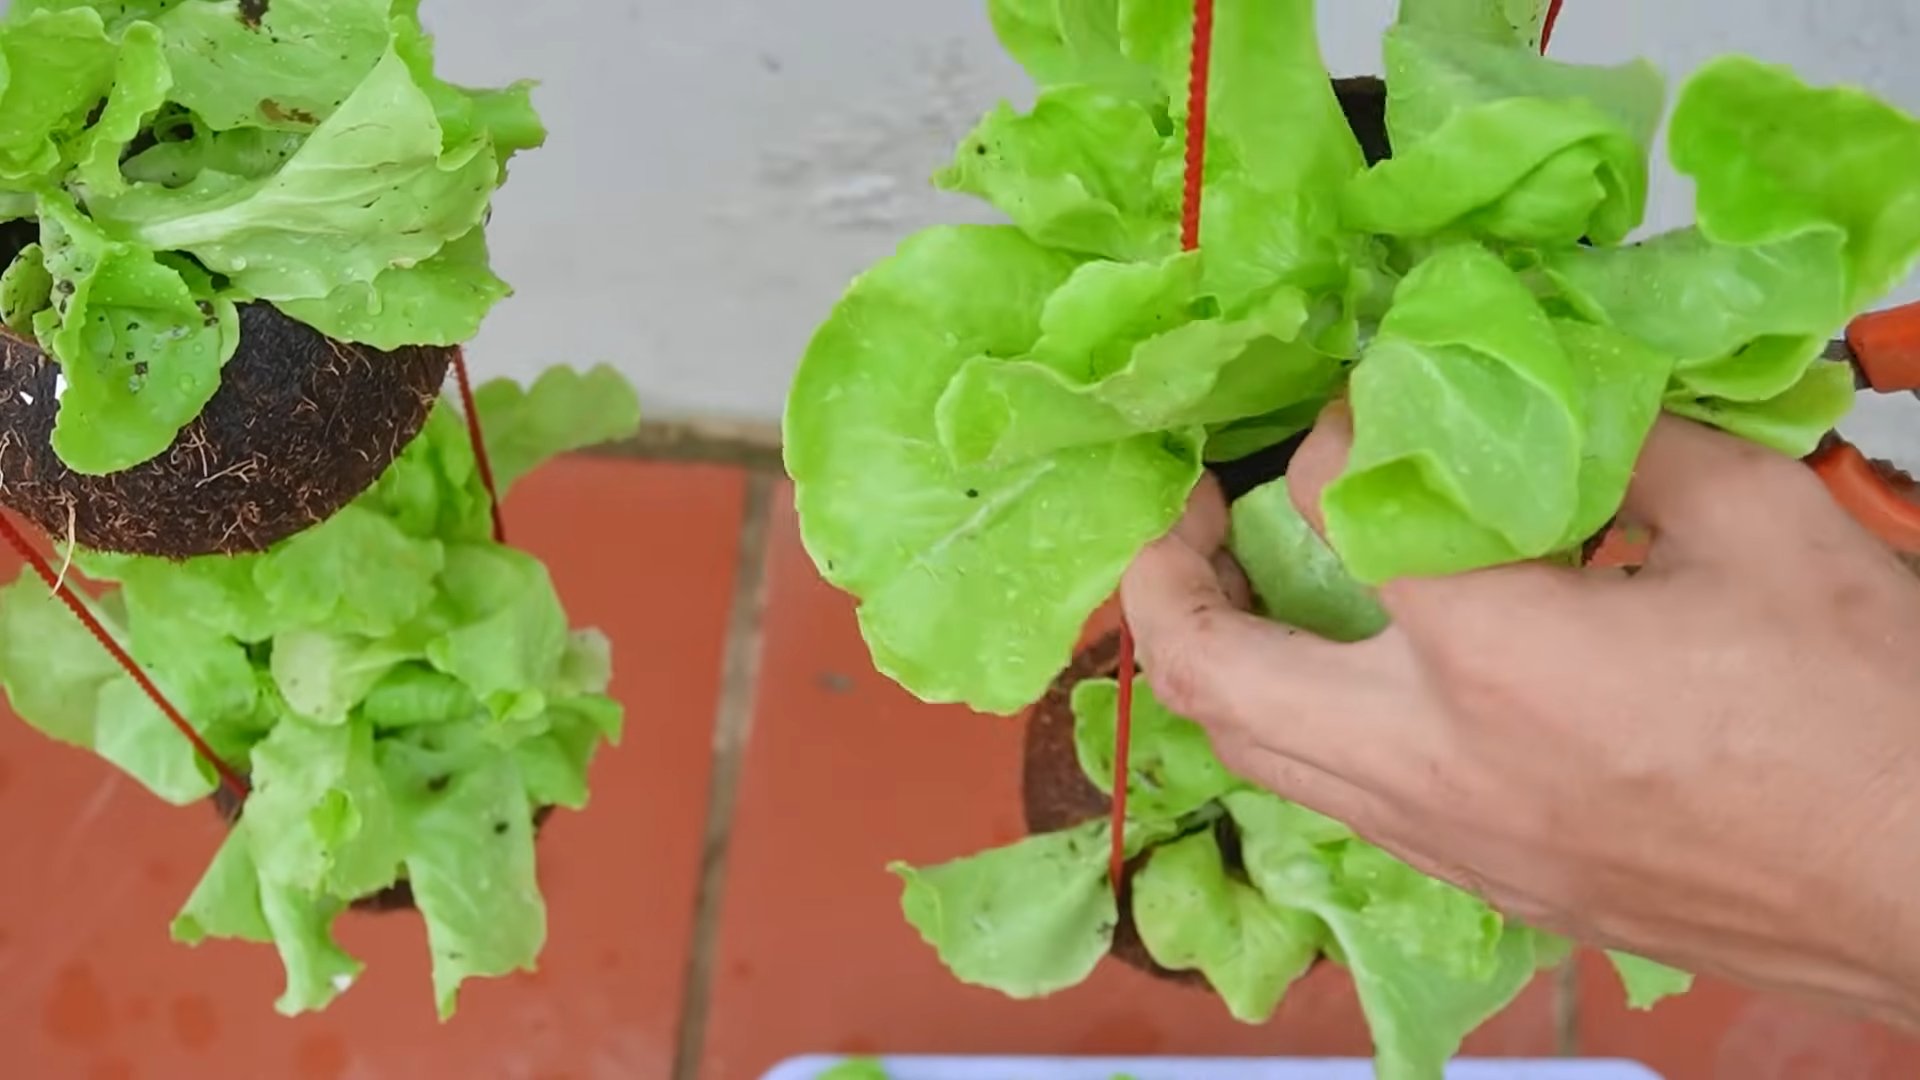
Hey there, fellow gardening enthusiasts! I’m so excited to share this super cool and eco-friendly project with you: growing lettuce in coconut shells! It’s a fantastic way to repurpose those coconut shells you might otherwise toss, and it adds a unique, rustic touch to your garden or even your kitchen windowsill. Plus, fresh, homegrown lettuce is always a win!
What You’ll Need
Before we dive in, let’s gather our supplies. This is a pretty simple project, so you probably have most of these things lying around already.
* **Coconut Shells:** Obviously! You’ll need cleaned-out coconut shells. You can either buy pre-cleaned ones online or, even better, enjoy some fresh coconuts and clean out the shells yourself. Make sure they are thoroughly cleaned and dried.
* **Drill (Optional):** If your coconut shells don’t already have drainage holes, you’ll need a drill with a suitable drill bit to create them.
* **Potting Soil:** Choose a good quality potting mix that’s well-draining. Lettuce likes soil that retains moisture but doesn’t get waterlogged.
* **Lettuce Seeds:** Pick your favorite lettuce varieties! Romaine, butterhead, loose-leaf – the choice is yours. I personally love a mix of different types for a colorful salad.
* **Watering Can or Spray Bottle:** For gentle watering.
* **Small Stones or Gravel (Optional):** To improve drainage at the bottom of the shells.
* **Gloves (Optional):** To keep your hands clean.
* **Small Trowel or Spoon:** For handling the soil.
Preparing the Coconut Shells
This is a crucial step to ensure your lettuce thrives. We need to make sure the shells are clean and have proper drainage.
1. **Cleaning the Shells:** If you’re using fresh coconut shells, scoop out all the coconut meat and thoroughly wash the inside of the shells with warm, soapy water. Rinse them well to remove any residue. Let them dry completely in the sun. This helps prevent mold and bacteria growth.
2. **Creating Drainage Holes:** This is super important! Lettuce needs good drainage to prevent root rot. If your shells don’t have drainage holes, use a drill to create 3-4 holes in the bottom of each shell. Make sure the holes are large enough to allow water to drain freely, but not so large that the soil will fall out. I usually aim for about ¼ inch in diameter.
3. **Adding Drainage Layer (Optional):** To further improve drainage, you can add a layer of small stones or gravel to the bottom of each shell before adding the soil. This helps prevent the soil from becoming compacted and allows excess water to drain away more easily. I find this especially helpful if I’m using a slightly heavier potting mix.
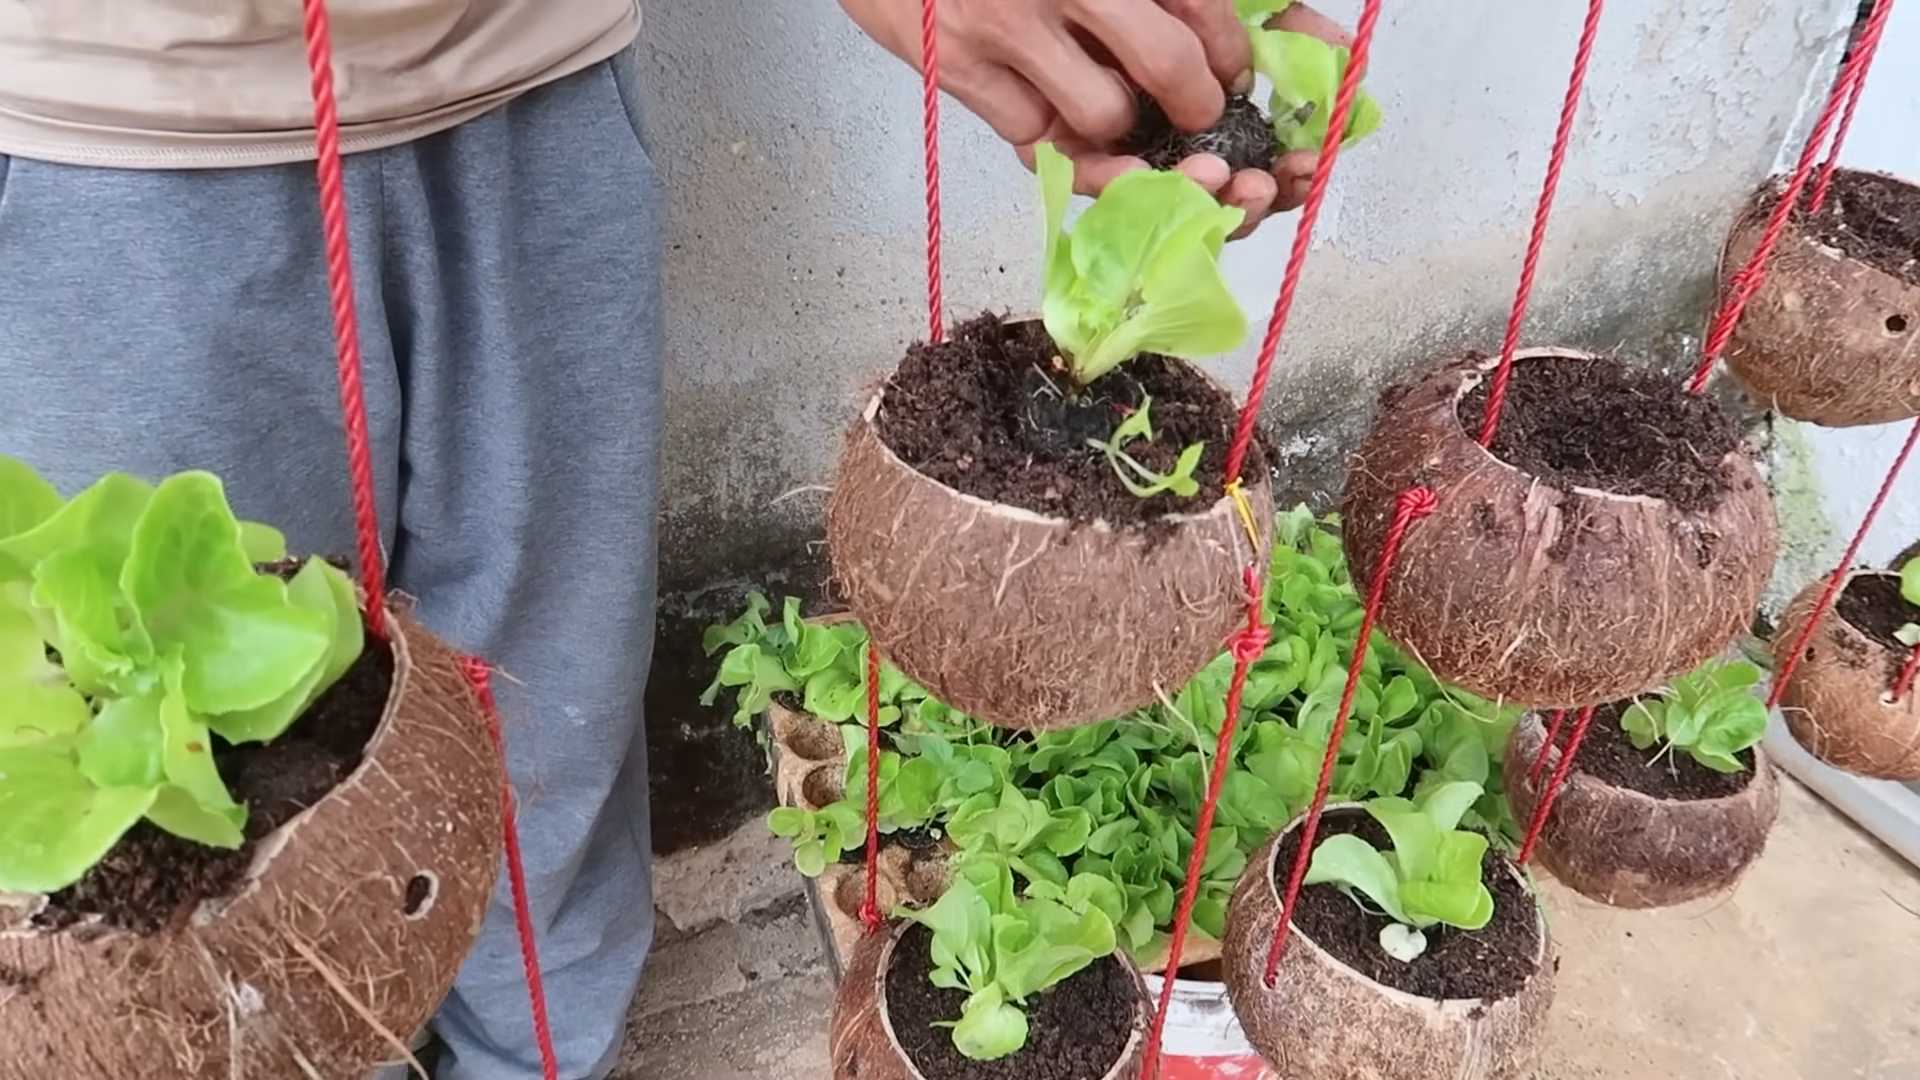
Planting the Lettuce Seeds
Now for the fun part – planting the seeds! This is where you get to see your little lettuce garden start to take shape.
1. **Filling the Shells with Soil:** Fill each coconut shell with potting soil, leaving about an inch of space at the top. Gently press down on the soil to remove any air pockets. You want the soil to be firm but not compacted.
2. **Sowing the Seeds:** Sprinkle the lettuce seeds evenly over the surface of the soil. Don’t overcrowd them! Lettuce seeds are tiny, so it’s easy to overdo it. A good rule of thumb is to space them about ½ inch apart.
3. **Covering the Seeds:** Lightly cover the seeds with a thin layer of soil (about ¼ inch). Lettuce seeds need light to germinate, so don’t bury them too deep.
4. **Watering Gently:** Use a watering can or spray bottle to gently water the soil. Be careful not to wash the seeds away. The soil should be moist but not soggy. I like to use a spray bottle to mist the surface of the soil until it’s evenly damp.
Caring for Your Lettuce Seedlings
This is where the patience comes in! But trust me, it’s worth it when you’re enjoying your homegrown lettuce.
1. **Finding the Right Location:** Place your coconut shells in a location that receives at least 6 hours of sunlight per day. Lettuce needs plenty of light to grow properly. If you’re growing them indoors, a sunny windowsill is ideal. You can also use grow lights if you don’t have enough natural light.
2. **Watering Regularly:** Keep the soil consistently moist, but not waterlogged. Water when the top inch of soil feels dry to the touch. Check the soil moisture daily, especially during hot weather. I usually water every other day, but it depends on the weather and the type of potting mix I’m using.
3. **Thinning the Seedlings:** Once the seedlings have emerged and have a few true leaves (usually after a week or two), you’ll need to thin them out. This means removing some of the seedlings to give the remaining ones enough space to grow. Choose the strongest, healthiest-looking seedlings and gently snip off the others at the soil line. Aim for a spacing of about 2-3 inches between plants.
4. **Fertilizing (Optional):** Lettuce doesn’t need a lot of fertilizer, but you can give it a boost by feeding it with a diluted liquid fertilizer every few weeks. Choose a fertilizer that’s specifically formulated for leafy greens. Follow the instructions on the fertilizer label carefully.
5. **Protecting from Pests:** Keep an eye out for pests like aphids, slugs, and snails. If you spot any, you can try removing them by hand or using an organic pest control spray. I’ve found that a strong blast of water from the hose can often dislodge aphids.
Harvesting Your Lettuce
The best part! You can start harvesting your lettuce once the leaves are big enough to eat, usually about 4-6 weeks after planting.
1. **Harvesting Loose-Leaf Lettuce:** For loose-leaf lettuce varieties, you can harvest individual leaves as needed. Simply snip off the outer leaves with scissors or a knife, leaving the inner leaves to continue growing. This allows you to harvest lettuce over a longer period of time.
2. **Harvesting Head Lettuce:** For head lettuce varieties like romaine or butterhead, you can harvest the entire head at once. Cut the head off at the base of the plant with a sharp knife.
3. **Washing and Storing:** After harvesting, wash the lettuce leaves thoroughly and pat them dry. Store them in a plastic bag or container in the refrigerator. They should stay fresh for several days.
Troubleshooting Tips
Even with the best planning, sometimes things don’t go exactly as expected. Here are a few common problems and how to fix them:
* **Seeds Not Germinating:** Make sure the soil is consistently moist and that the seeds are getting enough light. Lettuce seeds need light to germinate, so don’t bury them too deep.
* **Seedlings Leggy:** This means the seedlings are stretching towards the light because they’re not getting enough. Move them to a sunnier location or use grow lights.
* **Leaves Turning Yellow:** This could be a sign of overwatering, underwatering, or nutrient deficiency. Check the soil moisture and adjust your watering accordingly. You can also try fertilizing with a diluted liquid fertilizer.
* **Pests:** Regularly inspect your plants for pests and take action as soon as you spot them. Hand-picking, insecticidal soap, and neem oil are all effective options.
Why I Love This Project
I absolutely adore this project because it’s not only fun and rewarding, but it’s also a great way to be more sustainable. Repurposing coconut shells reduces waste and gives them a new life. Plus, growing your own lettuce means you’re reducing your carbon footprint by avoiding trips to the grocery store. And let’s be honest, there’s nothing quite like the taste of fresh, homegrown lettuce!
So, what are you waiting for? Grab some coconut shells, lettuce seeds, and get planting! I promise you’ll love the results. Happy gardening!
Conclusion
So, there you have it! Growing lettuce in coconut shells isn’t just a quirky gardening trend; it’s a genuinely effective and rewarding way to cultivate fresh, delicious greens right at your fingertips. We’ve explored the numerous benefits, from the eco-friendly repurposing of coconut shells to the enhanced drainage and aeration that promote healthy root development. This method is particularly appealing for urban gardeners, those with limited space, or anyone looking to add a touch of tropical charm to their edible garden.
But the real magic lies in the simplicity and adaptability of this DIY trick. Imagine plucking crisp, vibrant lettuce leaves directly from their coconut shell cradles, knowing you’ve nurtured them from seed to salad. The satisfaction is unparalleled!
Why is this a must-try? Because it’s sustainable, space-saving, visually appealing, and yields fantastic results. It’s a conversation starter, a learning experience, and a delicious way to connect with nature. Plus, it’s incredibly budget-friendly. You’re essentially turning waste into a thriving garden.
Don’t be afraid to experiment with different lettuce varieties. Romaine, butterhead, and loose-leaf lettuces all thrive in coconut shells. You can also try companion planting. Consider adding herbs like basil or chives to the same coconut shell for a flavorful combination. Another variation is to paint or decorate your coconut shells to add a personal touch and make them even more visually appealing. Get creative with your display! Hang them from a balcony railing, arrange them on a tiered stand, or create a vertical garden using a pallet.
We’ve covered the basics, but the real fun begins when you start experimenting and tailoring the process to your specific environment and preferences. Remember to monitor the moisture levels, provide adequate sunlight, and protect your lettuce from extreme temperatures.
We wholeheartedly encourage you to give this DIY trick a try. It’s a fantastic project for gardeners of all skill levels, and the rewards are well worth the effort. Once you’ve harvested your first batch of coconut shell lettuce, we’d love to hear about your experience! Share your photos, tips, and variations in the comments below. Let’s build a community of coconut shell gardeners and inspire others to embrace this sustainable and rewarding practice. Happy gardening!
Frequently Asked Questions (FAQs)
What type of lettuce grows best in coconut shells?
Most lettuce varieties will thrive in coconut shells, but some are particularly well-suited. Loose-leaf varieties like Black Seeded Simpson, Red Sails, and Oakleaf are excellent choices because they mature quickly and can be harvested continuously. Butterhead varieties like Buttercrunch and Tom Thumb also perform well due to their compact size. Romaine lettuce can be grown, but it may require a larger coconut shell or more frequent watering. Ultimately, the best lettuce for you will depend on your personal preferences and local climate. Experiment with different varieties to see what grows best in your specific conditions.
How often should I water my lettuce in coconut shells?
Watering frequency depends on several factors, including the weather, the type of potting mix you’re using, and the size of the coconut shell. Generally, you should water your lettuce whenever the top inch of soil feels dry to the touch. In hot, sunny weather, this may be every day, while in cooler, cloudy weather, you may only need to water every few days. Be careful not to overwater, as this can lead to root rot. Ensure the coconut shell has adequate drainage holes to prevent water from pooling at the bottom. A good rule of thumb is to water thoroughly until water drains out of the bottom of the shell.
What kind of potting mix should I use?
A well-draining potting mix is essential for growing healthy lettuce in coconut shells. Avoid using garden soil, as it can be too heavy and compact, leading to poor drainage. A good option is a mix of equal parts peat moss, perlite, and vermiculite. You can also use a commercially available potting mix specifically formulated for vegetables or herbs. Consider adding some compost to the mix to provide extra nutrients. The key is to ensure the potting mix is light, airy, and retains moisture without becoming waterlogged.
How much sunlight does lettuce need?
Lettuce needs at least six hours of sunlight per day to thrive. However, in hot climates, it can benefit from some afternoon shade to prevent bolting (going to seed). If you’re growing your lettuce indoors, place it near a sunny window or use grow lights to provide adequate light. Rotate the coconut shells regularly to ensure all sides of the lettuce receive equal sunlight. If your lettuce starts to look leggy or pale, it’s likely not getting enough light.
How do I fertilize my lettuce in coconut shells?
Lettuce is a relatively light feeder, but it still benefits from regular fertilization. You can use a liquid fertilizer diluted to half strength every two to three weeks. Look for a fertilizer that is specifically formulated for vegetables or herbs. Alternatively, you can add slow-release fertilizer granules to the potting mix at planting time. Avoid over-fertilizing, as this can lead to leggy growth and bitter-tasting leaves. Compost tea is another excellent option for providing nutrients to your lettuce.
How do I prevent pests and diseases?
To prevent pests and diseases, start with healthy plants and a clean growing environment. Inspect your lettuce regularly for signs of pests, such as aphids, slugs, or snails. Handpick any pests you find or use organic pest control methods, such as insecticidal soap or neem oil. Ensure good air circulation around your lettuce to prevent fungal diseases. Avoid overwatering, as this can create a favorable environment for disease. If you notice any signs of disease, such as yellowing leaves or spots, remove the affected leaves immediately.
How do I harvest my lettuce?
You can harvest your lettuce as soon as the leaves are large enough to eat. For loose-leaf varieties, you can harvest individual leaves as needed, allowing the plant to continue growing. For head lettuce varieties, wait until the head is firm and well-formed before harvesting. To harvest, simply cut the leaves or head at the base of the plant. Wash the lettuce thoroughly before eating.
Can I reuse the coconut shells?
Yes, you can definitely reuse the coconut shells! After harvesting your lettuce, simply remove the old potting mix and clean the shell thoroughly. You can sterilize the shell by soaking it in a solution of water and bleach (1 part bleach to 9 parts water) for 30 minutes. Rinse the shell thoroughly before reusing it. Coconut shells are durable and can last for several growing seasons with proper care.
What if I don’t have access to coconut shells?
While coconut shells are the star of this DIY trick, you can adapt the concept to other containers. Small pots, recycled yogurt containers, or even repurposed plastic bottles can be used as alternatives. Just make sure the container has adequate drainage holes and is large enough to accommodate the lettuce roots. The key is to provide a well-draining environment and adequate space for the lettuce to grow.
My lettuce is bolting (going to seed). What should I do?
Bolting is a common problem with lettuce, especially in hot weather. Once lettuce bolts, the leaves become bitter and unpalatable. To prevent bolting, choose heat-tolerant lettuce varieties, provide afternoon shade, and water regularly. If your lettuce starts to bolt, harvest the remaining leaves immediately. You can also try planting lettuce in the fall or early spring to avoid the hottest months of the year.

Leave a Comment