

Bag Grown Corn Yield: Imagine harvesting plump, juicy corn right from your own backyard, even if you don’t have a sprawling farm! Sounds too good to be true? Well, it’s not! For centuries, resourceful gardeners have found innovative ways to maximize their harvests, and growing corn in bags is a fantastic example of this ingenuity. From the ancient Aztecs, who revered corn as a sacred crop, to modern urban gardeners, the desire to cultivate this golden grain has persisted.
I know what you’re thinking: “Corn needs a lot of space!” And traditionally, you’d be right. But that’s where this DIY trick comes in. Growing corn in bags is a game-changer, especially for those of us with limited space. It allows you to control the soil quality, optimize watering, and even move your corn plants to the sunniest spot in your yard. Plus, it’s a super rewarding project that’s perfect for beginners and experienced gardeners alike.
This article will guide you through the entire process, from choosing the right bag and soil to ensuring a bountiful bag grown corn yield. We’ll cover all the essential tips and tricks to help you achieve a successful harvest. So, ditch the store-bought corn and get ready to enjoy the sweet taste of homegrown goodness!
Growing Corn in Bags: A Bountiful Harvest, Even Without a Garden!
Hey there, fellow gardening enthusiasts! Ever dreamed of sinking your teeth into sweet, homegrown corn but thought you needed acres of land? Well, I’m here to tell you that’s simply not true! You can absolutely grow corn in bags, even if you only have a small patio, balcony, or deck. I’ve done it myself, and let me tell you, the taste of that fresh, homegrown corn is unbeatable. So, grab your supplies, and let’s get started on this exciting DIY project!
What You’ll Need: The Essential Supplies
Before we dive into the nitty-gritty, let’s gather everything we need. This will make the whole process smoother and more enjoyable.
* Large, Sturdy Bags: Think big! We’re talking about bags that can hold at least 10-15 gallons of soil. Heavy-duty garbage bags, grow bags specifically designed for plants, or even repurposed feed sacks will work. Just make sure they’re strong enough to support the weight of the soil and the growing corn stalks. I personally prefer grow bags because they allow for better drainage and aeration.
* High-Quality Potting Mix: This is crucial! Don’t skimp on the potting mix. You need a well-draining mix that’s rich in nutrients. A blend of compost, peat moss, and perlite is ideal. Avoid using garden soil directly, as it can become compacted in the bags and hinder root growth.
* Corn Seeds: Choose a variety that’s suitable for your climate and growing season. Look for “early maturing” or “short season” varieties, especially if you live in an area with a shorter growing season. Sweet corn is the most popular choice, but you can also grow popcorn or ornamental corn.
* Slow-Release Fertilizer: Corn is a heavy feeder, meaning it needs a lot of nutrients to thrive. A slow-release fertilizer will provide a steady supply of nutrients throughout the growing season. Look for a fertilizer with a balanced NPK ratio (nitrogen, phosphorus, and potassium).
* Watering Can or Hose: Essential for keeping your corn plants hydrated.
* Scissors or a Knife: For making drainage holes in the bags.
* Optional: Stakes or Trellis: Depending on the variety of corn you choose and the weather conditions in your area, you might need to provide some support for the stalks.
* Optional: Mulch: Mulch helps retain moisture in the soil and suppress weeds. Straw, wood chips, or shredded bark are all good options.
Step-by-Step Guide: Planting Your Corn
Now that we have all our supplies, let’s get our hands dirty and plant some corn!
1. Prepare the Bags: First things first, we need to get our bags ready. If you’re using plastic bags, carefully cut several drainage holes in the bottom. This is super important to prevent the roots from sitting in water, which can lead to rot. Grow bags usually have built-in drainage, so you can skip this step if you’re using those.
2. Fill the Bags with Potting Mix: Now, fill the bags with your high-quality potting mix, leaving about 2-3 inches of space at the top. This space will make watering easier and prevent the soil from overflowing.
3. Add Slow-Release Fertilizer: Sprinkle the slow-release fertilizer evenly over the surface of the potting mix, following the instructions on the fertilizer package. Gently mix it into the top inch or two of the soil.
4. Plant the Corn Seeds: Here’s the fun part! Plant the corn seeds about 1-2 inches deep and 4-6 inches apart. Corn needs to be planted in blocks rather than rows for proper pollination. Aim for at least 4-6 plants per bag for good pollination.
5. Water Thoroughly: After planting, water the bags thoroughly until the water drains out of the bottom. This will help settle the soil and ensure that the seeds have good contact with the moisture.
6. Choose a Sunny Location: Corn needs at least 6-8 hours of direct sunlight per day to thrive. Place your bags in a sunny spot where they’ll get plenty of light. A south-facing location is usually ideal.
Caring for Your Corn: Nurturing Your Crop to Maturity
Once your corn is planted, it’s important to provide it with the care it needs to grow strong and healthy.
1. Watering: Water your corn plants regularly, especially during hot, dry weather. The soil should be consistently moist, but not soggy. Check the soil moisture by sticking your finger into the soil. If the top inch or two feels dry, it’s time to water.
2. Fertilizing: Corn is a heavy feeder, so you’ll need to supplement the slow-release fertilizer with additional feedings throughout the growing season. Use a liquid fertilizer specifically formulated for vegetables, following the instructions on the package. I like to fertilize every 2-3 weeks.
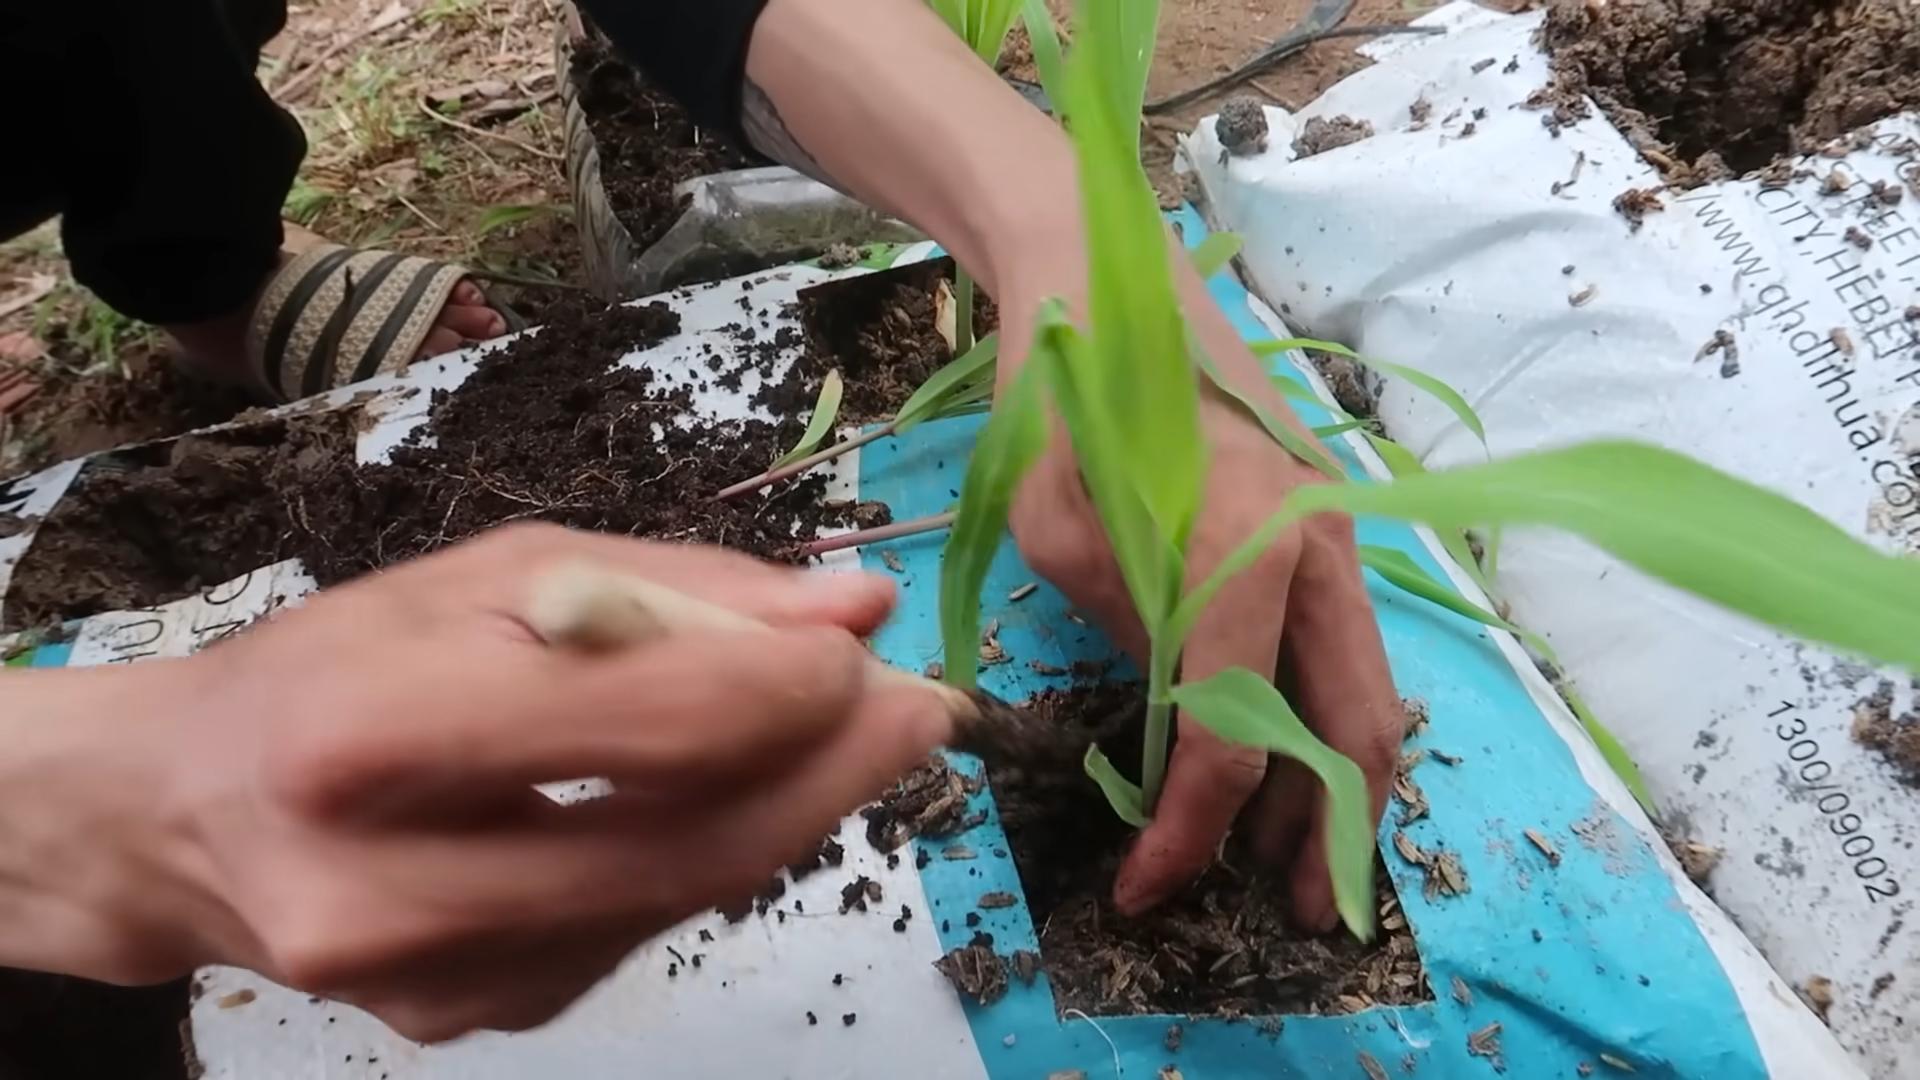
3. Pollination: Corn is wind-pollinated, meaning that the pollen from the tassels (the male flowers at the top of the plant) needs to reach the silks (the female flowers that emerge from the developing ears of corn). If you’re growing corn in a confined space, you may need to hand-pollinate to ensure good ear development. To hand-pollinate, gently shake the tassels over the silks, or collect pollen from the tassels with a small brush and apply it to the silks. Do this in the morning when the pollen is most active.
4. Weed Control: Keep the bags free of weeds, as they can compete with the corn plants for nutrients and water. Hand-pull any weeds that appear.
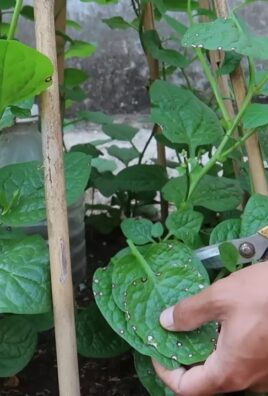
5. Pest and Disease Control: Keep an eye out for pests and diseases. Common corn pests include corn earworms, aphids, and spider mites. Diseases can include rust and leaf blight. If you notice any problems, take action promptly. You can use organic pest control methods, such as insecticidal soap or neem oil, to control pests. For diseases, ensure good air circulation and avoid overhead watering.
6. Staking (Optional): As the corn stalks grow taller, they may become susceptible to wind damage. If you live in a windy area, or if you’re growing a tall variety of corn, you may need to provide support for the stalks. You can use stakes or a trellis to support the plants. Simply insert the stakes into the soil near the base of the plants and tie the stalks to the stakes with twine.
Harvesting Your Corn: The Sweet Reward
After all your hard work, it’s finally time to harvest your corn!
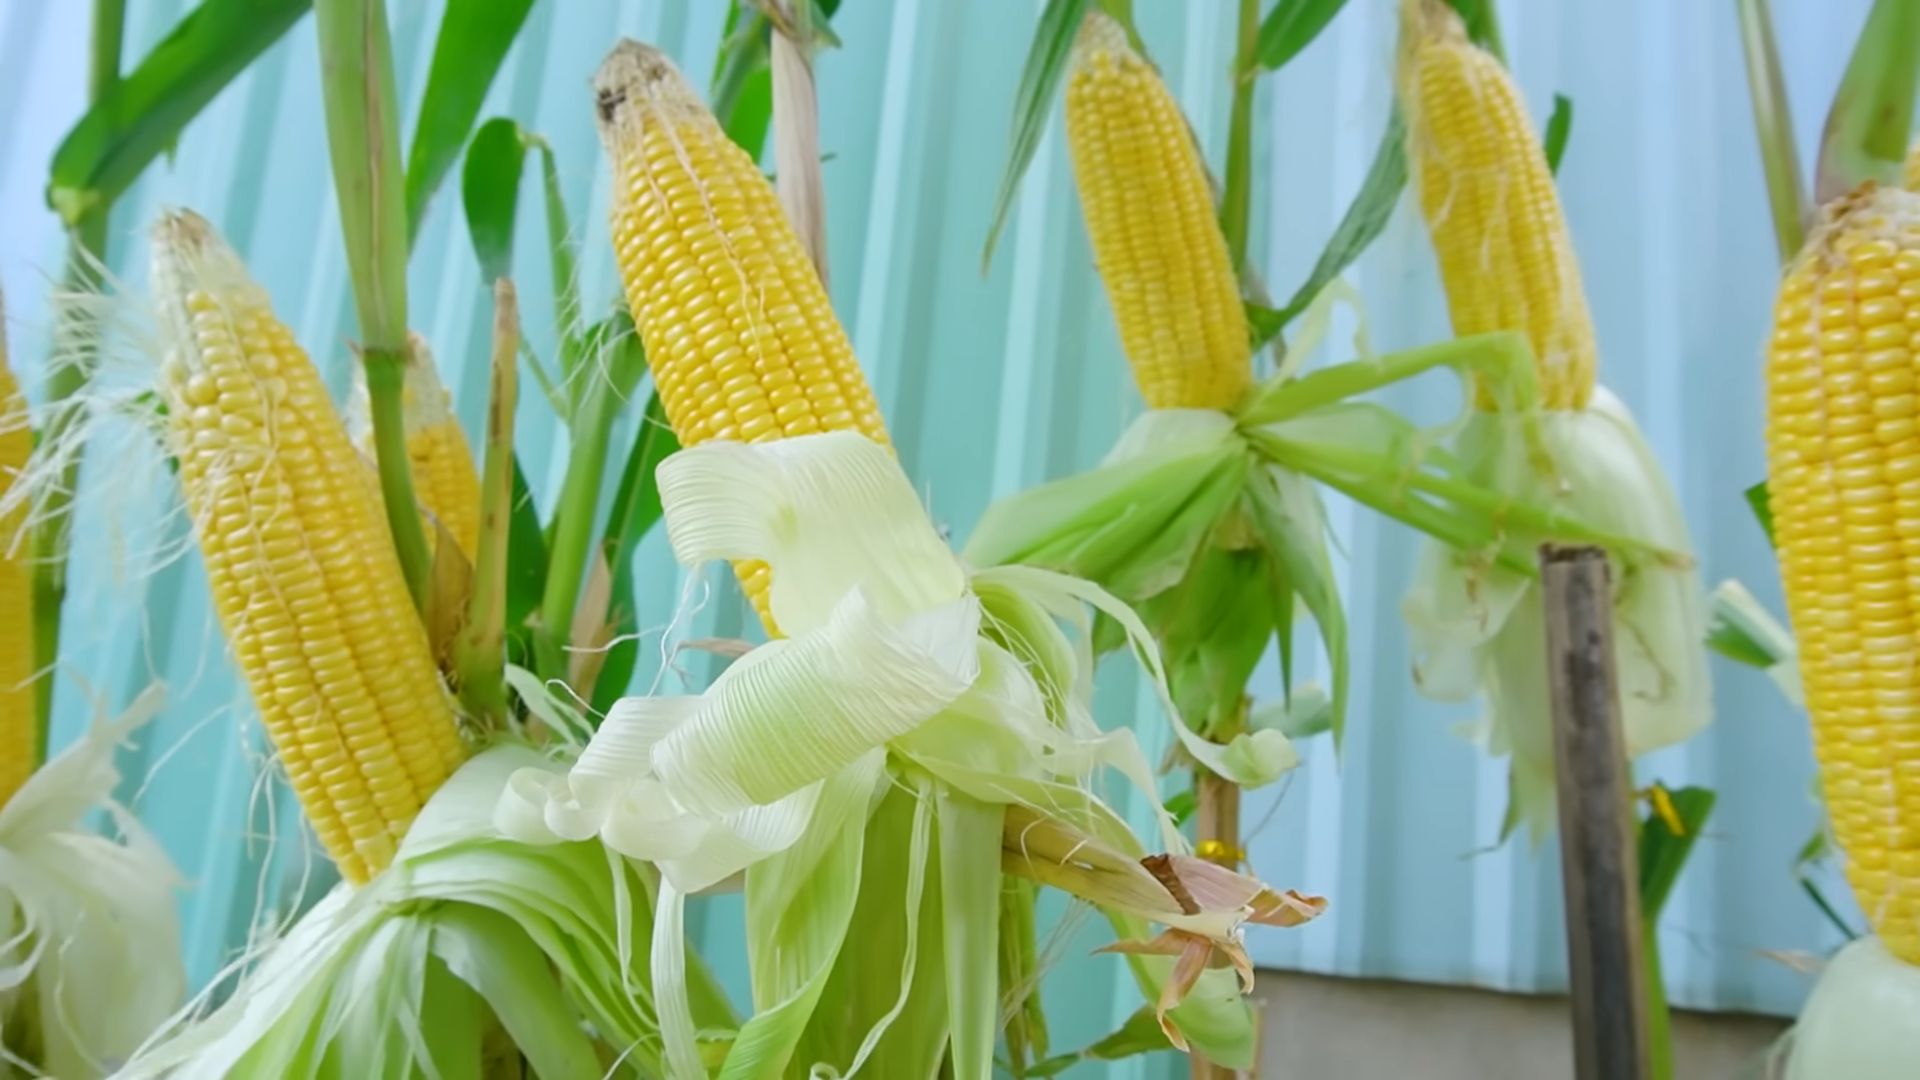
1. Check for Ripeness: The ears of corn are usually ready to harvest about 2-3 weeks after the silks emerge. To check for ripeness, peel back a small portion of the husk and puncture a kernel with your fingernail. If the liquid that comes out is milky, the corn is ready to harvest. If the liquid is clear, the corn is not yet ripe. If the liquid is thick and pasty, the corn is overripe.
2. Harvest the Ears: To harvest the ears of corn, grasp the ear firmly and twist it downward. The ear should snap off easily from the stalk.
3. Enjoy Your Harvest: Now comes the best part! You can enjoy your homegrown corn in so many ways. Grill it, boil it, roast it, or eat it raw. Freshly picked corn is incredibly sweet and flavorful.
Troubleshooting: Addressing Common Issues
Even with the best care, you might encounter some challenges along the way. Here are a few common issues and how to address them:
* Poor Germination: If your corn seeds don’t germinate, it could be due to several factors, such as poor seed quality, cold soil temperatures, or overwatering. Make sure you’re using fresh, high-quality seeds and that the soil temperature is at least 60°F (15°C). Avoid overwatering, as this can cause the seeds to rot.
* Yellowing Leaves: Yellowing leaves can be a sign of nutrient deficiency, especially nitrogen deficiency. Fertilize your corn plants with a nitrogen-rich fertilizer to correct the deficiency.
* Stunted Growth: Stunted growth can be caused by a variety of factors, such as poor soil quality, lack of sunlight, or pest infestation. Make sure your corn plants are getting enough sunlight and nutrients, and check for pests.
* Poor Pollination: Poor pollination can result in ears of corn with missing kernels. Hand-pollinate your corn plants to ensure good ear development.
Tips for Success: Maximizing Your Bag-Grown Corn Yield
Here are a few extra tips to help you maximize your bag-grown corn yield:
* Choose the Right Variety: Select a corn variety that’s well-suited for container growing and your local climate.
* Use High-Quality Potting Mix: Don’t skimp on the potting mix. A well-draining
Conclusion
So, there you have it! Growing corn in bags might seem unconventional, but as we’ve explored, it’s a fantastic solution for urban gardeners, those with limited space, or anyone simply looking for a fun and rewarding gardening project. The potential for a surprisingly bountiful bag grown corn yield is absolutely within reach, and the satisfaction of harvesting your own sweet corn, knowing you nurtured it from seed to table, is truly unparalleled.
This isn’t just about growing corn; it’s about reclaiming a little bit of self-sufficiency, connecting with nature, and proving that even without acres of farmland, you can still enjoy the fruits (or rather, the vegetables!) of your labor. The benefits extend beyond the delicious corn itself. You’re also creating a more sustainable lifestyle, reducing your reliance on commercially grown produce, and potentially saving money in the long run.
But the real magic lies in the adaptability of this method. Feel free to experiment! Try different varieties of corn to see which thrives best in your specific climate and growing conditions. Consider adding companion plants like beans or squash to your bags to create a mini-ecosystem that benefits all the plants involved. You could even try different types of containers – larger bags, repurposed containers, or even raised beds lined with plastic – to see what works best for you.
Don’t be afraid to get your hands dirty and learn as you go. Gardening is a journey, not a destination, and every mistake is a learning opportunity. The key is to pay attention to your plants, observe their needs, and adjust your approach accordingly. Remember to provide adequate sunlight, consistent watering, and proper fertilization, and you’ll be well on your way to a successful harvest.
We wholeheartedly encourage you to give this DIY trick a try. Start small, perhaps with just a few bags, and see how it goes. The initial investment is minimal, and the potential rewards are immense. Imagine the look on your friends’ and family’s faces when you serve them fresh, homegrown corn that you cultivated yourself!
And most importantly, we want to hear about your experiences! Share your successes, your challenges, and your tips and tricks in the comments below. Let’s create a community of bag-grown corn enthusiasts and learn from each other. Together, we can unlock the full potential of this innovative gardening method and enjoy the delicious rewards of our collective efforts. So, grab your bags, your seeds, and your gardening gloves, and let’s get growing! We are confident that you will be pleasantly surprised by your bag grown corn yield.
Frequently Asked Questions (FAQ)
What type of bag is best for growing corn?
The ideal bag for growing corn is a durable, UV-resistant grow bag made of fabric or a heavy-duty plastic bag. Fabric grow bags are generally preferred because they allow for better drainage and aeration, preventing the roots from becoming waterlogged. Look for bags that are at least 10-15 gallons in size to provide enough space for the corn roots to develop. Ensure the bag has drainage holes to prevent water from pooling at the bottom. Avoid using thin plastic bags, as they can easily tear and may not provide adequate support for the growing corn stalks.
How many corn plants can I grow in one bag?
For optimal growth and a good bag grown corn yield, it’s generally recommended to plant 3-4 corn plants per 10-15 gallon bag. Corn plants need space to develop their root systems and access nutrients. Overcrowding can lead to stunted growth, reduced yields, and increased susceptibility to diseases. If you’re using a larger container, you can adjust the number of plants accordingly, but always ensure that each plant has enough space to thrive. Remember that corn is wind pollinated, so planting in a square or circular pattern will help with pollination.
What type of soil should I use for growing corn in bags?
Corn thrives in well-draining, nutrient-rich soil. A good potting mix specifically formulated for vegetables is an excellent choice. You can also create your own mix by combining equal parts of compost, peat moss (or coconut coir), and perlite or vermiculite. Compost provides essential nutrients, peat moss or coconut coir helps retain moisture, and perlite or vermiculite improves drainage and aeration. Avoid using garden soil directly in bags, as it can become compacted and may not drain well. Adding a slow-release fertilizer to the soil mix at planting time can also help provide a steady supply of nutrients throughout the growing season.
How often should I water corn grown in bags?
Corn plants grown in bags require consistent watering, especially during hot and dry weather. Check the soil moisture regularly by sticking your finger about an inch into the soil. If the soil feels dry to the touch, it’s time to water. Water deeply until the water drains out of the bottom of the bag. Avoid overwatering, as this can lead to root rot. The frequency of watering will depend on the weather conditions, the size of the bag, and the type of soil you’re using. As a general rule, you may need to water daily or every other day during the peak growing season.
What kind of fertilizer should I use for corn grown in bags?
Corn is a heavy feeder and requires a steady supply of nutrients to produce a good bag grown corn yield. Use a balanced fertilizer with a higher nitrogen content, such as a 10-10-10 or 12-12-12 formula. You can either use a slow-release fertilizer at planting time or apply a liquid fertilizer every 2-3 weeks during the growing season. Follow the instructions on the fertilizer package for application rates. Avoid over-fertilizing, as this can burn the roots and damage the plants. You can also supplement with organic fertilizers like compost tea or fish emulsion.
How much sunlight does corn need when grown in bags?
Corn requires at least 6-8 hours of direct sunlight per day to thrive. Choose a location for your bags that receives plenty of sunlight throughout the day. If you’re growing corn indoors, you may need to supplement with grow lights. Insufficient sunlight can lead to stunted growth, weak stalks, and reduced yields. Rotate the bags periodically to ensure that all sides of the plants receive adequate sunlight.
How do I pollinate corn grown in bags?
Corn is wind-pollinated, meaning that the pollen from the tassels (male flowers) needs to be transferred to the silks (female flowers) by the wind. In a confined space like a garden or balcony, you may need to assist with pollination to ensure a good bag grown corn yield. You can do this by gently shaking the corn stalks to release the pollen or by using a small paintbrush to collect pollen from the tassels and apply it to the silks. Repeat this process every day for several days when the silks are emerging.
What are some common pests and diseases that affect corn grown in bags?
Common pests that can affect corn grown in bags include aphids, corn earworms, and spider mites. Diseases include corn smut, rust, and leaf blight. Regularly inspect your plants for signs of pests or diseases. Treat infestations with insecticidal soap or neem oil. Prevent diseases by ensuring good air circulation, avoiding overwatering, and removing any infected leaves or plants. Companion planting with herbs like basil or marigolds can also help deter pests.
When is the right time to harvest corn grown in bags?
Corn is typically ready to harvest about 60-90 days after planting, depending on the variety. The silks will turn brown and dry, and the kernels will be plump and milky when pierced with a fingernail. To test for ripeness, peel back a portion of the husk and puncture a kernel with your fingernail. If the liquid is milky, the corn is ready to harvest. If the liquid is clear, it needs more time to mature. If the liquid is doughy, it’s overripe. Harvest the corn by twisting and pulling the ear from the stalk.
Can I grow different varieties of corn in bags?
Yes, you can grow different varieties of corn in bags, but it’s important to choose varieties that are well-suited to container gardening and your local climate. Shorter, more compact varieties are generally better suited for growing in bags. Consider factors like days to maturity, disease resistance, and kernel color when selecting your corn varieties. Be aware that different varieties of corn can cross-pollinate, so if you’re growing multiple varieties, you may want to isolate them to prevent cross-pollination and maintain the purity of the seeds.
Leave a Comment