

Grow Mushrooms Indoors? Absolutely! Imagine harvesting fresh, flavorful mushrooms right from your own home, whenever you want. No more trips to the grocery store or settling for less-than-perfect specimens. This isn’t just a culinary dream; it’s a surprisingly achievable reality with the right know-how. For centuries, cultivating mushrooms has been a revered practice in various cultures, from ancient China, where they were prized for their medicinal properties, to European traditions where foraging for wild mushrooms was a cherished pastime.
But let’s be honest, foraging isn’t always practical, and store-bought mushrooms can be expensive and lack that fresh-picked flavor. That’s where the magic of DIY mushroom cultivation comes in! I’m going to show you some simple, effective tricks and hacks to grow mushrooms indoors, regardless of your experience level. Whether you’re a seasoned gardener or a complete beginner, this guide will empower you to create your own thriving indoor mushroom farm. Get ready to unlock a world of delicious possibilities and impress your friends and family with your newfound mycological skills!
Growing Mushrooms Indoors: A Beginner’s Guide
Okay, so you want to grow mushrooms indoors? Awesome! It’s a surprisingly rewarding hobby, and you get delicious, fresh mushrooms out of the deal. I’m going to walk you through a simple method that’s perfect for beginners, focusing on growing oyster mushrooms because they’re relatively easy and forgiving. Let’s get started!
What You’ll Need: The Essentials
Before we dive in, let’s gather our supplies. This is crucial for a smooth and successful grow.
* Oyster Mushroom Spawn: This is the “seed” of your mushrooms. You can buy it online from reputable mushroom suppliers. Make sure you get the right kind for your climate and desired mushroom type. I recommend starting with blue or pearl oyster mushrooms.
* Straw: This will be our substrate, the food source for the mushrooms. You can usually find straw bales at garden centers or farm supply stores. Make sure it’s clean and free of mold.
* Large Plastic Bags: Heavy-duty garbage bags work great. You’ll need enough to hold your pasteurized straw.
* Heat-Resistant Container: A large pot or tub that can withstand boiling water. This is for pasteurizing the straw.
* Thermometer: To monitor the temperature of the water during pasteurization.
* Spray Bottle: Filled with clean water for misting.
* Gloves: To keep things sanitary.
* Rubbing Alcohol: For sanitizing surfaces and tools.
* Drill or Knife: For creating ventilation holes in the bags.
* Optional: Lime (Calcium Hydroxide) – This helps adjust the pH of the straw, making it more favorable for mushroom growth and less favorable for competing molds.
Step 1: Preparing the Straw (Pasteurization)
This is arguably the most important step. We need to kill off any competing organisms in the straw so the oyster mushrooms can thrive. We’re not sterilizing (which is overkill for oyster mushrooms), just pasteurizing.
1. Chop the Straw: Cut the straw into smaller pieces, about 2-4 inches long. This makes it easier to pack into the bags and allows the mycelium (the mushroom’s root system) to colonize it more quickly. I usually use garden shears for this.
2. Lime Treatment (Optional but Recommended): If you’re using lime, mix about 1 tablespoon of lime per gallon of water in your heat-resistant container. This will raise the pH of the water.
3. Heat the Water: Fill your container with water (with or without lime, depending on your choice) and heat it on a stove or with a heat source until it reaches 160-180°F (71-82°C). Use your thermometer to monitor the temperature.
4. Submerge the Straw: Carefully submerge the chopped straw into the hot water. Make sure it’s completely covered. You might need to weigh it down with a brick or something similar.
5. Maintain the Temperature: Keep the water temperature between 160-180°F (71-82°C) for 60-90 minutes. This is crucial for effective pasteurization. Check the temperature regularly and adjust the heat source as needed.
6. Drain the Straw: After pasteurization, carefully drain the hot water from the straw. Let the straw cool down until you can comfortably handle it with your gloved hands. This usually takes a few hours. You want the straw to be moist but not dripping wet. Squeeze out any excess water.
Step 2: Inoculating the Straw (Adding the Spawn)
Now for the fun part – introducing the oyster mushroom spawn to the prepared straw!
1. Sanitize Your Work Area: Before you start, thoroughly clean and sanitize your work surface with rubbing alcohol. This helps prevent contamination.
2. Sanitize Your Hands: Put on your gloves and sanitize them with rubbing alcohol as well.
3. Layer the Straw and Spawn: In your plastic bag, create a layer of pasteurized straw, about 4-6 inches thick. Then, sprinkle a generous amount of oyster mushroom spawn over the straw. Aim for about 5-10% spawn by weight (e.g., if you have 10 pounds of straw, use 0.5-1 pound of spawn).
4. Repeat the Layers: Continue layering straw and spawn until the bag is almost full, leaving a few inches of space at the top. Make sure the spawn is evenly distributed throughout the straw.
5. Seal the Bag: Tightly seal the bag with tape or a zip tie.
6. Create Ventilation Holes: Use a drill or knife to create several small ventilation holes (about ¼ inch in diameter) in the bag. These holes will allow air exchange, which is essential for mushroom growth. Space the holes a few inches apart.
Step 3: Incubation (Letting the Mycelium Grow)
This is the waiting game. The mycelium needs time to colonize the straw.
1. Find a Suitable Location: Place the inoculated bag in a dark, warm (65-75°F or 18-24°C) location with good air circulation. A closet, basement, or spare room works well. Avoid direct sunlight.
2. Monitor the Colonization: Over the next few weeks, you’ll see the white mycelium spreading throughout the straw. It will look like a fuzzy, white network.
3. Check for Contamination: Keep an eye out for any signs of contamination, such as green, black, or other colored molds. If you see contamination, it’s best to discard the bag to prevent it from spreading.
4. Patience is Key: It usually takes 2-4 weeks for the mycelium to fully colonize the straw. The bag should feel firm and solid when it’s fully colonized.
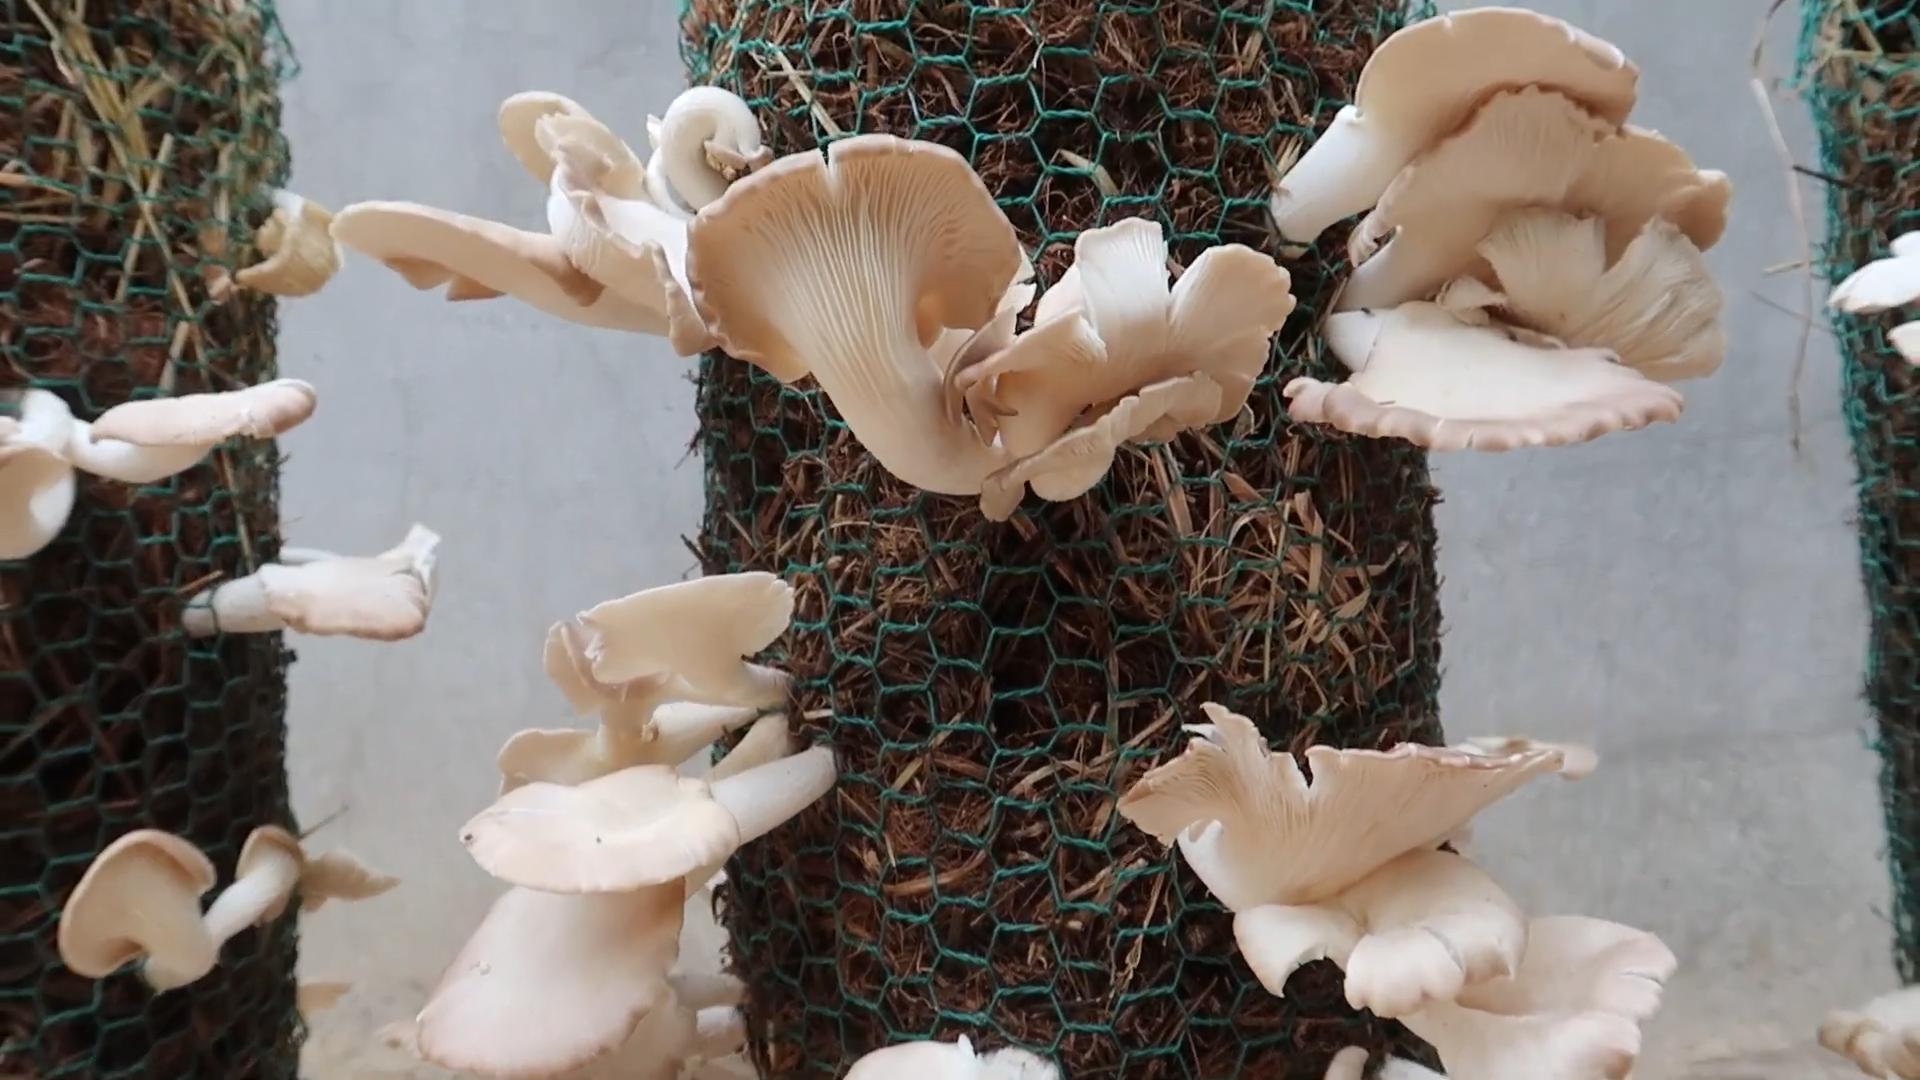
Step 4: Fruiting (Growing the Mushrooms)
Time to get those mushrooms growing!
1. Increase Humidity: Once the bag is fully colonized, it’s time to increase the humidity. This triggers the mushrooms to fruit. You can do this by misting the bag with water several times a day.
2. Increase Light: Move the bag to a location with indirect light. Oyster mushrooms don’t need a lot of light, but they do need some to fruit properly.
3. Cut Slits for Fruiting: Use a clean knife to cut slits or X’s in the bag where you want the mushrooms to grow. These slits will provide access to fresh air and light.
4. Maintain Humidity and Ventilation: Continue misting the bag regularly to maintain high humidity. Make sure there’s good air circulation around the bag.
5. Watch the Mushrooms Grow: Over the next few days, you’ll see tiny mushroom pins (baby mushrooms) forming at the slits. These pins will quickly grow into mature mushrooms.
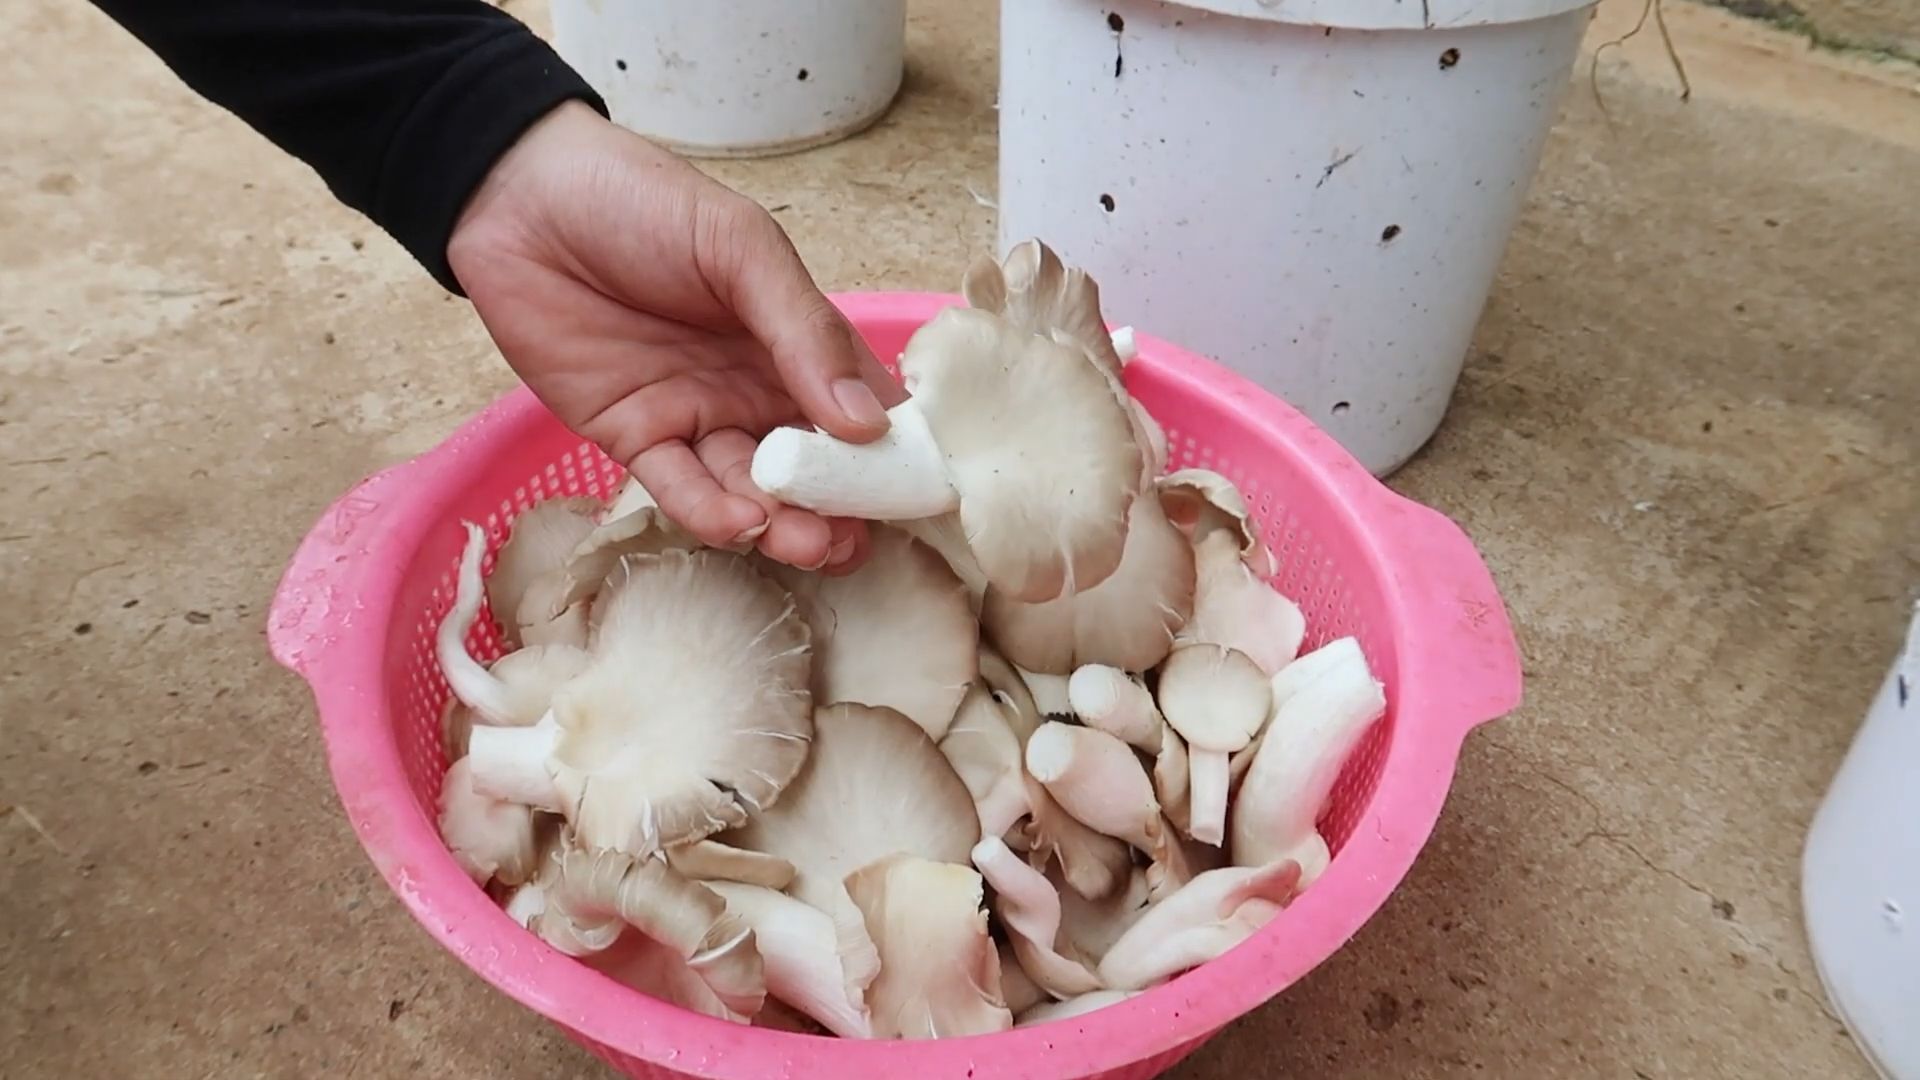
Step 5: Harvesting and Enjoying Your Mushrooms
The best part!
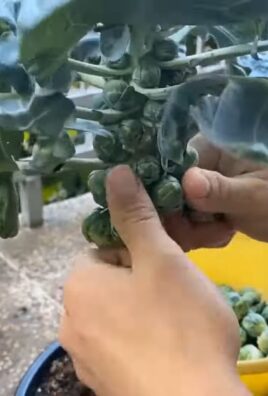
1. Harvest When Mature: Harvest the mushrooms when the caps are fully developed but before they start to drop spores (you’ll see a powdery substance on the surface).
2. Twist and Pull: Gently twist and pull the mushrooms from the bag.
3. Enjoy Your Harvest: Cook and enjoy your fresh oyster mushrooms! They’re delicious sautéed, grilled, or added to soups and stews.
4. Second Flush: After harvesting, you can often get a second (or even third) flush of mushrooms. Simply continue misting the bag and maintaining humidity and ventilation.
Troubleshooting Tips
* Contamination: If you see contamination, it’s usually due to poor pasteurization or sanitation. Make sure to thoroughly pasteurize the straw and sanitize your work area.
* Slow Colonization: Slow colonization can be caused by low temperatures or insufficient spawn. Make sure the temperature is within the optimal range and use enough spawn.
* No Fruiting: If the mushrooms aren’t fruiting, it could be due to low humidity, insufficient light, or poor ventilation. Increase humidity, provide indirect light, and ensure good air circulation.
* Small Mushrooms: Small mushrooms can be caused by insufficient nutrients or water. Make sure the straw is properly pasteurized and keep the bag well-hydrated.
Growing mushrooms indoors is a rewarding experience. Don’t be discouraged if you encounter problems along the way. Just keep learning and experimenting, and you’ll be enjoying fresh, homegrown mushrooms in no time! Good luck, and happy growing!
Conclusion
So, there you have it! Growing mushrooms indoors might seem like a daunting task at first, but with a little patience, the right setup, and this straightforward guide, you’ll be harvesting your own delicious, homegrown fungi in no time. This DIY approach to cultivating mushrooms offers a multitude of benefits, from the unparalleled freshness and flavor of your harvest to the satisfaction of nurturing life from start to finish. Plus, you’ll know exactly what went into your food, avoiding any unwanted chemicals or additives.
Why is this DIY trick a must-try? Because it empowers you to take control of your food source, reduces your reliance on grocery stores, and opens up a world of culinary possibilities. Imagine adding freshly picked oyster mushrooms to your pasta, or enriching your morning omelet with the earthy goodness of shiitake. The possibilities are truly endless!
Don’t be afraid to experiment with different varieties of mushrooms. While we’ve focused on some beginner-friendly options, there’s a whole universe of fungi out there waiting to be explored. Consider trying lion’s mane for its unique texture and cognitive benefits, or enoki for its delicate flavor and visual appeal in Asian-inspired dishes. You can also adjust the substrate to suit different mushroom types. Some thrive on straw, while others prefer hardwood sawdust or coffee grounds.
Furthermore, consider the environmental impact. By growing your own mushrooms, you’re reducing your carbon footprint associated with transportation and packaging. You’re also contributing to a more sustainable food system.
This DIY mushroom growing method is not just a fun project; it’s a step towards a healthier, more sustainable lifestyle.
We encourage you to embrace the challenge and embark on your own indoor mushroom growing adventure. Remember to document your progress, take photos, and share your experiences with us! We’d love to hear about your successes, your challenges, and any tips or tricks you discover along the way. Your insights could help other aspiring mushroom growers and contribute to a thriving community of home cultivators.
So, what are you waiting for? Grab your supplies, follow our guide, and get ready to witness the magic of mushroom cultivation firsthand. Happy growing!
Frequently Asked Questions (FAQ)
What are the easiest types of mushrooms to grow indoors for beginners?
Oyster mushrooms are generally considered the easiest for beginners due to their rapid growth, tolerance of a wide range of conditions, and ability to thrive on various substrates like straw or coffee grounds. Shiitake mushrooms are also a good option, although they require a bit more patience as they take longer to fruit. Button mushrooms, the kind you typically find in grocery stores, are more challenging and require more precise environmental control.
What kind of space do I need to grow mushrooms indoors?
You don’t need a lot of space! A small closet, a spare room, or even a corner of your basement can work. The key is to have a space where you can control the temperature, humidity, and light levels. A dark, cool, and humid environment is ideal for most mushroom varieties.
How long does it take to grow mushrooms indoors?
The time it takes to grow mushrooms varies depending on the species and the growing conditions. Oyster mushrooms can fruit in as little as 2-3 weeks after inoculation, while shiitake mushrooms may take several months. Be patient and monitor your mushrooms closely for signs of growth.
What is the best substrate for growing mushrooms?
The best substrate depends on the type of mushroom you’re growing. Oyster mushrooms thrive on straw, coffee grounds, or even cardboard. Shiitake mushrooms prefer hardwood sawdust. Make sure to sterilize or pasteurize your substrate before inoculation to prevent contamination.
How do I maintain the right humidity levels?
Maintaining high humidity is crucial for mushroom growth. You can use a humidifier, mist the growing area regularly with water, or create a humidity tent using plastic sheeting. Aim for a humidity level of 80-90%.
How much light do mushrooms need?
Mushrooms don’t need a lot of light. In fact, they prefer darkness during the colonization phase. Once the mushrooms start to fruit, they need a small amount of indirect light to develop properly. Avoid direct sunlight, which can dry them out.
How do I know when my mushrooms are ready to harvest?
Mushrooms are ready to harvest when the caps are fully developed but before they start to release spores. The caps should be firm and slightly curved downwards. Gently twist or cut the mushrooms off at the base of the stem.
What are some common problems when growing mushrooms indoors and how can I fix them?
Common problems include contamination, slow growth, and small yields. Contamination can be prevented by sterilizing your substrate and maintaining a clean growing environment. Slow growth can be caused by low temperatures or humidity. Small yields can be due to insufficient nutrients or improper fruiting conditions. Research the specific needs of the mushroom variety you’re growing and adjust your setup accordingly.
Can I reuse the substrate after harvesting mushrooms?
Yes, you can often get multiple flushes (harvests) from the same substrate. After harvesting, soak the substrate in water for a few hours to rehydrate it and then return it to the growing area. You may get smaller yields with subsequent flushes. Eventually, the substrate will become depleted of nutrients and you’ll need to replace it. The old substrate can be composted and used to enrich your garden soil.
Is it safe to eat homegrown mushrooms?
Yes, it is safe to eat homegrown mushrooms as long as you have correctly identified the species and grown them in a clean environment. Only consume mushrooms that you are 100% certain are edible. If you are unsure, consult with an expert mycologist.
Where can I buy mushroom spawn or cultures?
Mushroom spawn and cultures can be purchased online from reputable suppliers or at local gardening stores. Make sure to choose a supplier that offers high-quality, contaminant-free spawn.
Can I grow mushrooms from store-bought mushrooms?
While it’s possible to grow mushrooms from store-bought mushrooms, it’s not always successful. Store-bought mushrooms are often treated with chemicals to prevent them from spoiling, which can inhibit their growth. It’s best to start with a reputable source of spawn or cultures.
What are the benefits of using coffee grounds as a substrate?
Coffee grounds are a readily available and inexpensive substrate that is rich in nutrients. They also help to retain moisture and suppress the growth of some contaminants. Make sure to use fresh coffee grounds and mix them with other substrates like straw or sawdust for best results.
How do I prevent pests from attacking my mushrooms?
Pests are not usually a major problem when growing mushrooms indoors, but you can take precautions to prevent them. Keep your growing area clean and free of debris. Use sticky traps to catch any flying insects. You can also use natural pest control methods like neem oil.
What are some creative ways to use my homegrown mushrooms?
The possibilities are endless! You can add them to soups, stews, stir-fries, pasta dishes, omelets, and salads. You can also sauté them with garlic and herbs, grill them, or even pickle them. Get creative and experiment with different recipes to discover your favorite ways to enjoy your homegrown mushrooms.
Leave a Comment