

Easy to grow vegetables – that’s the dream, isn’t it? Imagine stepping into your backyard and harvesting fresh, delicious produce for your dinner table. No more questionable supermarket veggies; just vibrant, homegrown goodness. But the thought of starting a garden can feel overwhelming, especially if you’re a beginner. Where do you even begin?
For centuries, humans have cultivated their own food, from ancient kitchen gardens to the elaborate landscapes of Versailles. This connection to the earth is deeply ingrained in our history. Growing your own food isn’t just a trend; it’s a return to a more sustainable and fulfilling way of life.
That’s why I’m so excited to share these simple, yet effective, DIY tricks and hacks that will make growing easy to grow vegetables a reality for you, no matter your experience level or the size of your space. We’ll explore clever container gardening ideas, soil secrets, and pest control solutions that won’t break the bank.
In today’s fast-paced world, taking control of your food source is more important than ever. Not only will you enjoy fresher, healthier meals, but you’ll also experience the therapeutic benefits of gardening. So, grab your gardening gloves, and let’s get started on this exciting journey together!
Propagating Plants Like a Pro This June!
Hey plant lovers! June is practically *the* perfect month to get your propagation game on. The weather’s usually warm and humid, which creates ideal conditions for those little cuttings to root and thrive. I’m going to walk you through some of my favorite propagation methods, so you can multiply your plant collection without spending a dime!
Choosing Your Propagation Method
Before we dive into the nitty-gritty, let’s talk about the different ways you can propagate plants. The best method depends on the type of plant you’re working with, but here are a few popular options:
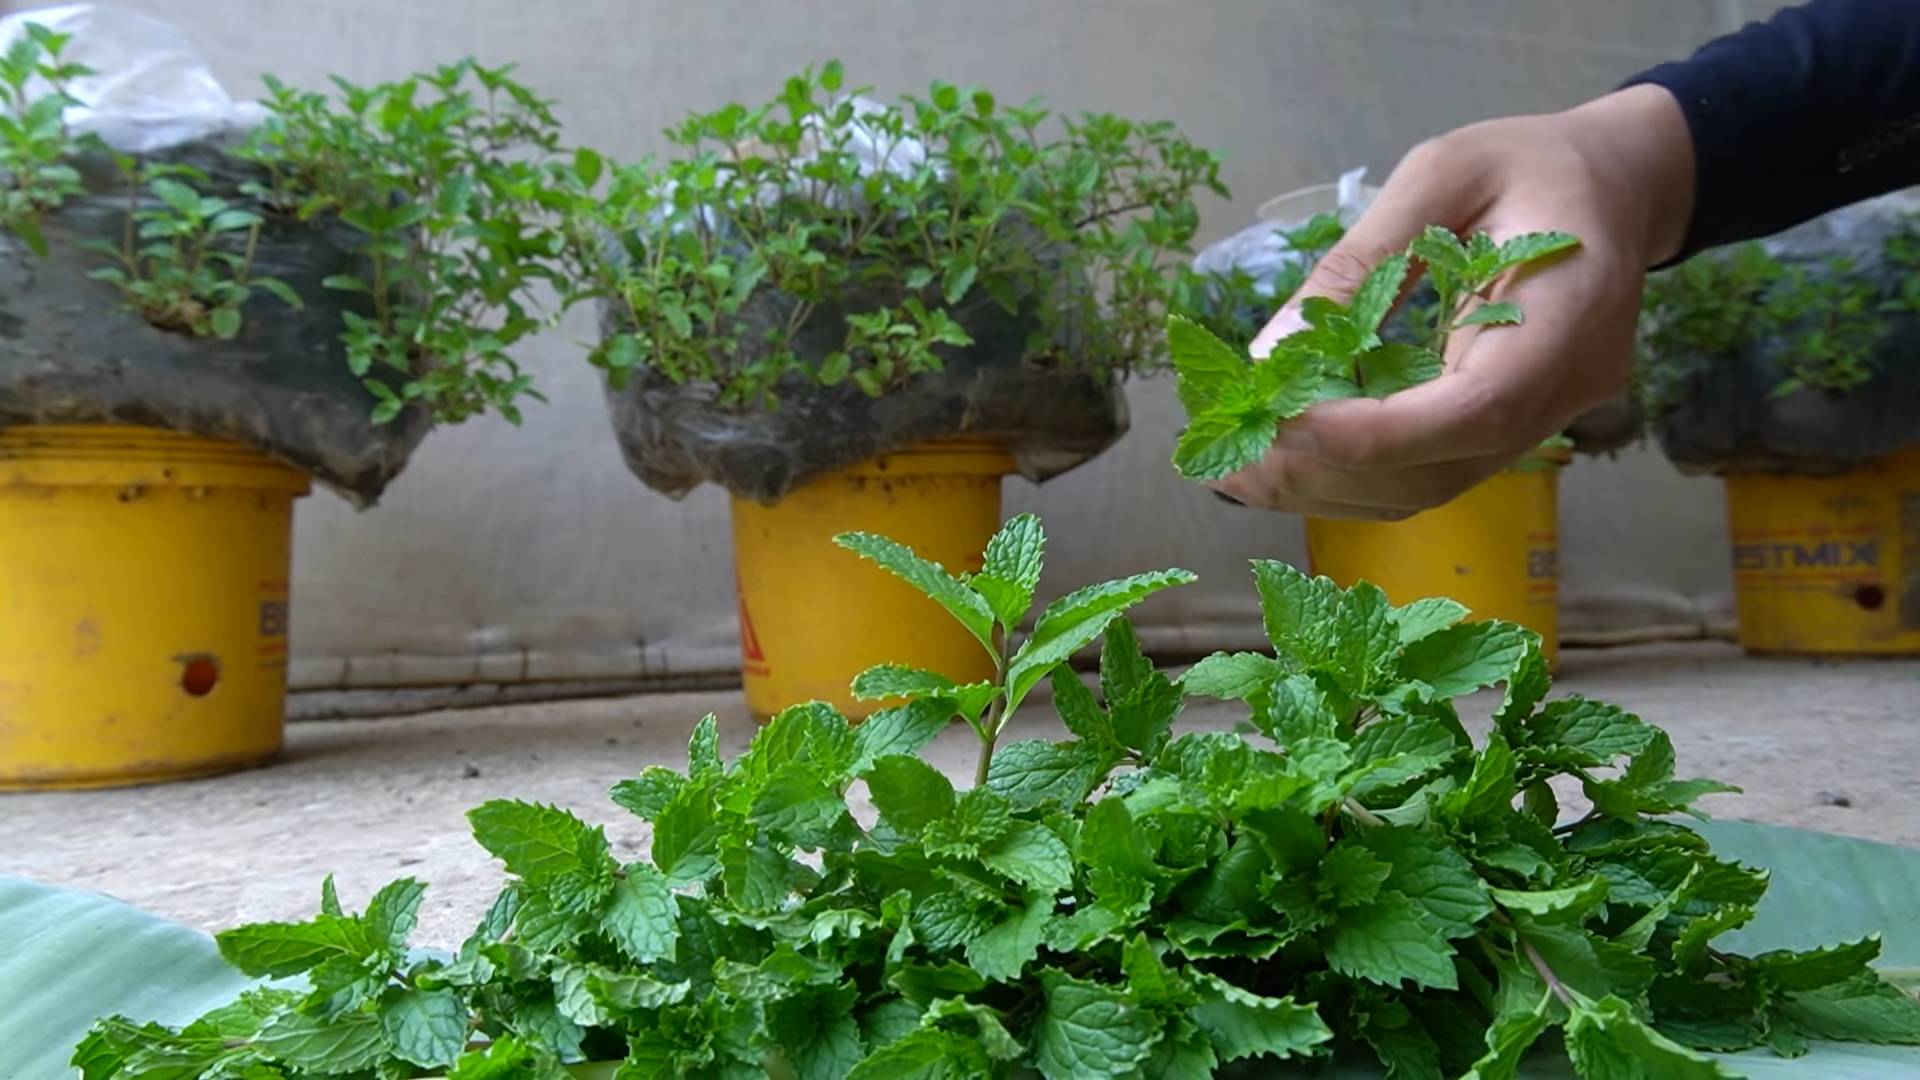
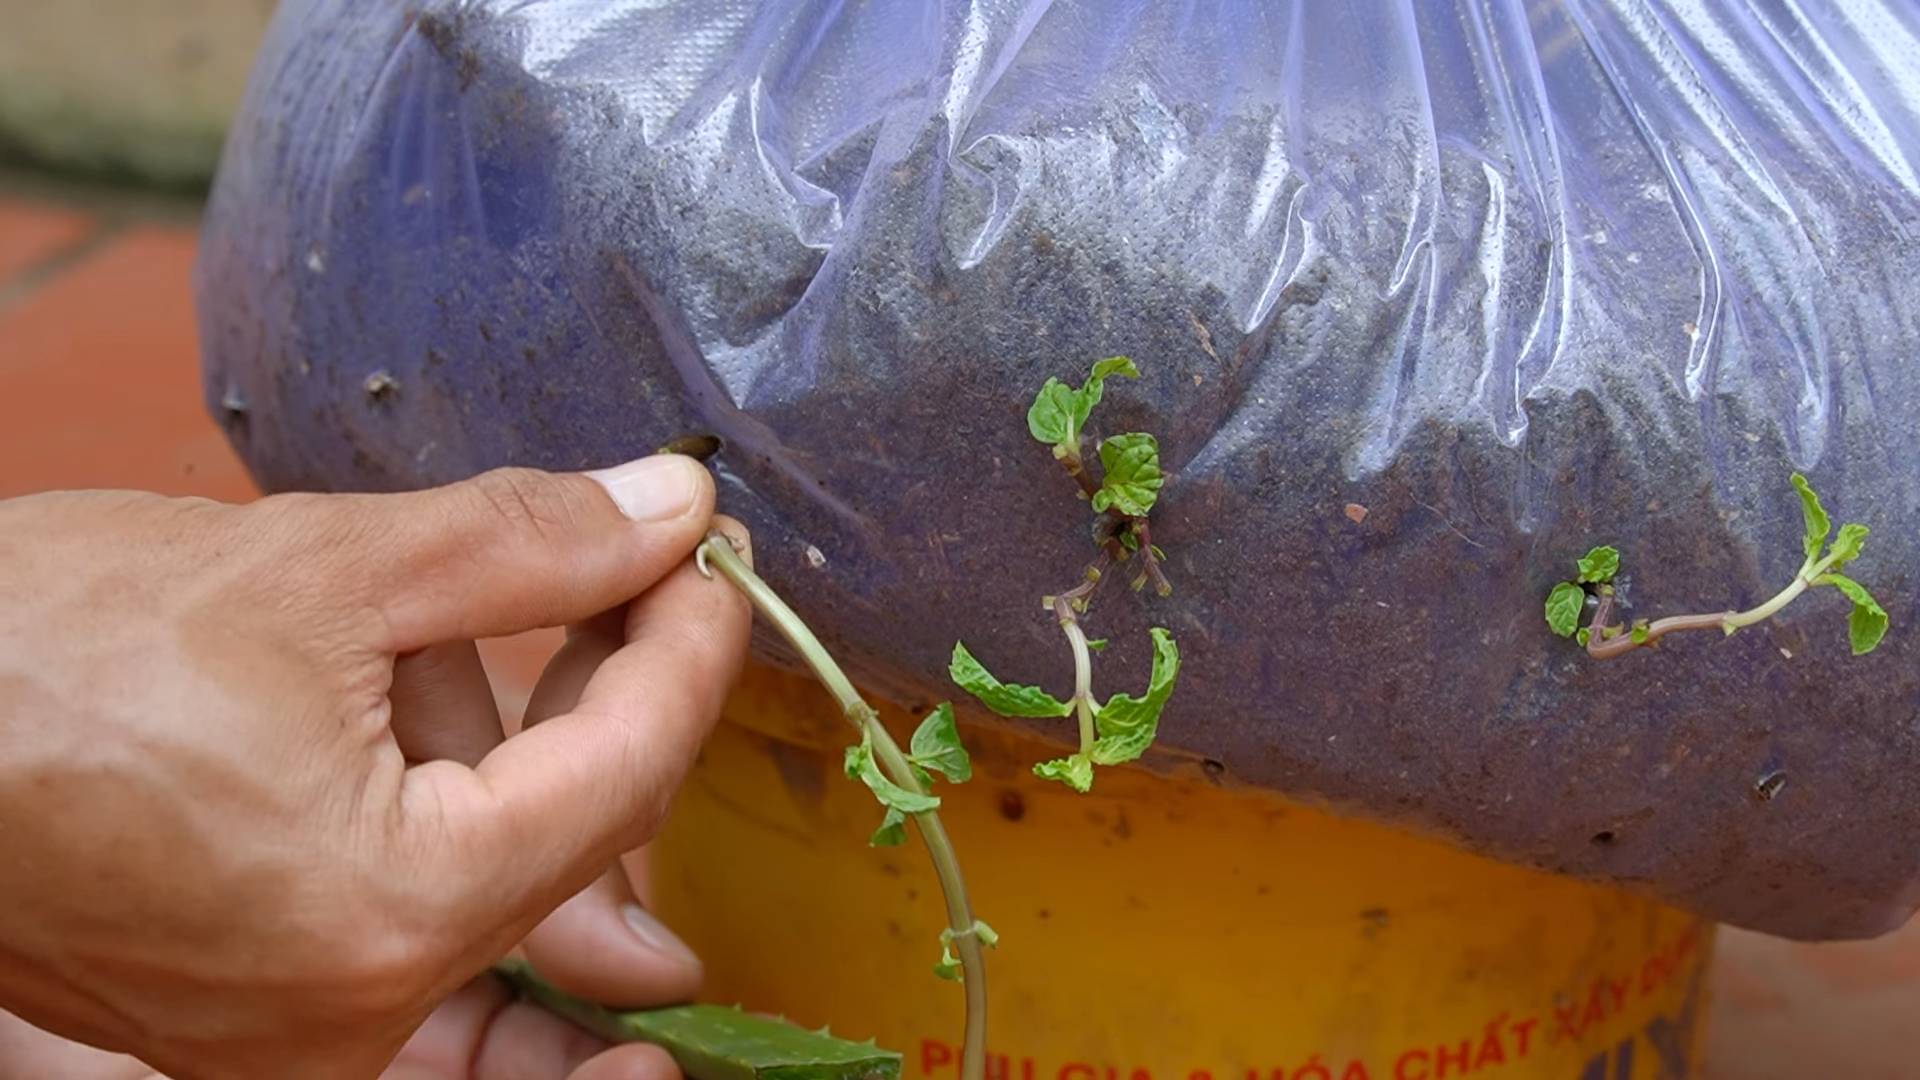
* Stem Cuttings: This is probably the most common method, and it works well for a wide variety of plants, including pothos, philodendrons, succulents, and herbs like rosemary and mint. You basically take a cutting from a stem and encourage it to grow roots.
* Leaf Cuttings: Some plants, like snake plants and African violets, can be propagated from just a single leaf! It’s a bit slower than stem cuttings, but it’s super satisfying when it works.
* Water Propagation: This is a great option for beginners because you can actually *see* the roots growing! It works well for plants like pothos, monstera, and spider plants.
* Division: This method is perfect for plants that grow in clumps, like snake plants, ZZ plants, and peace lilies. You simply divide the plant into smaller sections, each with its own roots.
* Air Layering: This is a more advanced technique, but it’s great for propagating larger plants like ficus trees without having to take a cutting.
Getting Started: Essential Supplies
Okay, before we get our hands dirty, let’s gather our supplies. You’ll need:
* Sharp, clean scissors or pruning shears: This is crucial! Dull or dirty tools can damage the plant and introduce diseases. I always sterilize mine with rubbing alcohol before and after each use.
* Rooting hormone (optional): This can help speed up the rooting process, but it’s not always necessary. I usually use it for plants that are known to be a bit more difficult to root.
* Water: Tap water is usually fine, but you can also use filtered water if you prefer.
* A clear glass or jar: For water propagation.
* Potting mix: A well-draining potting mix is essential for planting your rooted cuttings. I like to use a mix of peat moss, perlite, and vermiculite.
* Small pots: To plant your newly rooted cuttings.
* Plastic bag or humidity dome (optional): To create a humid environment for your cuttings.
* Spray bottle: To mist your cuttings.
* Labels: To keep track of what you’re propagating! Trust me, it’s easy to forget.
Stem Cuttings: A Step-by-Step Guide
This is my go-to method for propagating many of my houseplants. Here’s how I do it:
1. Choose a healthy stem: Look for a stem that’s actively growing and free from pests or diseases.
2. Make the cut: Using your clean scissors or pruning shears, make a clean cut just below a node (the point where a leaf or branch grows from the stem). I usually aim for a cutting that’s about 4-6 inches long.
3. Remove the lower leaves: Remove any leaves that will be submerged in water or buried in soil. This will prevent them from rotting and contaminating the cutting.
4. Apply rooting hormone (optional): Dip the cut end of the stem into rooting hormone. Tap off any excess powder.
5. Plant the cutting: You have two options here:
* Water Propagation: Place the cutting in a glass or jar of water, making sure that the node is submerged.
* Soil Propagation: Plant the cutting directly into a small pot filled with well-draining potting mix.
6. Provide humidity: If you’re propagating in soil, you can increase humidity by covering the pot with a plastic bag or placing it in a humidity dome. Make sure to leave a small opening for ventilation.
7. Place in bright, indirect light: Avoid direct sunlight, which can scorch the cuttings.
8. Keep the soil moist (for soil propagation) or change the water regularly (for water propagation): For soil propagation, water the cutting when the top inch of soil feels dry. For water propagation, change the water every few days to prevent algae growth.
9. Be patient! It can take several weeks for roots to develop. You’ll know the cutting has rooted when you see new growth or feel resistance when you gently tug on the cutting.
Leaf Cuttings: A Patient Approach
This method requires a bit more patience, but it’s so rewarding when you see those tiny new plants emerge!
1. Choose a healthy leaf: Select a mature, healthy leaf from your plant.
2. Make the cut: Depending on the plant, you’ll either cut the leaf in half horizontally (for snake plants) or detach the entire leaf from the stem (for African violets).
3. Allow the cut end to callous over: This is important to prevent rot. Let the cut end of the leaf dry out for a few days until it forms a callous.
4. Plant the leaf: Insert the cut end of the leaf into a small pot filled with well-draining potting mix. For snake plant leaves, insert the cut end about an inch deep. For African violet leaves, insert the petiole (the stalk that attaches the leaf to the stem) into the soil.
5. Provide humidity: Cover the pot with a plastic bag or place it in a humidity dome.
6. Place in bright, indirect light: Avoid direct sunlight.
7. Keep the soil moist: Water the cutting when the top inch of soil feels dry.
8. Wait patiently! It can take several weeks or even months for new plants to emerge.
Water Propagation: Seeing is Believing!
This is a super easy and fun method, especially for beginners.
1. Take a stem cutting: Follow the same steps as for stem cuttings, making sure to remove the lower leaves.
2. Place the cutting in water: Place the cutting in a clear glass or jar of water, making sure that the node is submerged.
3. Place in bright, indirect light: Avoid direct sunlight.
4. Change the water regularly: Change the water every few days to prevent algae growth.
5. Wait for roots to develop: You should start to see roots forming within a week or two.
6. Plant the rooted cutting: Once the roots are about an inch long, you can plant the cutting in a small pot filled with well-draining potting mix.
Division: Multiplying Your Clump-Forming Plants
This method is perfect for plants that grow in clumps, like snake plants, ZZ plants, and peace lilies.
1. Remove the plant from its pot: Gently remove the plant from its pot and loosen the soil around the roots.
2. Divide the plant: Using your hands or a sharp knife, carefully divide the plant into smaller sections, making sure that each section has its own roots and leaves.
3. Pot the divisions: Plant each division in a separate pot filled with well-draining potting mix.
4. Water thoroughly: Water the newly potted divisions thoroughly.
5. Place in bright, indirect light: Avoid direct sunlight.
Air Layering: For the More Adventurous Plant Parent
This is a more advanced technique, but it’s great for propagating larger plants like ficus trees without having to take a cutting.
1. Choose a healthy branch: Select a healthy branch that you want to propagate.
2. Make a cut: Using a sharp knife, make a shallow cut around the branch, just below a node.
3. Apply rooting hormone: Apply rooting hormone to the cut area.
4. Wrap the cut area: Wrap the cut area with moist sphagnum moss.
5. Cover with plastic wrap: Cover the sphagnum moss with plastic wrap to retain moisture.
6. Secure the plastic wrap: Secure the plastic wrap with tape or twine.
7. Wait for roots to develop: It can take several weeks or even months for roots to develop. You’ll know the branch has rooted when you see roots growing through the sphagnum moss.
8. Cut the branch: Once the roots are well-developed, cut the branch below the rooted area.
9. Plant the rooted branch: Plant the rooted branch in a pot filled with well-draining potting mix.
Caring for Your New Plant Babies
Conclusion
So, there you have it! Growing your own vegetables doesn’t have to be an intimidating or expensive endeavor. This DIY trick for starting your garden with minimal resources and maximum success is a game-changer, especially if you’re new to gardening or working with limited space. We’ve shown you how to nurture those tiny seeds into thriving seedlings, ready to be transplanted into your garden or containers.
Why is this a must-try? Because it simplifies the entire process. Forget about complicated setups, expensive equipment, or the fear of failure. This method is accessible, affordable, and incredibly rewarding. Imagine the satisfaction of harvesting your own fresh, flavorful vegetables, knowing you nurtured them from seed to table. The taste of homegrown produce is simply unmatched, and the health benefits of consuming fresh, organic food are undeniable. Plus, you’ll be reducing your carbon footprint by cutting down on transportation and packaging.
But the beauty of this DIY trick lies in its adaptability. Feel free to experiment with different types of containers. Upcycled yogurt cups, egg cartons, or even repurposed plastic containers can work wonders. Just ensure they have drainage holes to prevent waterlogging. You can also adjust the soil mix to suit the specific needs of the vegetables you’re growing. For example, leafy greens like lettuce and spinach thrive in a nutrient-rich soil, while root vegetables like carrots and radishes prefer a looser, sandier mix.
Consider variations like starting your seeds indoors during the colder months to get a head start on the growing season. This is particularly useful if you live in a region with a short growing season. You can also use a heat mat to provide bottom heat, which can significantly speed up germination. Another variation is to use a grow light if you don’t have access to a sunny windowsill. Grow lights provide the necessary light spectrum for healthy seedling development.
Don’t be afraid to experiment and find what works best for you and your environment. The most important thing is to get started and enjoy the process of watching your seeds sprout and grow.
We are confident that this DIY trick will empower you to successfully grow your own vegetables, regardless of your experience level. It’s a simple, effective, and sustainable way to enjoy fresh, healthy produce.
Now, it’s your turn! We encourage you to try this DIY trick and experience the joy of growing your own vegetables. Share your experiences with us in the comments below. We’d love to hear about your successes, challenges, and any variations you’ve tried. Let’s build a community of gardeners who are passionate about growing their own food! We are eager to see your progress and learn from your experiences. Happy gardening!
Frequently Asked Questions (FAQ)
What kind of vegetables are easiest to grow for beginners?
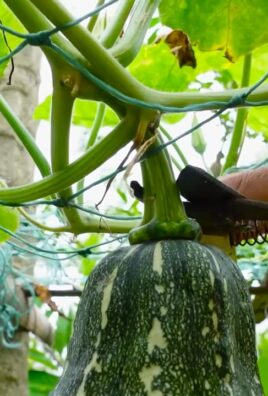
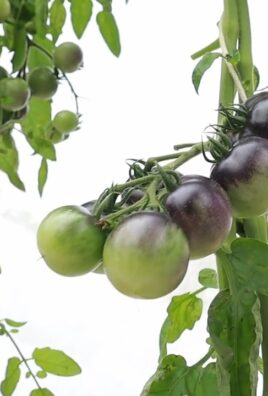
That’s a great question! Some of the easiest vegetables to grow for beginners include lettuce, spinach, radishes, carrots, bush beans, zucchini, and tomatoes (especially cherry tomatoes). These vegetables are relatively low-maintenance and can tolerate a wider range of growing conditions. They also tend to germinate quickly and produce a harvest within a reasonable timeframe, which can be very encouraging for new gardeners. When selecting seeds, look for varieties that are labeled as “easy to grow” or “disease-resistant.”
How much sunlight do my vegetable seedlings need?
Sunlight is crucial for healthy seedling development. Most vegetable seedlings need at least 6-8 hours of direct sunlight per day. If you don’t have a sunny windowsill, you can use a grow light to supplement or replace natural sunlight. Place the grow light a few inches above the seedlings and adjust the height as they grow. Signs that your seedlings aren’t getting enough light include leggy growth (tall and spindly stems), pale leaves, and a tendency to lean towards the light source.
What kind of soil should I use for starting seeds?
It’s best to use a seed-starting mix specifically formulated for starting seeds. These mixes are typically lightweight, sterile, and well-draining, which helps prevent fungal diseases and promotes healthy root development. Avoid using garden soil, as it can be too heavy and may contain pathogens that can harm your seedlings. You can find seed-starting mixes at most garden centers or online retailers. Alternatively, you can make your own seed-starting mix by combining equal parts peat moss, vermiculite, and perlite.
How often should I water my vegetable seedlings?
Watering frequency depends on several factors, including the type of container, the temperature, and the humidity. In general, you should water your seedlings when the top inch of soil feels dry to the touch. Avoid overwatering, as this can lead to root rot. Water gently to avoid disturbing the seedlings. A spray bottle or watering can with a gentle nozzle works well. It’s also a good idea to water in the morning so that the foliage has time to dry before nightfall, which can help prevent fungal diseases.
When should I transplant my vegetable seedlings into the garden?
The timing of transplanting depends on the type of vegetable and the weather conditions. In general, you should wait until the danger of frost has passed and the soil has warmed up. Before transplanting, harden off your seedlings by gradually exposing them to outdoor conditions for a week or two. Start by placing them in a sheltered location for a few hours each day, gradually increasing the amount of time they spend outdoors. This will help them acclimate to the sun, wind, and temperature changes.
What if my seeds don’t germinate?
There are several reasons why seeds might not germinate. Common causes include using old or poor-quality seeds, planting the seeds too deep or too shallow, providing insufficient moisture, and maintaining improper temperatures. Ensure that you’re using fresh seeds from a reputable source. Follow the planting instructions on the seed packet carefully. Keep the soil consistently moist but not waterlogged. And maintain a temperature range that is suitable for the type of vegetable you’re growing. If your seeds still don’t germinate, try starting a new batch using fresh seeds and a different seed-starting mix.
Can I grow vegetables in containers if I don’t have a garden?
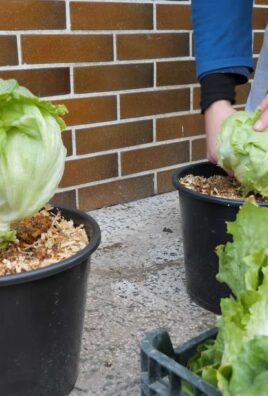
Absolutely! Container gardening is a great option for people who don’t have access to a traditional garden. Many vegetables, including tomatoes, peppers, herbs, lettuce, and radishes, can be successfully grown in containers. Choose containers that are large enough to accommodate the mature size of the plant. Ensure that the containers have drainage holes. Use a high-quality potting mix. And provide adequate sunlight and water.
How do I deal with pests and diseases in my vegetable garden?
Prevention is key when it comes to pests and diseases. Choose disease-resistant varieties of vegetables. Practice good garden hygiene by removing weeds and debris. Water at the base of the plants to avoid wetting the foliage. Monitor your plants regularly for signs of pests or diseases. If you spot any problems, take action promptly. Organic pest control methods include using insecticidal soap, neem oil, and beneficial insects. For diseases, you can try using copper fungicide or baking soda spray.
What are some tips for successful vegetable gardening?
Here are a few additional tips for successful vegetable gardening:
* Choose a location that receives at least 6-8 hours of sunlight per day.
* Prepare the soil properly by amending it with compost or other organic matter.
* Water regularly, especially during dry spells.
* Fertilize your plants as needed.
* Weed regularly to prevent competition for resources.
* Harvest your vegetables when they are ripe.
* Keep a garden journal to track your progress and learn from your mistakes.
* Most importantly, have fun and enjoy the process of growing your own food!
How can I ensure I am growing easy to grow vegetables organically?
Growing vegetables organically involves avoiding synthetic pesticides, herbicides, and fertilizers. Instead, focus on building healthy soil, using natural pest control methods, and choosing disease-resistant varieties. Amend your soil with compost and other organic matter to improve its fertility and drainage. Use cover crops to suppress weeds and add nutrients to the soil. Rotate your crops to prevent the buildup of pests and diseases. Attract beneficial insects to your garden by planting flowers that provide nectar and pollen. And use organic pest control methods such as insecticidal soap, neem oil, and Bacillus thuringiensis (Bt). By following these practices, you can grow healthy, delicious vegetables without harming the environment.
Leave a Comment