

Growing Peanuts at Home might sound like a quirky challenge reserved for seasoned farmers, but trust me, it’s a surprisingly rewarding and fun project anyone can tackle! Imagine the satisfaction of harvesting your own homegrown peanuts, roasted to perfection and enjoyed fresh from your garden. Forget the store-bought variety – we’re talking about a truly unique and delicious experience.
The humble peanut, despite its name, isn’t actually a nut! It’s a legume with a fascinating history, originating in South America thousands of years ago. Evidence suggests that peanuts were cultivated as early as 7,600 years ago in Peru! From ancient civilizations to modern-day snacks, peanuts have nourished and delighted people across the globe.
But why should you consider growing peanuts at home? Well, for starters, it’s a fantastic way to connect with nature and learn about the life cycle of a plant. Plus, store-bought peanuts can sometimes be treated with chemicals or lack that fresh, earthy flavor. Growing peanuts at home allows you to control the entire process, ensuring a healthy and delicious harvest. In this article, I’m going to share some simple DIY tricks and hacks that will make growing peanuts at home easier than you think, even if you have limited space or gardening experience. Let’s get started!
Growing Peanuts at Home: A Beginner’s Guide
Hey there, fellow gardening enthusiasts! Ever thought about growing your own peanuts? It’s easier than you might think, and the satisfaction of harvesting your own homegrown peanuts is truly rewarding. I’ve been growing peanuts for a few years now, and I’m excited to share my experience and guide you through the process. Let’s get started!
Choosing the Right Peanut Variety
Before you even think about planting, you need to pick the right peanut variety for your climate and growing conditions. Different varieties have different growing times and are suited to different regions. Here are a few popular options:
* Virginia Peanuts: These are the large, gourmet peanuts you often see roasted in the shell. They require a long growing season (120-130 days) and are best suited for warmer climates.
* Spanish Peanuts: These are smaller peanuts with reddish-brown skins. They have a shorter growing season (100-110 days) and are more tolerant of cooler temperatures.
* Runner Peanuts: These are the most commonly grown peanuts in the United States, often used for peanut butter. They have a medium growing season (110-120 days) and are adaptable to various climates.
* Valencia Peanuts: These peanuts have multiple kernels in each shell and are known for their sweet flavor. They also have a shorter growing season (90-100 days).
I personally prefer Spanish peanuts because they mature quickly and are perfect for my slightly cooler climate. Do some research and choose a variety that suits your area!
Preparing Your Peanut Patch
Peanuts need well-drained, sandy loam soil to thrive. They also need plenty of sunlight – at least 6-8 hours a day. Here’s how to prepare your peanut patch:
* Soil Testing: It’s always a good idea to test your soil to determine its pH and nutrient levels. Peanuts prefer a slightly acidic soil with a pH between 6.0 and 6.5. You can purchase a soil testing kit at most garden centers or send a sample to your local agricultural extension office.
* Soil Amendment: If your soil is heavy clay or compacted, you’ll need to amend it with organic matter like compost, well-rotted manure, or peat moss. This will improve drainage and aeration. I usually add a generous layer of compost to my peanut patch in the fall and till it in.
* Fertilizing: Peanuts are legumes, which means they can fix nitrogen from the air. However, they still benefit from a balanced fertilizer. I recommend using a fertilizer with a low nitrogen content (e.g., 5-10-10) to encourage root development and pod production. Avoid over-fertilizing with nitrogen, as this can lead to excessive foliage growth and fewer peanuts.
* Weed Control: Peanuts are slow to germinate and establish, so it’s important to control weeds early on. You can use a pre-emergent herbicide or hand-weed the area before planting. I prefer hand-weeding to avoid using chemicals in my garden.
Planting Your Peanuts
Now comes the fun part – planting! Here’s how to do it:
1. Timing is Key: Peanuts are warm-season crops and should be planted after the last frost when the soil temperature has warmed to at least 65°F (18°C). I usually wait until late spring or early summer to plant my peanuts.
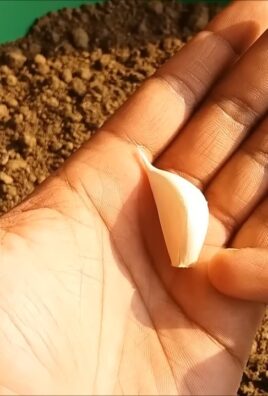
2. Soaking the Seeds: To speed up germination, you can soak the peanut seeds in water for 24 hours before planting. This will help soften the shells and encourage sprouting.
3. Shelling the Peanuts (Optional): You can plant peanuts in the shell or shelled. Shelling them can speed up germination, but it also makes them more vulnerable to pests and diseases. I usually plant them in the shell to protect them.
4. Planting Depth and Spacing: Plant the peanuts 1-2 inches deep and 6-8 inches apart in rows that are 2-3 feet apart. This will give them enough room to grow and spread.
5. Watering: After planting, water the peanuts thoroughly to help them establish. Keep the soil consistently moist, but not waterlogged, until they germinate.
Caring for Your Peanut Plants
Once your peanut plants have sprouted, it’s important to provide them with proper care to ensure a good harvest.
* Watering: Peanuts need consistent moisture throughout the growing season, especially during flowering and pod development. Water deeply and regularly, especially during dry spells.
* Weeding: Keep the peanut patch free of weeds, as they can compete with the plants for nutrients and water. Hand-weeding is the best option, as herbicides can damage the peanut plants.
* Hilling: As the peanut plants grow, they will produce “pegs” that grow downwards from the base of the plant into the soil. These pegs are where the peanuts will develop. To encourage pod development, hill the soil around the base of the plants every few weeks. This will provide the pegs with a loose, friable soil to penetrate.
* Pest and Disease Control: Peanuts are relatively pest-resistant, but they can be susceptible to certain pests and diseases, such as aphids, spider mites, and leaf spot. Monitor your plants regularly and take action if you notice any problems. You can use insecticidal soap or neem oil to control pests, and copper fungicide to control diseases. I prefer using organic methods whenever possible.
* Calcium: Peanuts need calcium to develop properly. If your soil is deficient in calcium, you can add gypsum (calcium sulfate) to the soil.
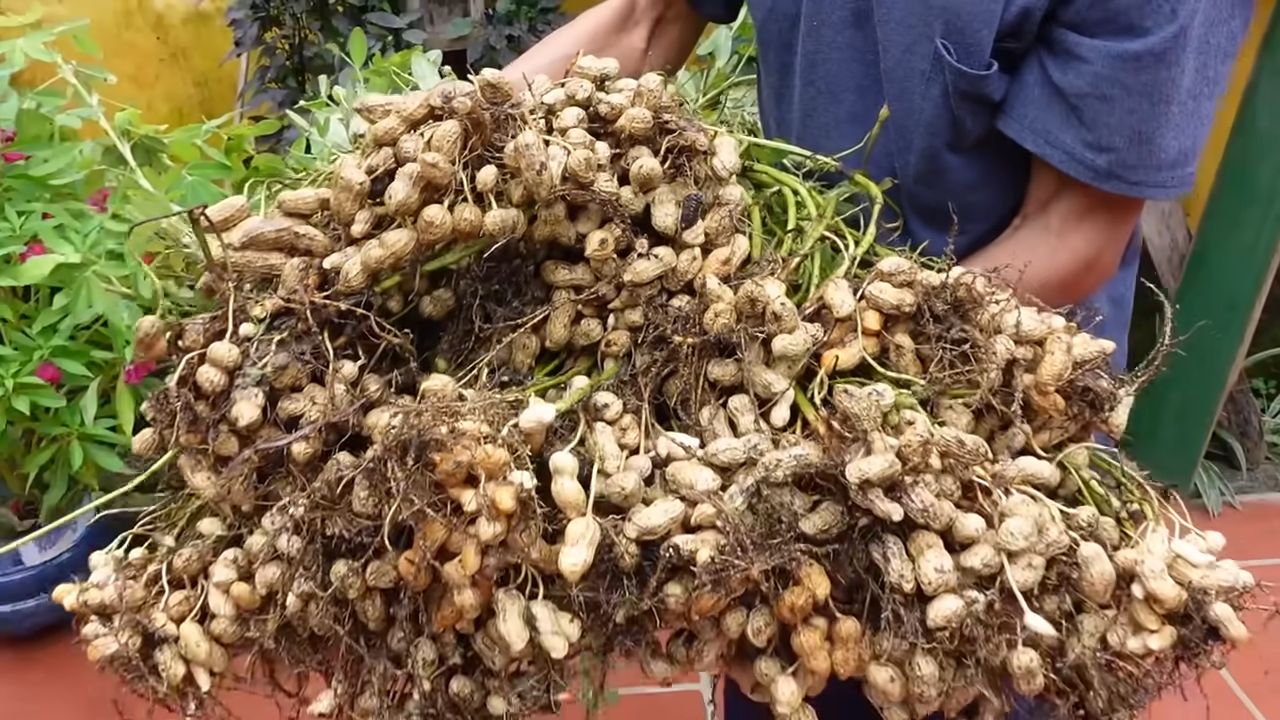
Harvesting Your Peanuts
Harvesting is the most exciting part of growing peanuts! Here’s how to know when it’s time to harvest and how to do it:
1. Timing: Peanuts are typically ready to harvest in the fall, about 120-150 days after planting, depending on the variety. A good indicator is when the leaves start to turn yellow and the plants begin to die back. You can also dig up a few plants to check the peanuts. If the shells are mature and the kernels are plump, it’s time to harvest.
2. Digging: Use a garden fork or shovel to carefully dig up the peanut plants. Be careful not to damage the peanuts.
3. Shaking and Cleaning: Shake off the excess soil from the plants and remove any loose peanuts.
4. Curing: The peanuts need to be cured before they can be stored. To cure them, hang the plants upside down in a well-ventilated area for 2-4 weeks. This will allow the peanuts to dry and the shells to harden. I usually hang them in my garage.
5. Threshing: Once the peanuts are cured, you can thresh them by removing the peanuts from the plants. You can do this by hand or use a peanut thresher.
6. Storing: Store the peanuts in a cool, dry place in airtight containers. They can be stored for several months.
Troubleshooting Common Peanut Growing Problems
Even with the best care, you might encounter some problems while growing peanuts. Here are a few common issues and how to address them:
* Poor Germination: If your peanut seeds don’t germinate, it could be due to several factors, such as cold soil, poor-quality seeds, or overwatering. Make sure the soil temperature is warm enough before planting, use fresh seeds, and avoid overwatering.
* Yellowing Leaves: Yellowing leaves can be a sign of nutrient deficiency, especially nitrogen. Apply a balanced fertilizer to the soil.
* Small Peanuts: Small peanuts can be caused by a lack of calcium or water. Add gypsum to the soil and water the plants regularly.
* Pest Infestations: Monitor your plants regularly for pests and take action if you notice any problems. Use insecticidal soap or neem oil to control pests.
* Disease Problems: Leaf spot is a common disease that can affect peanuts. Use copper fungicide to control the disease.
Enjoying Your Homegrown Peanuts
After all your hard work, it’s time to enjoy the fruits (or rather, nuts!) of your labor. Here are a few ways to enjoy your homegrown peanuts:
* Roasted Peanuts: Roast the peanuts in the oven or in a skillet. They’re delicious as a snack or as an ingredient in other dishes.
* Peanut Butter: Make your own peanut butter using a food processor. It’s healthier and tastier than store-bought peanut butter.
* Peanut Brittle: Make peanut brittle using your homegrown peanuts. It’s a classic treat that everyone will love.
* Peanut Oil: You can even make your own peanut oil using a peanut oil press.
Growing peanuts at home is a rewarding experience that anyone can enjoy. With a little bit of planning and care, you can harvest your own delicious peanuts and enjoy them in a

Conclusion
So, there you have it! Growing peanuts at home is not only achievable, but it’s also a deeply rewarding experience that connects you to the origins of this beloved snack. Forget the store-bought varieties for a moment and imagine the satisfaction of harvesting your own homegrown peanuts, bursting with fresh, earthy flavor. This DIY project is more than just a gardening endeavor; it’s a journey into understanding the life cycle of a plant, a lesson in patience, and a delicious reward all rolled into one.
Why is this a must-try? Because it’s surprisingly simple, even for novice gardeners. With just a few basic supplies – peanut seeds (or raw, unsalted peanuts), well-draining soil, and a sunny spot – you can embark on this exciting adventure. Plus, think about the educational value! It’s a fantastic way to teach children about where their food comes from and the importance of sustainable practices.
But the benefits don’t stop there. Homegrown peanuts often taste superior to commercially grown ones, as you have complete control over the growing conditions and can harvest them at peak ripeness. You also avoid the preservatives and additives often found in store-bought peanuts.
Ready to experiment? Consider these variations:
* Container Gardening: If you have limited space, growing peanuts in large containers is a perfect solution. Choose a container at least 18 inches deep and wide to allow ample room for root development and pegging.
* Different Varieties: Explore different peanut varieties to find your favorite flavor profile. Virginia peanuts are known for their large size, while Spanish peanuts are smaller and sweeter. Valencia peanuts typically have three or more kernels per shell.
* Companion Planting: Enhance your peanut patch by planting beneficial companion plants like marigolds (to deter nematodes) or herbs like basil and oregano (to attract pollinators).
* Roasting Techniques: Once you’ve harvested your peanuts, experiment with different roasting techniques to achieve your desired level of crunch and flavor. Try oven roasting, pan roasting, or even air frying!
Growing peanuts at home is an incredibly fulfilling experience. It’s a chance to connect with nature, learn new skills, and enjoy the fruits (or rather, nuts!) of your labor. Don’t be intimidated by the process. Start small, be patient, and enjoy the journey.
We wholeheartedly encourage you to give this DIY trick a try. It’s a fantastic way to add a unique and delicious element to your garden and your kitchen. And most importantly, we want to hear about your experiences! Share your tips, tricks, and triumphs in the comments below. Let’s build a community of peanut-growing enthusiasts and learn from each other. Did you try a specific variety? Did you encounter any challenges? What was your favorite way to roast your homegrown peanuts? Your insights will be invaluable to other aspiring peanut farmers. So, get your hands dirty, plant those seeds, and get ready to enjoy the taste of homegrown goodness! Let us know what you think about this **growing peanuts at home** guide.
Frequently Asked Questions (FAQ)
Q: How long does it take to grow peanuts?
A: From planting to harvest, peanuts typically take between 120 to 150 days, depending on the variety and growing conditions. Be patient, as the majority of the growth happens underground!
Q: What kind of soil is best for growing peanuts?
A: Peanuts thrive in well-draining, sandy loam soil with a slightly acidic pH (around 6.0 to 6.5). Avoid heavy clay soils, as they can hinder pegging (the process where the peanut stems enter the soil to form the peanuts). If you have clay soil, amend it with plenty of organic matter like compost or aged manure to improve drainage.
Q: How much sunlight do peanuts need?
A: Peanuts require at least 6-8 hours of direct sunlight per day to produce a good yield. Choose a sunny location in your gar
So, there you have it! Growing peanuts at home is not only achievable, but it’s also a deeply rewarding experience that connects you to the origins of this beloved snack. Forget the store-bought varieties for a moment and imagine the satisfaction of harvesting your own homegrown peanuts, bursting with fresh, earthy flavor. This DIY project is more than just a gardening endeavor; it’s a journey into understanding the life cycle of a plant, a lesson in patience, and a delicious reward all rolled into one.
Why is this a must-try? Because it’s surprisingly simple, even for novice gardeners. With just a few basic supplies – peanut seeds (or raw, unsalted peanuts), well-draining soil, and a sunny spot – you can embark on this exciting adventure. Plus, think about the educational value! It’s a fantastic way to teach children about where their food comes from and the importance of sustainable practices.
But the benefits don’t stop there. Homegrown peanuts often taste superior to commercially grown ones, as you have complete control over the growing conditions and can harvest them at peak ripeness. You also avoid the preservatives and additives often found in store-bought peanuts.
Ready to experiment? Consider these variations:
* Container Gardening: If you have limited space, growing peanuts in large containers is a perfect solution. Choose a container at least 18 inches deep and wide to allow ample room for root development and pegging.
* Different Varieties: Explore different peanut varieties to find your favorite flavor profile. Virginia peanuts are known for their large size, while Spanish peanuts are smaller and sweeter. Valencia peanuts typically have three or more kernels per shell.
* Companion Planting: Enhance your peanut patch by planting beneficial companion plants like marigolds (to deter nematodes) or herbs like basil and oregano (to attract pollinators).
* Roasting Techniques: Once you’ve harvested your peanuts, experiment with different roasting techniques to achieve your desired level of crunch and flavor. Try oven roasting, pan roasting, or even air frying!
Growing peanuts at home is an incredibly fulfilling experience. It’s a chance to connect with nature, learn new skills, and enjoy the fruits (or rather, nuts!) of your labor. Don’t be intimidated by the process. Start small, be patient, and enjoy the journey.
We wholeheartedly encourage you to give this DIY trick a try. It’s a fantastic way to add a unique and delicious element to your garden and your kitchen. And most importantly, we want to hear about your experiences! Share your tips, tricks, and triumphs in the comments below. Let’s build a community of peanut-growing enthusiasts and learn from each other. Did you try a specific variety? Did you encounter any challenges? What was your favorite way to roast your homegrown peanuts? Your insights will be invaluable to other aspiring peanut farmers. So, get your hands dirty, plant those seeds, and get ready to enjoy the taste of homegrown goodness! Let us know what you think about this **growing peanuts at home** guide.
Frequently Asked Questions (FAQ)
Q: How long does it take to grow peanuts?
A: From planting to harvest, peanuts typically take between 120 to 150 days, depending on the variety and growing conditions. Be patient, as the majority of the growth happens underground!
Q: What kind of soil is best for growing peanuts?
A: Peanuts thrive in well-draining, sandy loam soil with a slightly acidic pH (around 6.0 to 6.5). Avoid heavy clay soils, as they can hinder pegging (the process where the peanut stems enter the soil to form the peanuts). If you have clay soil, amend it with plenty of organic matter like compost or aged manure to improve drainage.
Q: How much sunlight do peanuts need?
A: Peanuts require at least 6-8 hours of direct sunlight per day to produce a good yield. Choose a sunny location in your garden or on your patio for optimal growth.
Q: How often should I water my peanut plants?
A: Water your peanut plants regularly, especially during dry periods. Keep the soil consistently moist, but avoid overwatering, which can lead to root rot. A good rule of thumb is to water deeply when the top inch of soil feels dry to the touch. Reduce watering as the plants mature and the peanuts begin to ripen.
Q: When is the best time to plant peanuts?
A: Plant peanuts after the last frost when the soil temperature has warmed to at least 65°F (18°C). In most regions, this is typically in late spring or early summer.
Q: How do I know when my peanuts are ready to harvest?
A: Harvesting peanuts at the right time is crucial for optimal flavor and texture. A good indicator is when the foliage begins to yellow and the lower leaves start to die back. You can also dig up a few plants and check the peanuts. The shells should be well-formed and the kernels should be plump and have a distinct peanut flavor.
Q: How do I harvest peanuts?
A: To harvest peanuts, carefully dig up the entire plant, being careful not to damage the peanuts. Gently shake off any excess soil and hang the plants upside down in a well-ventilated area to dry for several weeks. This curing process helps to improve the flavor and texture of the peanuts.
Q: How do I store peanuts after harvesting?
A: Once the peanuts are fully dried, you can remove them from the plants and store them in airtight containers in a cool, dry place. Shelled peanuts can be stored in the refrigerator or freezer for longer shelf life.
Q: Can I grow peanuts from roasted peanuts?
A: No, you cannot grow peanuts from roasted peanuts. The roasting process damages the embryo, preventing germination. You need to use raw, unsalted peanuts that have not been processed.
Q: Are there any pests or diseases that affect peanut plants?
A: Yes, peanut plants can be susceptible to certain pests and diseases, such as aphids, spider mites, nematodes, and fungal diseases. Regularly inspect your plants for any signs of infestation or disease and take appropriate measures to control them. Organic pest control methods, such as insecticidal soap or neem oil, can be effective for managing pests. Ensure proper air circulation and avoid overwatering to prevent fungal diseases.
Q: Can I grow peanuts indoors?
A: While it’s possible to grow peanuts indoors, it can be challenging due to the need for ample sunlight and space. If you choose to grow peanuts indoors, provide them with at least 6-8 hours of direct sunlight per day or supplement with grow lights. Use a large container and ensure good drainage.
Q: What are some common mistakes to avoid when growing peanuts?
A: Some common mistakes to avoid when growing peanuts include planting too early, using heavy clay soil, overwatering, underwatering, and not providing enough sunlight. Pay attention to the specific needs of peanut plants and adjust your growing practices accordingly.
Q: Can I eat the peanut shells?
A: While peanut shells are technically edible, they are not very palatable and can be difficult to digest. They are often used as a soil amendment or compost material.
Q: Are peanuts actually nuts?
A: No, peanuts are legumes, not nuts. They belong to the same family as beans and peas. However, they are often referred to as nuts due to their similar flavor and nutritional profile.
Leave a Comment